Chapter 1: Introducing the AirCard 555 Network Card
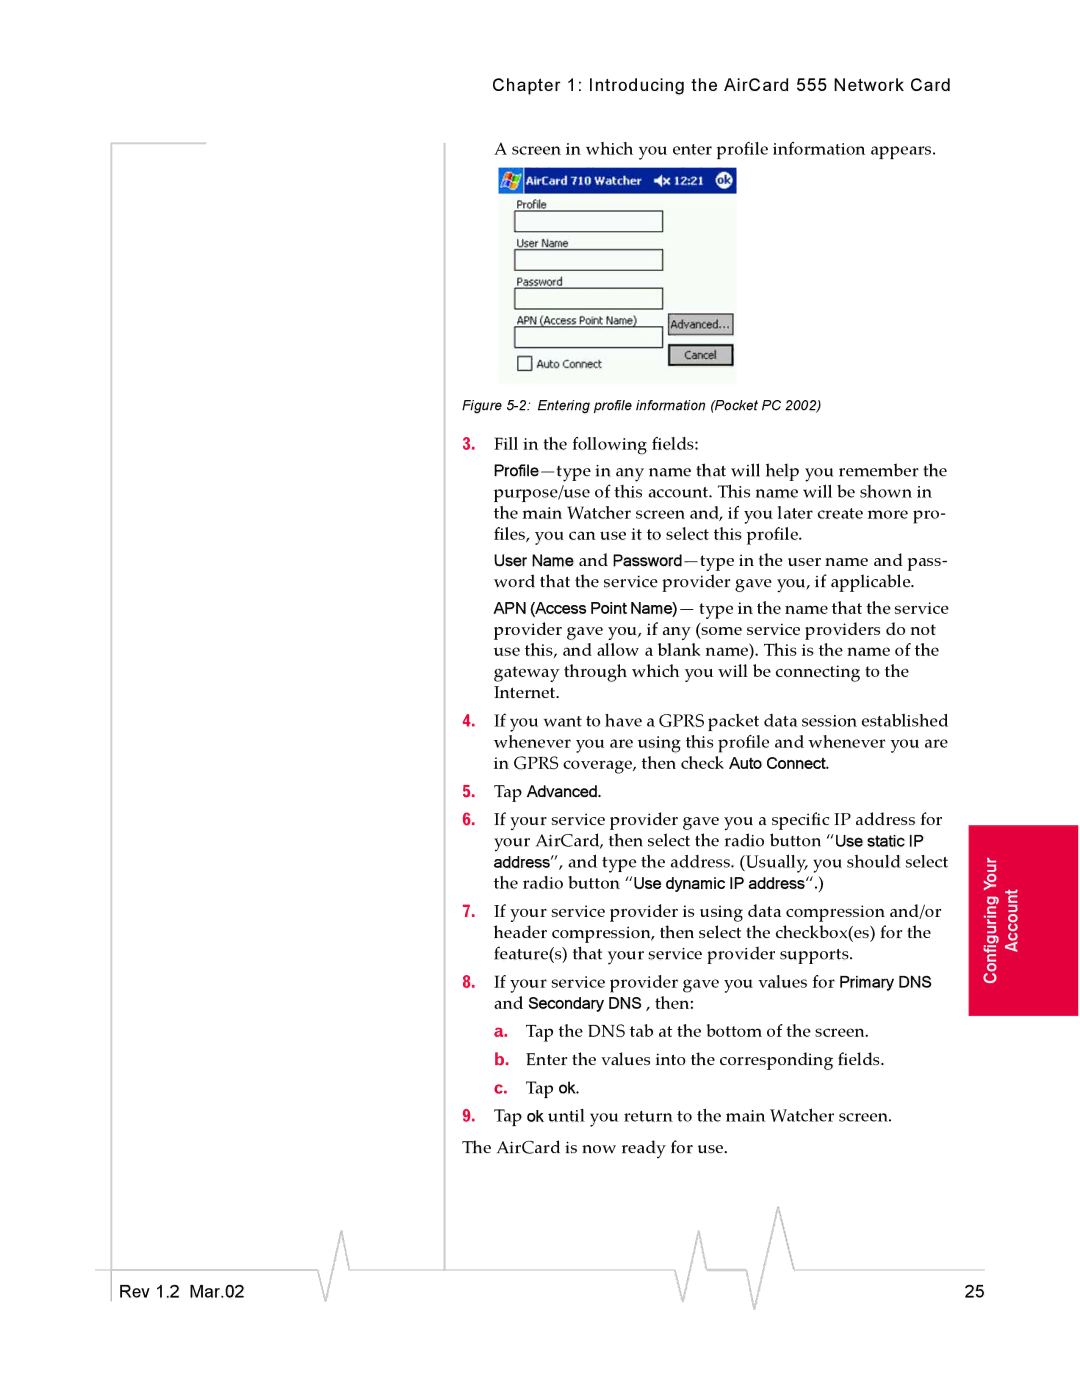
A screen in which you enter profile information appears.
Figure 5-2: Entering profile information (Pocket PC 2002)
3.Fill in the following fields:
User Name and
4.If you want to have a GPRS packet data session established whenever you are using this profile and whenever you are in GPRS coverage, then check Auto Connect.
5.Tap Advanced.
6.If your service provider gave you a specific IP address for your AirCard, then select the radio button “Use static IP address”, and type the address. (Usually, you should select the radio button “Use dynamic IP address“.)
7.If your service provider is using data compression and/or header compression, then select the checkbox(es) for the feature(s) that your service provider supports.
8.If your service provider gave you values for Primary DNS and Secondary DNS , then:
a.Tap the DNS tab at the bottom of the screen.
b.Enter the values into the corresponding fields.
c.Tap ok.
9.Tap ok until you return to the main Watcher screen.
The AirCard is now ready for use.
Configuring Your Account
|
|
|
|
|
|
|
Rev 1.2 Mar.02 |
|
|
|
|
| 25 |
|
|
|