CONFIGURATION AND MANAGEMENT
Virtual LAN Configuration
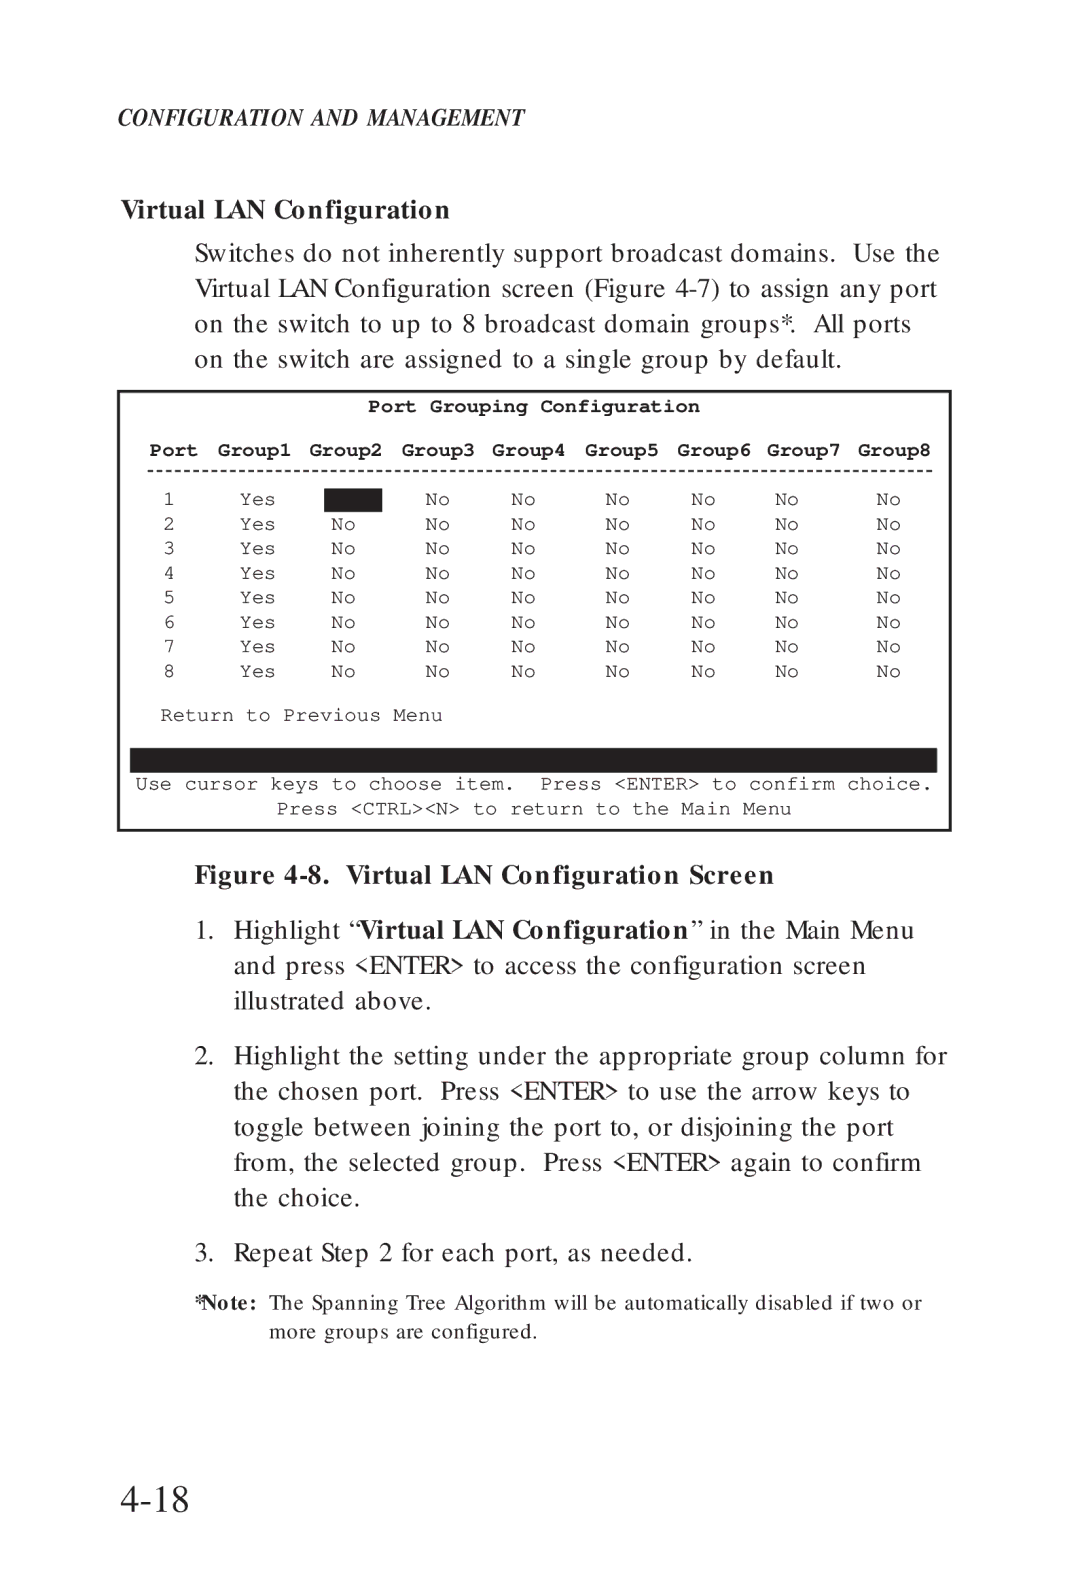
Switches do not inherently support broadcast domains. Use the Virtual LAN Configuration screen (Figure
Port Grouping Configuration
Port Group1 Group2 Group3 Group4 Group5 Group6 Group7 Group8
1 | Yes |
| No | No | No | No | No | No |
2 | Yes | No | No | No | No | No | No | No |
3 | Yes | No | No | No | No | No | No | No |
4 | Yes | No | No | No | No | No | No | No |
5 | Yes | No | No | No | No | No | No | No |
6 | Yes | No | No | No | No | No | No | No |
7 | Yes | No | No | No | No | No | No | No |
8 | Yes | No | No | No | No | No | No | No |
Return to Previous Menu
Use cursor keys to choose item. Press <ENTER> to confirm choice.
Press <CTRL><N> to return to the Main Menu
Figure 4-8. Virtual LAN Configuration Screen
1.Highlight “Virtual LAN Configuration” in the Main Menu and press <ENTER> to access the configuration screen illustrated above.
2.Highlight the setting under the appropriate group column for the chosen port. Press <ENTER> to use the arrow keys to toggle between joining the port to, or disjoining the port from, the selected group. Press <ENTER> again to confirm the choice.
3.Repeat Step 2 for each port, as needed.
*Note: The Spanning Tree Algorithm will be automatically disabled if two or more groups are configured.
