Model SB1019 | S E R V I C E | For Machines Mfg. Since 8/09 |
Adjusting Angle Stops
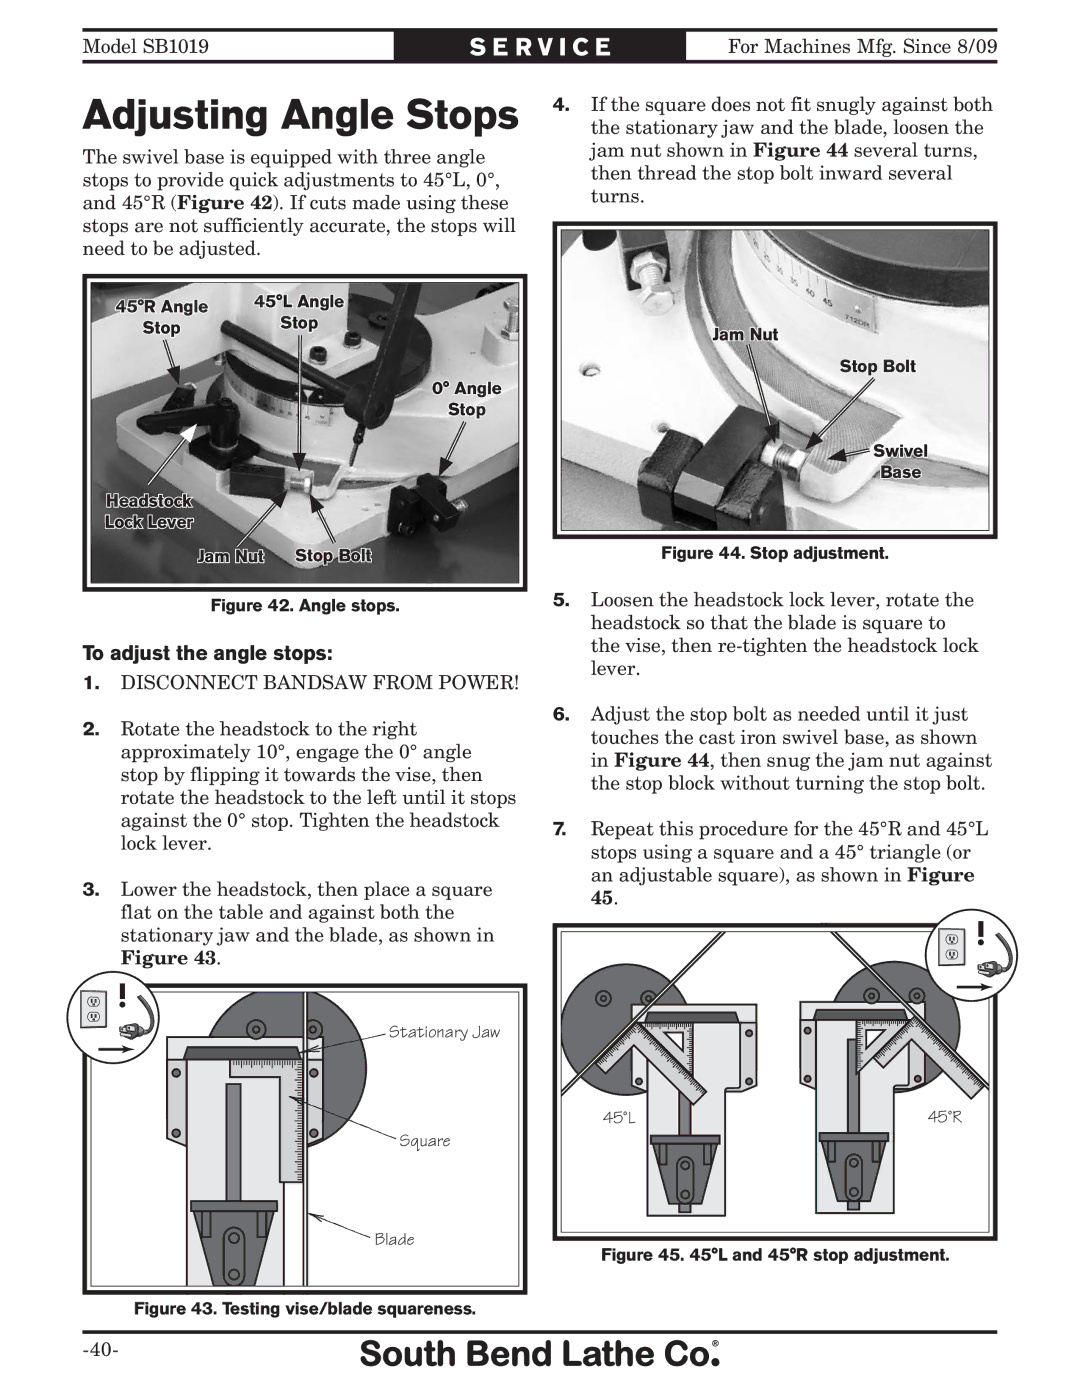
The swivel base is equipped with three angle stops to provide quick adjustments to 45°L, 0°, and 45°R (Figure 42). If cuts made using these stops are not sufficiently accurate, the stops will need to be adjusted.
45°R Angle | 45°L Angle |
Stop | Stop |
0° Angle
Stop
Headstock
Lock Lever
Jam Nut Stop Bolt
Figure 42. Angle stops.
To adjust the angle stops:
1.DISCONNECT BANDSAW FROM POWER!
2.Rotate the headstock to the right approximately 10°, engage the 0° angle stop by flipping it towards the vise, then rotate the headstock to the left until it stops against the 0° stop. Tighten the headstock lock lever.
3.Lower the headstock, then place a square flat on the table and against both the stationary jaw and the blade, as shown in Figure 43.
! |
Stationary Jaw |
Square |
Blade |
Figure 43. Testing vise/blade squareness.
4.If the square does not fit snugly against both the stationary jaw and the blade, loosen the jam nut shown in Figure 44 several turns, then thread the stop bolt inward several turns.
Jam Nut
Stop Bolt
![]()
![]() Swivel
Swivel
Base
Figure 44. Stop adjustment.
5.Loosen the headstock lock lever, rotate the headstock so that the blade is square to the vise, then
6.Adjust the stop bolt as needed until it just touches the cast iron swivel base, as shown in Figure 44, then snug the jam nut against the stop block without turning the stop bolt.
7.Repeat this procedure for the 45°R and 45°L stops using a square and a 45° triangle (or an adjustable square), as shown in Figure 45.
| ! |
45°L | 45°R |