Model SB1019 | E L E C T R I C A L | For Machines Mfg. Since 8/09 |
220V Conversion
Wiring diagrams are provided in this section showing the Model SB1019 wired for both 110V and 220V. Refer to these diagrams if needed when following this procedure.
Items Needed | Qty. |
220V Switch (Part No. PSB1019204). | .................. 1 |
Phillips Screwdriver #2 | 1 |
Wrench 18mm | 1 |
Wire nut (sized for two 14 Ga. wires) | 1 |
Electrical Tape | As needed |
To convert the Model SB1019 to 220V:
1.DISCONNECT BANDSAW FROM POWER!
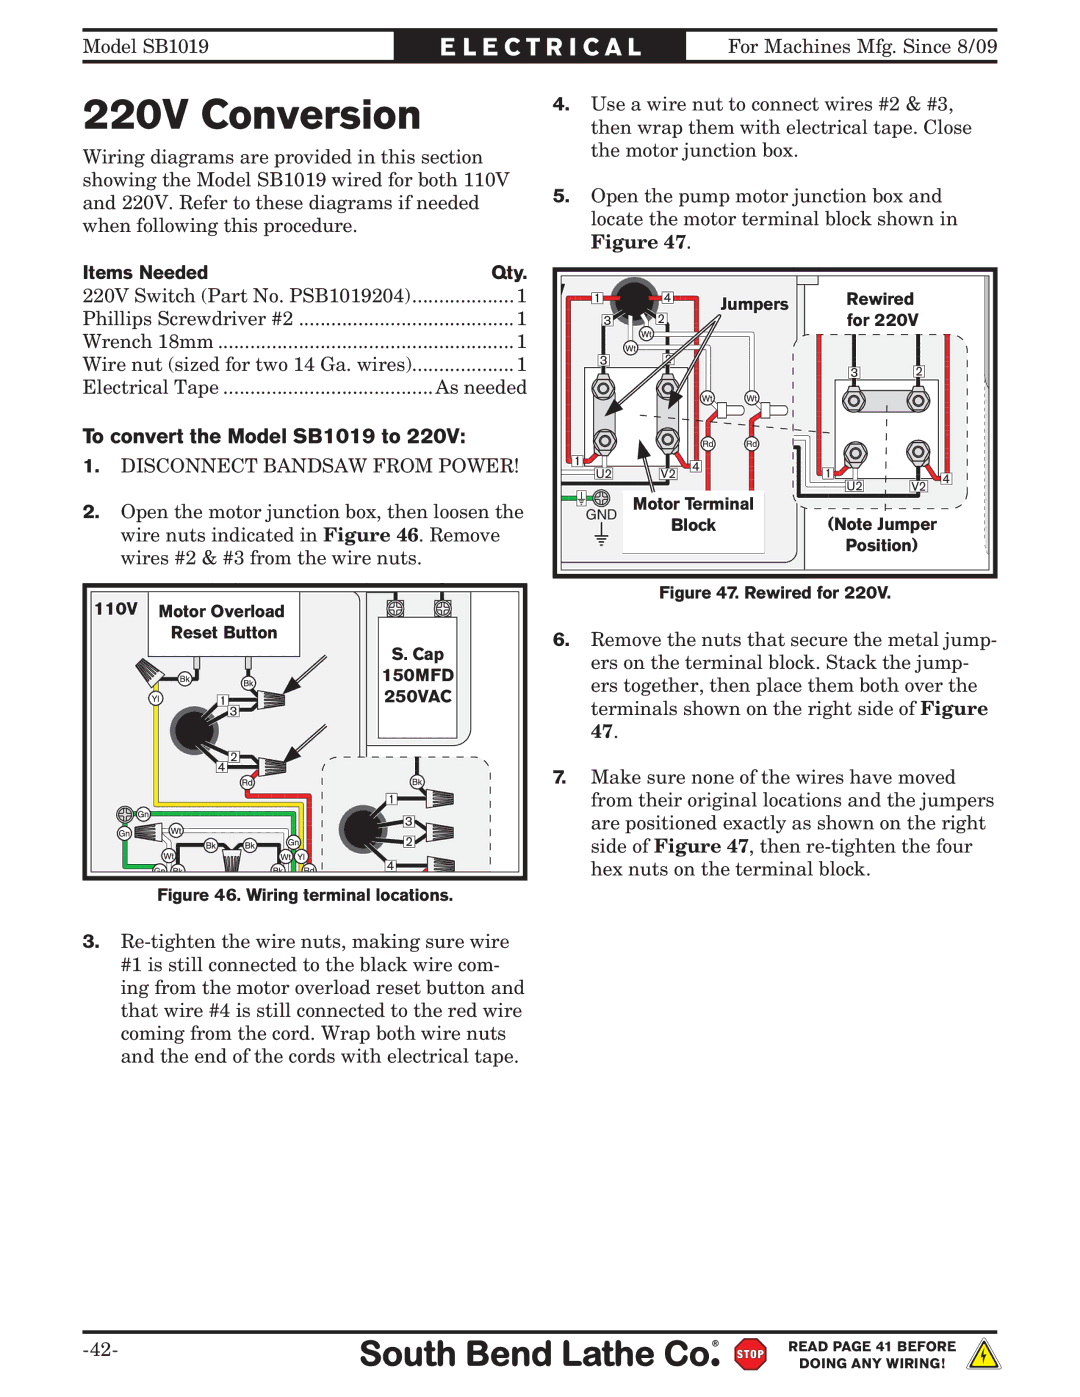
2.Open the motor junction box, then loosen the wire nuts indicated in Figure 46. Remove wires #2 & #3 from the wire nuts.
110V | Motor Overload |
|
| Reset Button |
|
|
| S. Cap |
|
| 150MFD |
| 1 3 | 250VAC |
| 4 2 |
|
|
| 1 |
|
| 3 |
|
| 2 |
|
| 4 |
|
| Rewired |
| Figure 46. Wiring terminal locations. | |
3.
4.Use a wire nut to connect wires #2 & #3, then wrap them with electrical tape. Close the motor junction box.
5.Open the pump motor junction box and locate the motor terminal block shown in Figure 47.
V | 1 | 4 | Jumpers | Rewired |
| ||||
|
|
| ||
| 3 | 2 |
| for 220V |
3 | 2 | 2 |
| 3 |
220V |
1 |
| 4 | 1 |
|
| for |
U2 | V2 |
|
| |||
| 4 | Rewired | ||||
|
| |||||
|
|
| U2 | V2 | ||
| Motor Terminal |
| ||||
GND |
|
|
| |||
Start Capacitor | (Note Jumper |
|
| |||
| Block |
|
| |||
| 3MFD 450 VAC | Position) |
|
| ||
|
|
|
|
| ||
Figure 47. Rewired for 220V.
6. Remove the nuts that secure the metal jump- ers on the terminal block. Stack the jump- ers together, then place them both over the terminals shown on the right side of Figure
47.
7. Make sure none of the wires have moved from their original locations and the jumpers are positioned exactly as shown on the right side of Figure 47, then
READ PAGE 41 BEFORE
DOING ANY WIRING!