Model SB1029 | O P E R A T I O N | For Machines Mfg. Since 8/09 |
Removing & Installing Grinding Wheels
If installing a grinding wheel for the first time, or when replacing a worn wheel, this section explains the order in which this process must take place. Every time a grinding wheel is removed from its hub, this procedure must be repeated. If installing a new wheel right out of the box, the ring (Page 23) test must also still be completed.
To remove and install a grinding wheel:
1.DISCONNECT MACHINE FROM POWER!
2.Place a sheet of plywood or similar on top of the table (see Figure 21), and open the grinding wheel cover.
4.Using the wrenches, loosen the retaining nut in the direction shown in Figure 23.
! |
Hold
Figure 23. Removing wheel retaining nut.
5.Unthread the retaining nut (see Figure 24).
Plywood
! |
Figure 21. Protecting table. Figure 24. Exposing wheel retaining washer.
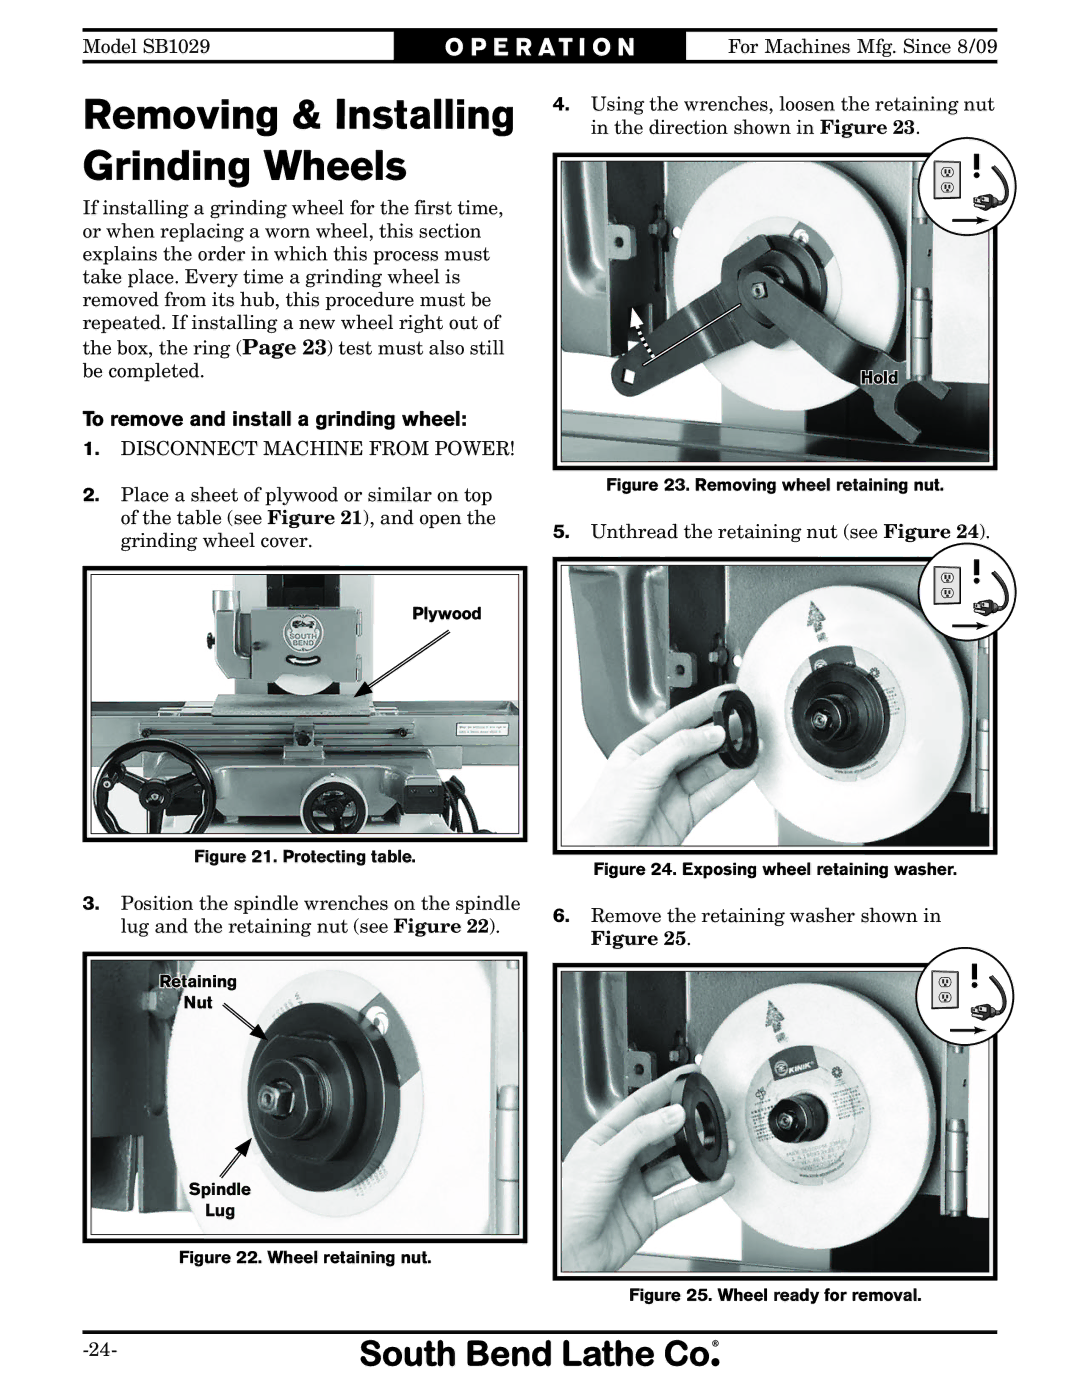
3.Position the spindle wrenches on the spindle lug and the retaining nut (see Figure 22).
Retaining
Nut
6.Remove the retaining washer shown in Figure 25.
! |
Spindle
Lug