3. Quick Installation Guide
The
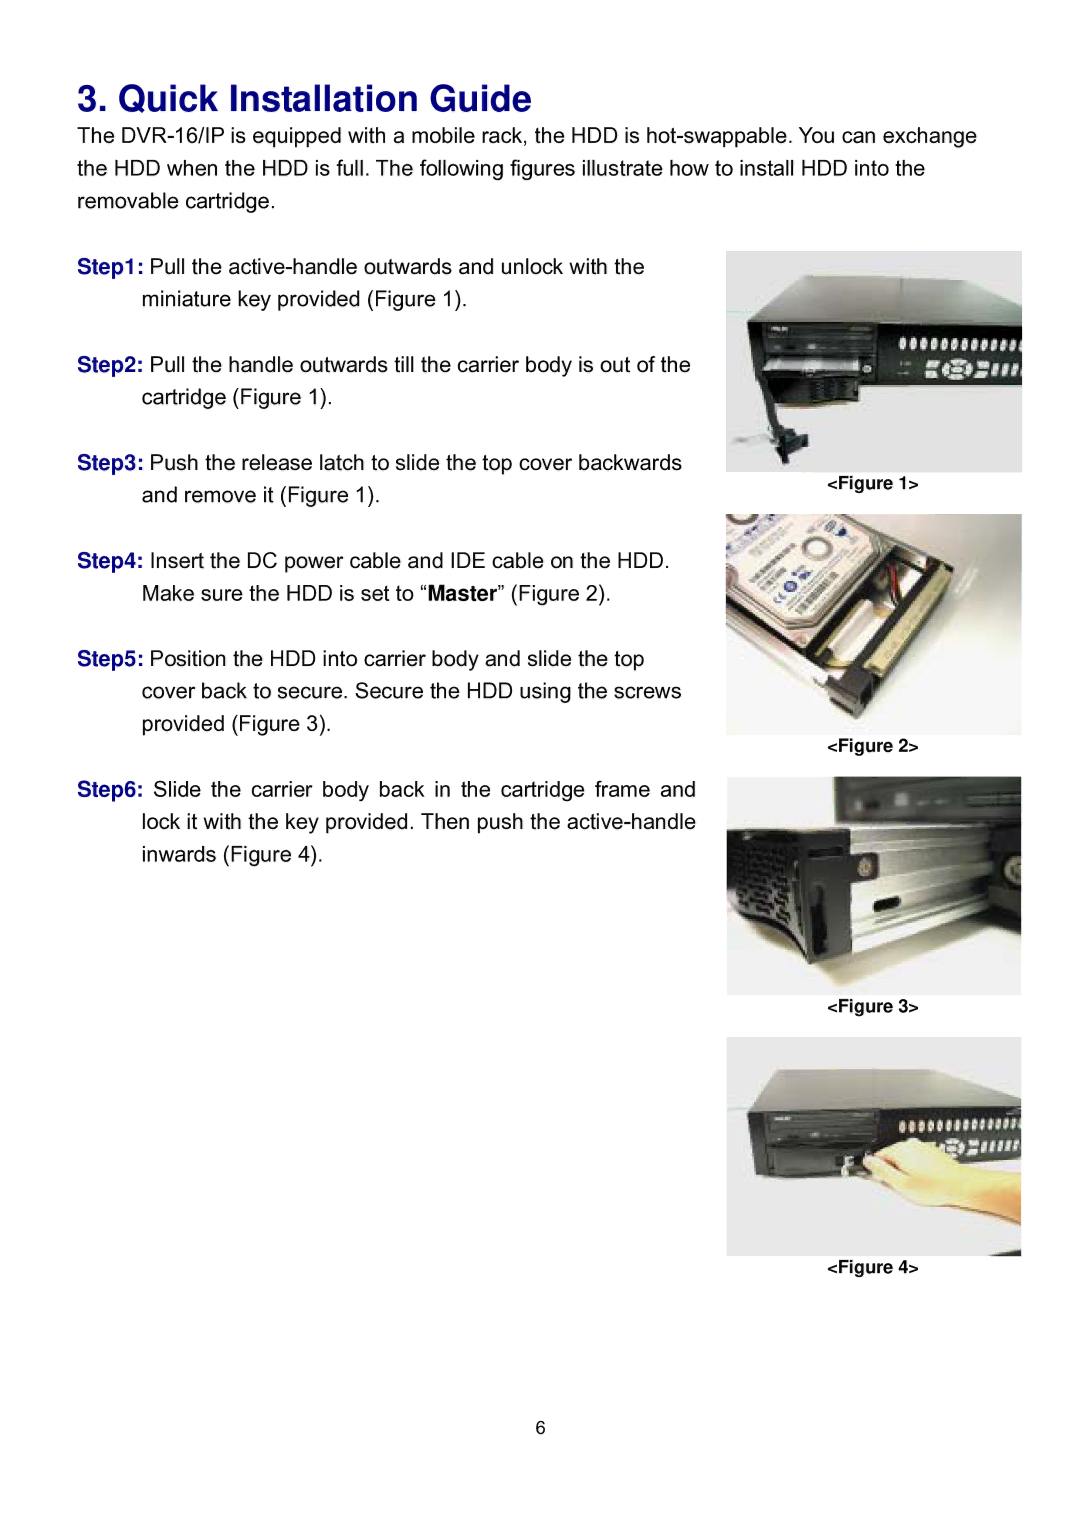
Step1: Pull the
Step2: Pull the handle outwards till the carrier body is out of the cartridge (Figure 1).
Step3: Push the release latch to slide the top cover backwards and remove it (Figure 1).
Step4: Insert the DC power cable and IDE cable on the HDD. Make sure the HDD is set to “Master” (Figure 2).
Step5: Position the HDD into carrier body and slide the top cover back to secure. Secure the HDD using the screws provided (Figure 3).
Step6: Slide the carrier body back in the cartridge frame and lock it with the key provided. Then push the
<Figure 1>
<Figure 2>
<Figure 3>
<Figure 4>
6
