2. MOUNTING THE FF520
The FF520 must be properly installed according the following instructions to get the best possible performance.
NOTE
TRANSDUCER: refer to Chapter 3 and to the Installation Manual supplied with the Transducer.
2.0INSTALLATION
The FF520 is designed to be mounted horizontally or vertically to enable it to be installed in the most convenient position. Although the unit is water resistant, care must be taken to select a location where it will not be subjected to spray or rain. After the cables have been run, and connected as per Par. 2.1, mount the FF520 in the desired location using the supplied hardware.
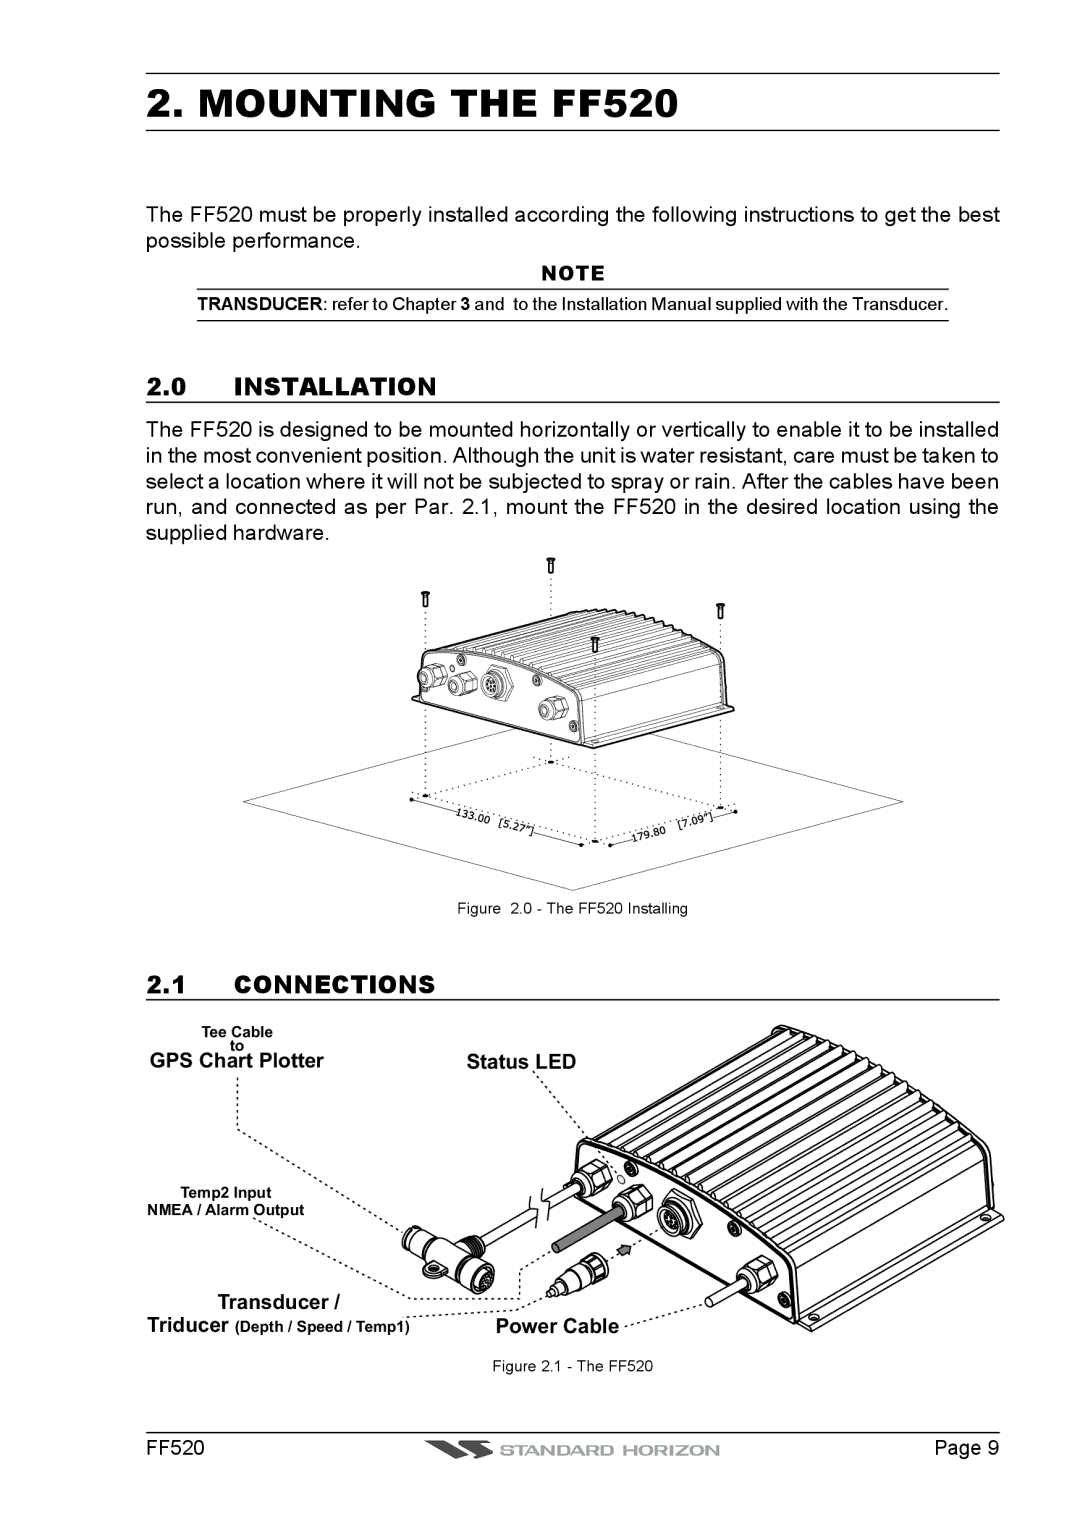
Figure 2.0 - The FF520 Installing
2.1CONNECTIONS
Tee Cable |
|
to |
|
GPS Chart Plotter | Status LED |
Temp2 Input
NMEA / Alarm Output
Transducer / |
|
Triducer (Depth / Speed / Temp1) | Power Cable |
| Figure 2.1 - The FF520 |
FF520 | Page 9 |