Manuals
/
Sterling
/
Lawn and Garden
/
Compact Loader
Sterling
sse
manual
Models:
sse
1
72
77
77
Download
77 pages
53.08 Kb
69
70
71
72
73
74
75
76
Troubleshooting
Install
Parts list
Alarms
Connecting Material Lines
Dimension
Maintenance
Accessories
Assembly
Setting the conveying time
Page 72
Image 72
Page 71
Page 73
Page 72
Image 72
Page 71
Page 73
Contents
Operating Instructions Machine-Side Hopper Loader SSE Series
Machine-Side Hopper Loaders
Iii
Machine-Side Hopper Loaders
Parts and Service Department
Table of Contents
Accessories 11-1 Electrical manual 12-1
General instructions
Machine-Side Hopper Loaders
Explanations and information
Legal basis
Fields of applications
Page
Safety instructions
For your safety
General
Assembly
Maintenance
Operation
For the operating safety of the equipment
Page
Transport, assembly and storage
Assembly
Transport and packing
Storage
Assembly instructions
Unpacking
Liter model
Installing the dump valve sensor
Dump valve and sensor
Attaching the pickup wand
Mounting
Mounting
Mounting on the processing machine
Mounting onto a machine hopper
Mounting onto mixing hoppers with lateral inlet
Mounting onto DT 30 dosing station
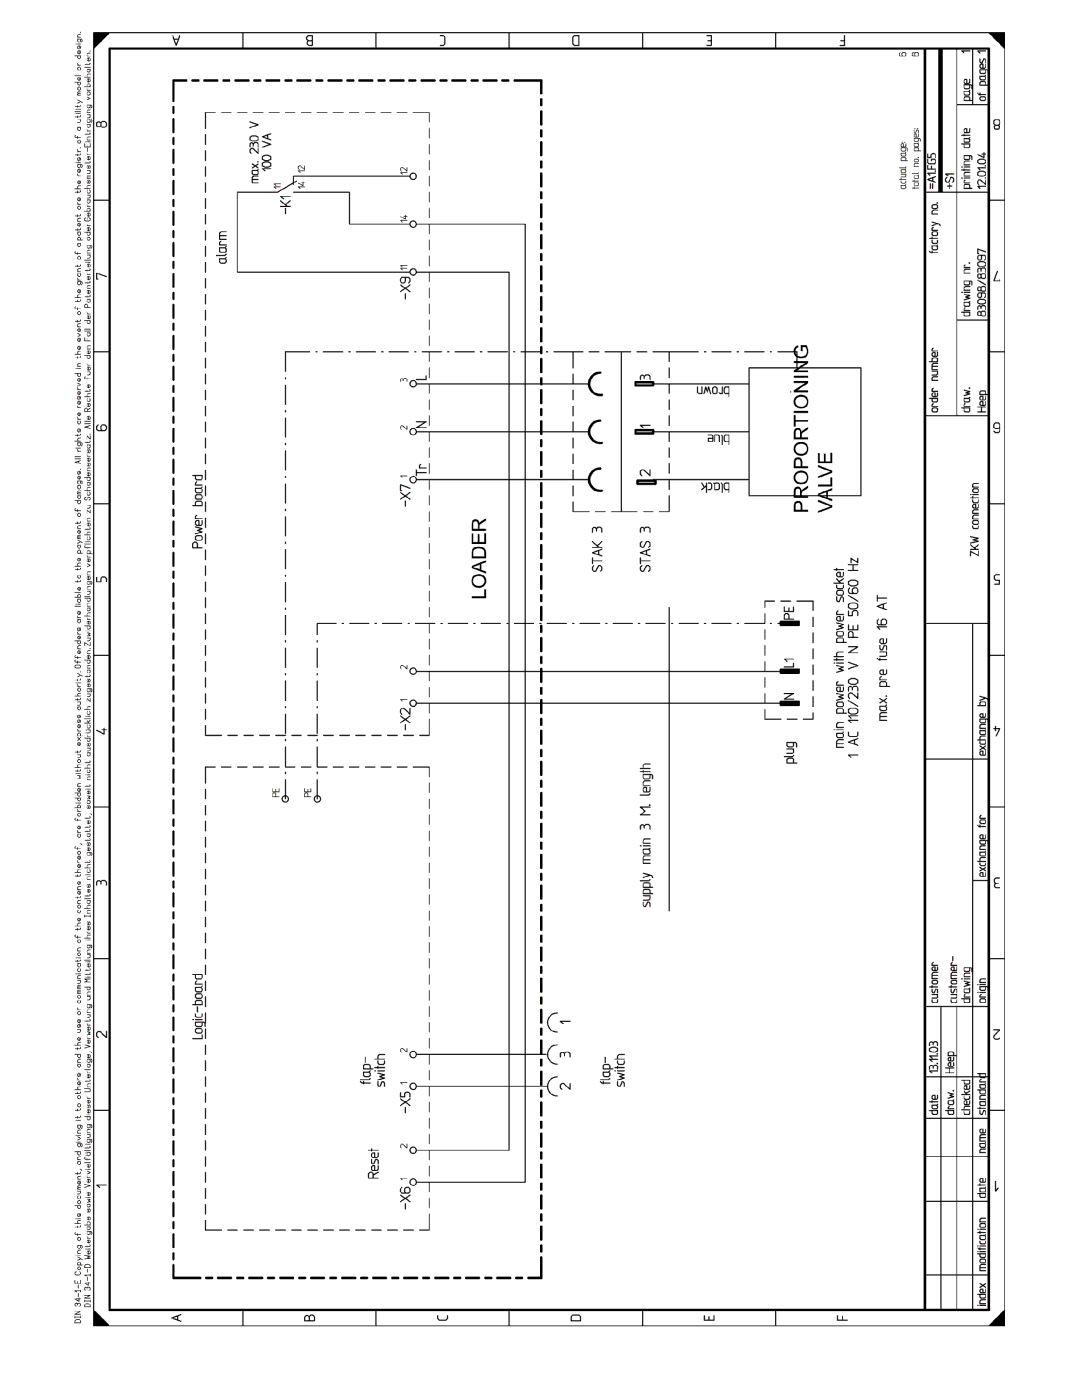
Electrical connection
Compressed air connection
Installation of the optional proportioning valve
X7, ZKW
Connecting Material Lines
Functional description
Sequence of operation
Controller
Operation
Switching on the unit
Checking the flexible hose
Setting the conveying time
Setting the purge time optional
Switching off the unit
Initial operation
Page
Troubleshooting
Alarms
Maintenance
Machine-Side Hopper Loaders
Maintenance intervals
Servicing the loader
Changing the sealing ring of the outlet flap
Adjusting the dump valve sensor
Cleaning the unit
Order numbers Filter cloth Wire cloth
Installation
Replacing carbon brushes at the motor
Machine-Side Hopper Loaders
Taking out of service, dismantling, disposal
Disposal Instructions
Technical data
Specifications Liter model Brushless motor Loader Capacity
Dimension Sheet
Liter model Liter brushless model
Spare parts list
Parts breakdown, brush-type motor
Parts lists, 2-liter model
10.2.1 V, 50 Hz
10.2.2 V, 60 Hz
10.2.3 V, 50 Hz with active cleaning
10.2.4 V, 60 Hz with active cleaning
Parts list, 5-liter model
10.3.1 V, 50 Hz V66372
10.3.2 V, 60 Hz V66378US
Pos. Order no. Designation
10.3.3 V, 50 Hz with active cleaning
10.3.4 V, 60 Hz with active cleaning
Parts breakdown and list, 5-liter model with brushless motor
10.5 V, 50 Hz
Accessories
Page
Electrical manual
Page
Page
Page
Page
Page
Page
Page
Page
Page
Setting the loader convey time
Quick Start Guide
Top
Page
Image
Contents