Chapter 6: Advanced Chassis Setup
6-3 System Fans
Six
The fans can adjust their speed according to the heat level sensed in the system, which results in more efficient and quieter fan operation. Fan speed is controlled by a setting in BIOS.
System Fan Failure
If a fan fails, you will need to have it replaced with the same type. Contact your vendor or Supermicro for information on replacement fans.
6-4 Drive Bay Installation/Removal
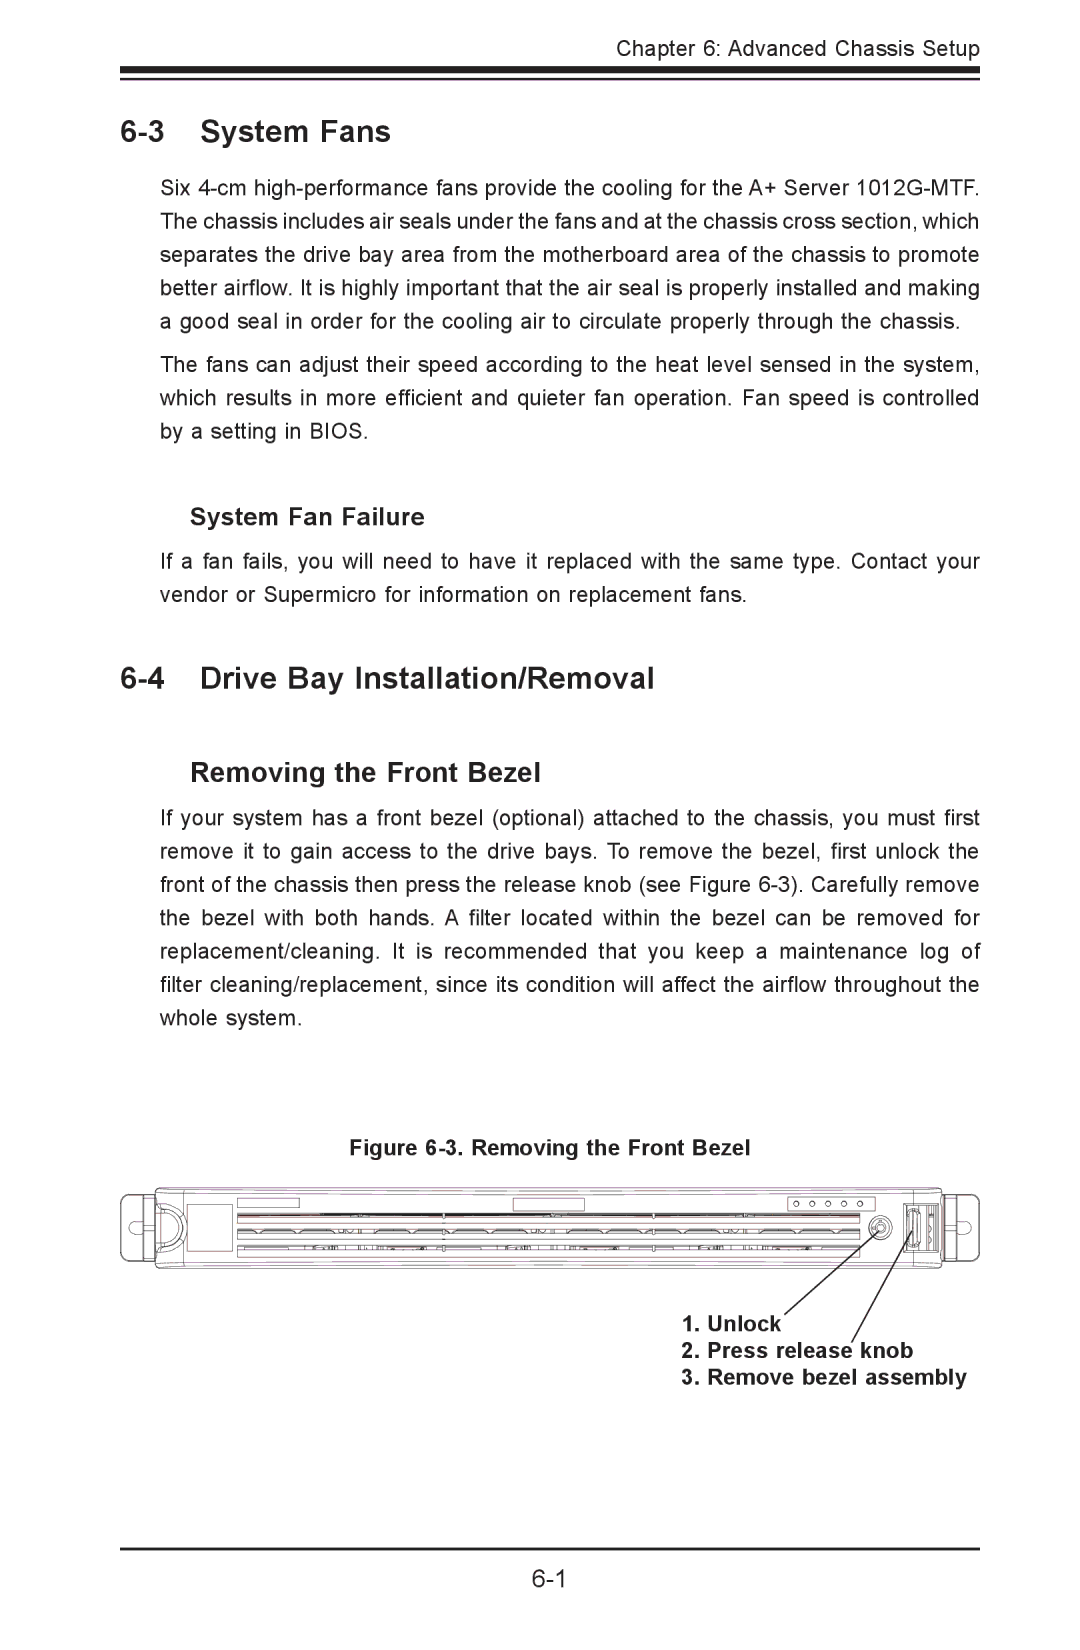
Removing the Front Bezel
If your system has a front bezel (optional) attached to the chassis, you must first remove it to gain access to the drive bays. To remove the bezel, first unlock the front of the chassis then press the release knob (see Figure