TYPICAL SETUPS
Connecting and Setting up the P2
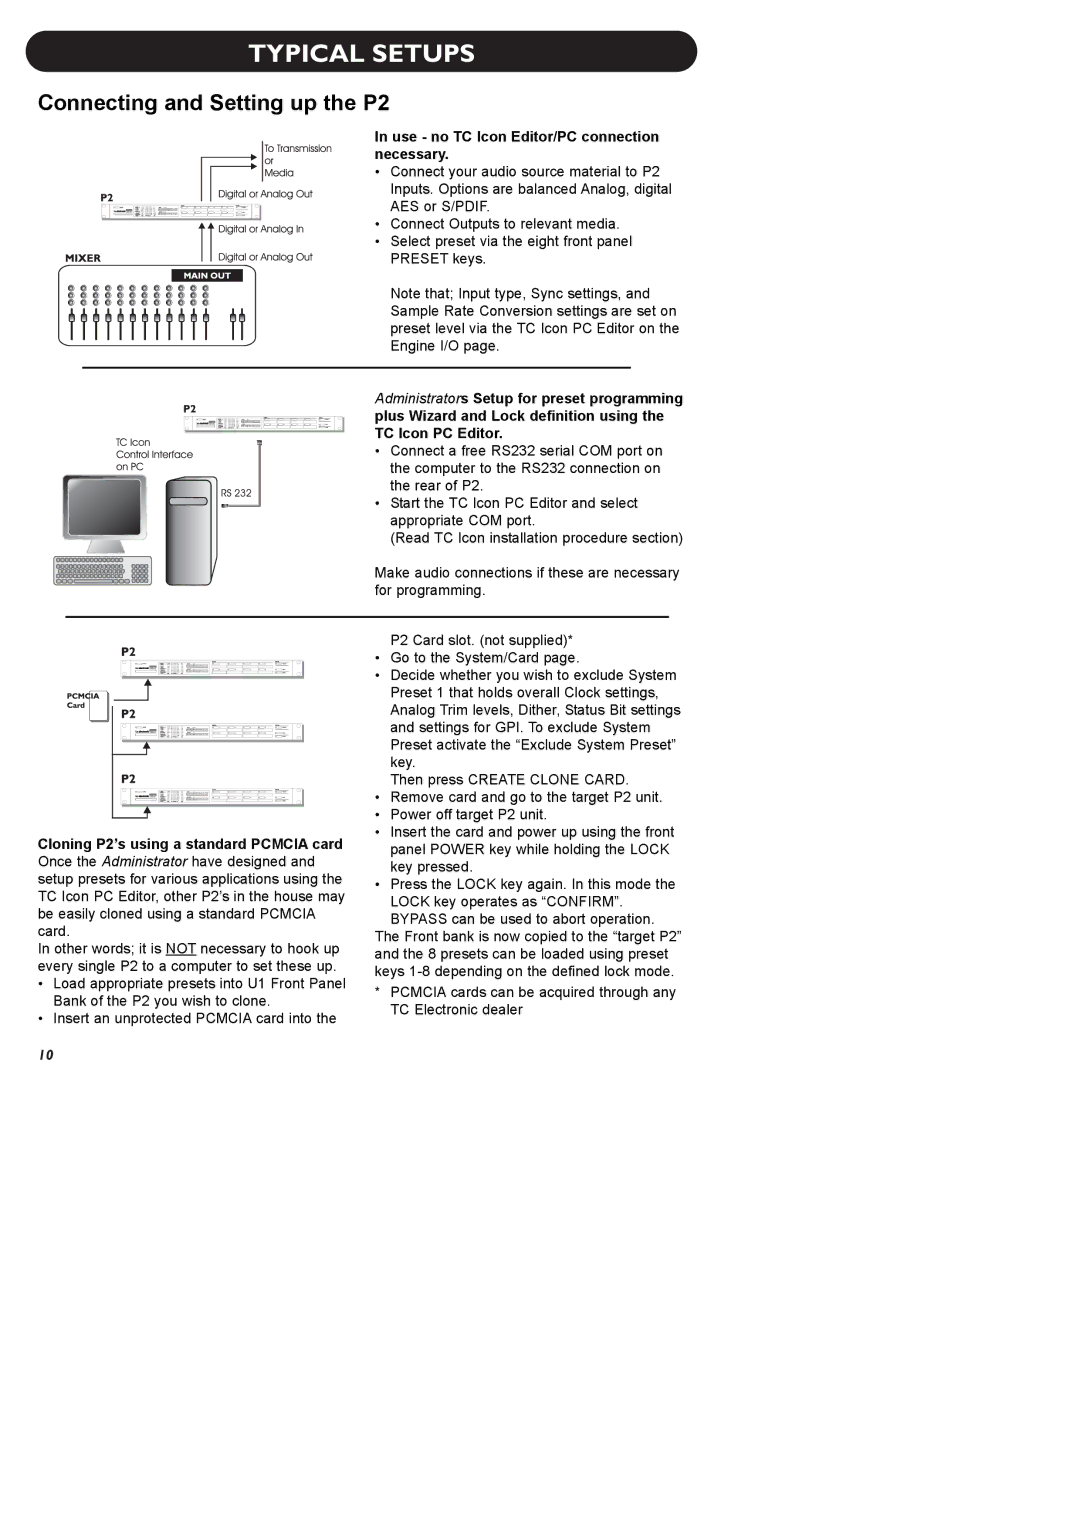
| In use - no TC Icon Editor/PC connection | ||
| necessary. | ||
| • Connect your audio source material to P2 | ||
|
| Inputs. Options are balanced Analog, digital | |
|
| AES or S/PDIF. | |
| • Connect Outputs to relevant media. | ||
| • Select preset via the eight front panel | ||
|
| PRESET keys. | |
|
| Note that; Input type, Sync settings, and | |
|
| Sample Rate Conversion settings are set on | |
|
| preset level via the TC Icon PC Editor on the | |
|
| Engine I/O page. | |
| Administrators Setup for preset programming | ||
| plus Wizard and Lock definition using the | ||
| TC Icon PC Editor. | ||
| • | Connect a free RS232 serial COM port on | |
|
| the computer to the RS232 connection on | |
|
| the rear of P2. | |
| • Start the TC Icon PC Editor and select | ||
|
| appropriate COM port. | |
|
| (Read TC Icon installation procedure section) | |
| Make audio connections if these are necessary | ||
| for programming. | ||
|
| P2 Card slot. (not supplied)* | |
| • Go to the System/Card page. | ||
| • Decide whether you wish to exclude System | ||
|
| Preset 1 that holds overall Clock settings, | |
|
| Analog Trim levels, Dither, Status Bit settings | |
|
| and settings for GPI. To exclude System | |
|
| Preset activate the “Exclude System Preset” | |
|
| key. | |
|
| Then press CREATE CLONE CARD. | |
| • Remove card and go to the target P2 unit. | ||
| • Power off target P2 unit. | ||
Cloning P2’s using a standard PCMCIA card | • Insert the card and power up using the front | ||
| panel POWER key while holding the LOCK | ||
Once the Administrator have designed and |
| key pressed. | |
setup presets for various applications using the |
| ||
• Press the LOCK key again. In this mode the | |||
TC Icon PC Editor, other P2’s in the house may | |||
| LOCK key operates as “CONFIRM”. | ||
be easily cloned using a standard PCMCIA |
| ||
| BYPASS can be used to abort operation. | ||
card. |
| ||
The Front bank is now copied to the “target P2” | |||
In other words; it is NOT necessary to hook up | |||
and the 8 presets can be loaded using preset | |||
every single P2 to a computer to set these up. | |||
keys | |||
• Load appropriate presets into U1 Front Panel | |||
* | PCMCIA cards can be acquired through any | ||
Bank of the P2 you wish to clone. | |||
| TC Electronic dealer | ||
• Insert an unprotected PCMCIA card into the |
| ||
|
| ||
10