2. PRINTER SETUP
ENGLISH VERSION
2.2 Fitting the Fan Filter
2.2 Fitting the Fan Filter | When installing the printer, it is important to ensure that the Fan Filter is | |
| attached before using the printer. | |
| The Fan Filter consists of 2 parts: | |
| (1) | Filter Pad |
| (2) | Filter Retainer |
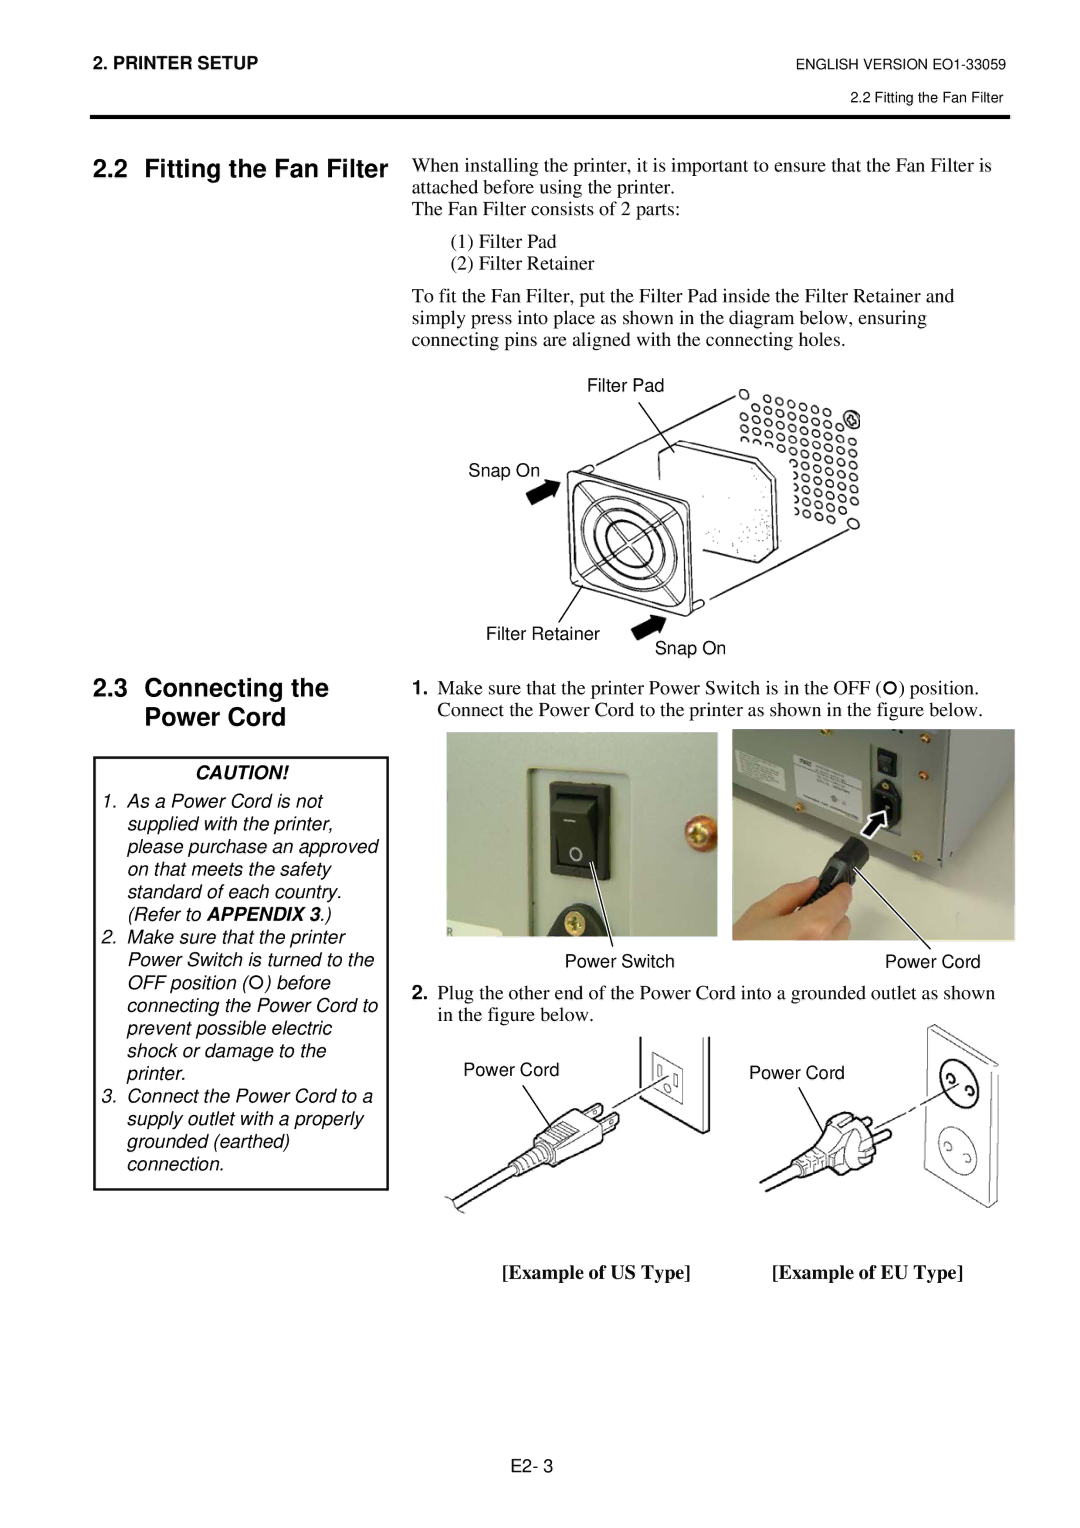
To fit the Fan Filter, put the Filter Pad inside the Filter Retainer and simply press into place as shown in the diagram below, ensuring connecting pins are aligned with the connecting holes.
2.3Connecting the Power Cord
CAUTION!
1.As a Power Cord is not supplied with the printer, please purchase an approved on that meets the safety standard of each country. (Refer to APPENDIX 3.)
2.Make sure that the printer Power Switch is turned to the OFF position ({) before connecting the Power Cord to prevent possible electric shock or damage to the printer.
3.Connect the Power Cord to a supply outlet with a properly grounded (earthed) connection.
Filter Pad
Snap On
Filter Retainer
Snap On
1.Make sure that the printer Power Switch is in the OFF ({) position. Connect the Power Cord to the printer as shown in the figure below.
Power Switch | Power Cord |
2.Plug the other end of the Power Cord into a grounded outlet as shown in the figure below.
Power Cord | Power Cord |
[Example of US Type] | [Example of EU Type] |
E2- 3
