2. PRINTER SETUP
ENGLISH VERSION
2.6 Connecting the Cables to Your Printer
2.6Connecting the Cables to Your Printer
NOTES:
1.The picture on the right shows the layout of the interface connectors when the options are fully installed. It may be different depending on your system configuration.
2.The USB interface and LAN interface cannot be used at the same time.
The following paragraphs outline how to connect the cables from the printer to your host computer, and will also show how to make cable connections to other devices. Depending on the application software you use to print labels, there are 4 possibilities for connecting the printer to your host computer. These are:
•A serial cable connection between the printer’s
•A parallel cable connection between the printer’s standard parallel connector and your host computer’s parallel port (LPT).
•An Ethernet connection using the optional LAN board.
•A USB cable connection between the printer’s optional USB connector and your host computer’s USB port. (Conforming to USB 1.1)
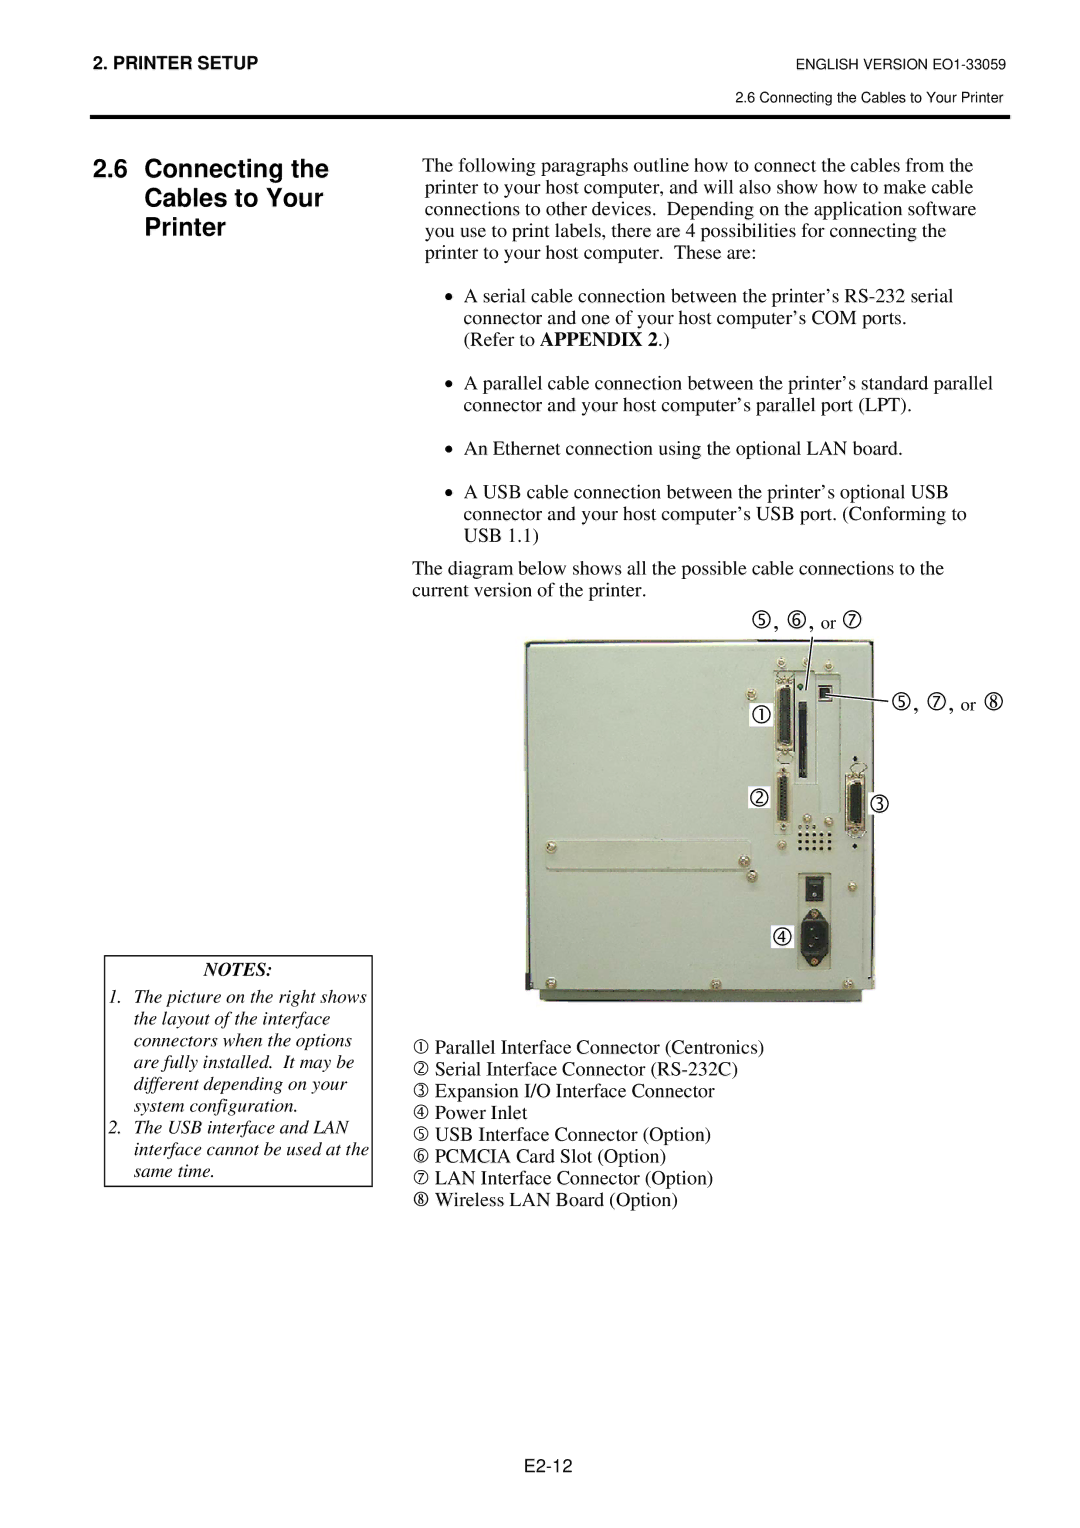
The diagram below shows all the possible cable connections to the current version of the printer.
, , or
, , or 8
Parallel Interface Connector (Centronics)
Serial Interface Connector
Expansion I/O Interface Connector
Power Inlet
USB Interface Connector (Option)
PCMCIA Card Slot (Option)
LAN Interface Connector (Option)
8Wireless LAN Board (Option)