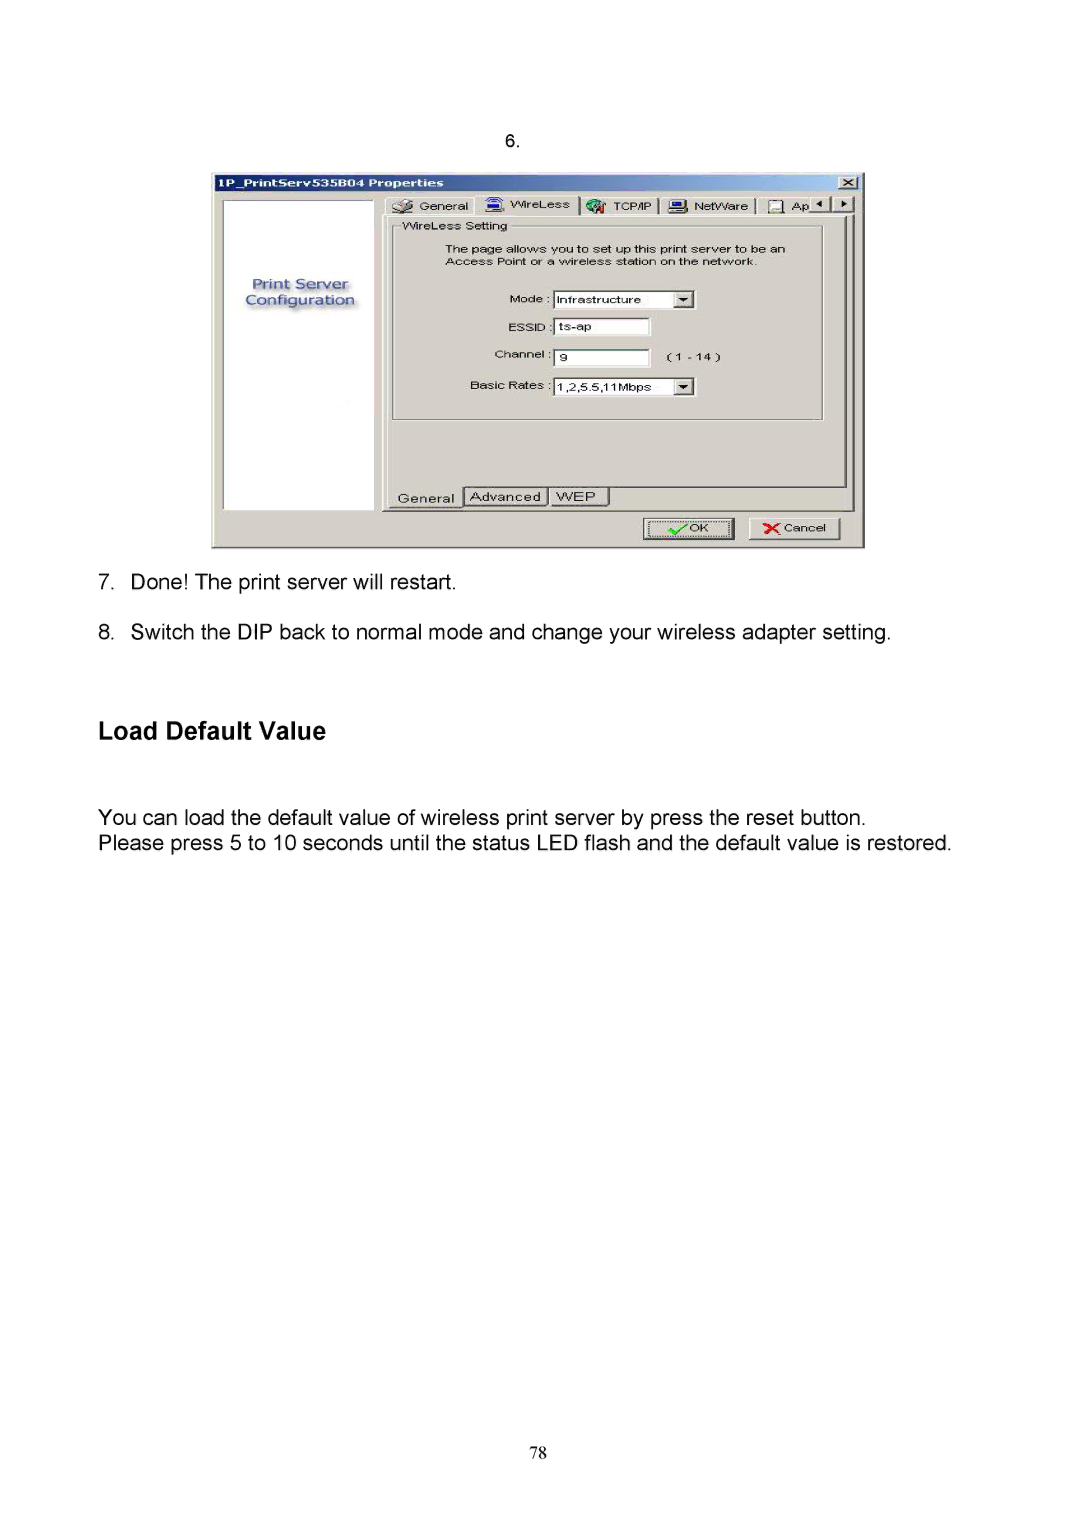
Page
Page
7. TCP/IP LPR PORT PRINTING INSTALLATION
6. NETWORK PRINT MONITOR
9. TROUBLESHOOTING
8.UPGRADING PRINT SERVER
APPENDIX
UPGRADING THE PRINT SERVER FROM WINDOWS NT/2000/XP THROUGH TCP/IP
Trademarks
Copyright
FCC Compliance Notice Radio Frequency Notice
Important Note FCC Radiation Exposure Statement
Network configuration
Wireless Specifications
1. Introduction
Product Overview
Components and Features Wireless Print server
Before you start, you should prepare
Hardware Installation
Ad-hoc PEER-to-PEER Mode
Wireless Network Environment
Infrastructure AP Mode
2. Print Server Installation
Configuration Solution Table
Setup Operating
Preparation
3.The Setup Utility for Windows-based
Comment
Installing the Setup Wizard
To install Wizard, please follow the directions listed below
4. After installation completes, the Setup Wizard message appears
5. Click Wireless Setup Wizard and the following message appear
Page
Channel: optional
Data Transmit Rates: Auto or 1,2Mbps, 5.5Mbps or 11Mbps Click NEXT
9. Choose Enable the WEP Encryption as you need, and click NEXT
12. Your wireless print server has been successfully configured
Page
Page
Page
Using PSAdmin
Wizard
TCP/IP Wizard
NetWare Wizard
Manual Setup
Specify an IP address
Properties -TCP/IP Options
Obtain an IP address from a DHCP server
Upgrade
Refresh
Reset
Multiple Print Queues Configuration
3. Click Change or Remove Programs tab
Uninstalling the PSAdmin on Windows PC
Procedure
4.Internet Printer Connection and HP Web JetAdmin
IPP Overview
Windows NT/2000/XP/2003
One port should be the port name as lp1
Three ports should be the port name as lp1, lp2, and lp3
HP Web JetAdmin Overview
System Requirements
Configuring and Modifying a Device
Installing HP Web JetAdmin
Confirming Installation and Supply Access
Removing HP Web JetAdmin Utility
5. Configuration from Embedded Web Server
Using Embedded Web Server
Overview
Status Menu
System Status
Wireless Status
Printer Status
TCP/IP Status
Netware Status
General Settings
NetWare NDS Setting
NetWare Bindery Setting
SNMP Status
AppleTalk Status
Setup Menu
Preparation
System Setup
Re-type Password
Wireless Setup
Basic Settings
WEP Settings
TCP/IP Status
NetWare Setup
Installing Print Server on NetWare 4.x/5.x
2. Select “NCF files options” 3. Select “Edit AUTOEXEC.NCF file”
Installation Procedure
SNMP Setup
snmp.snmpEnableAuthenTraps
system.sysContact
system.sysName
system.sysLocation
AppleTalk Setup
recommended
Preparation
Setting Up a Macintosh Computer
6. Network Print Monitor
TCP/IP Protocol Installation
TCP/IP
IPX/SPX
NetBEUI
7. Restart the computer
IPX/SPX-compatible Protocol Installation
NetBEUI Protocol Installation
Windows 95/98/Me/NT/2000/XP Installation Procedure
12. Select Printer and Properties
15. Select the Network Print Port and click OK
7. TCP/IP LPR Port Printing Installation
Uninstalling Network Print Port on Windows 95/98/Me/NT/2000/XP
Basic TCP/IP Installation Overview
3. Click Add/Remove tab
Windows NT LPR Port Printing Installation
Assigning an IP Address
DHCP
1. Use the Network Print Monitor utility
Windows 2000/XP Standard TCP/IP Port Printing Installation
2. Run Add Printer, Click Next
9. Click Finish
Note Please DO NOT type any other name than lp1 in this step
8. Click OK, and Next
13. Done
UNIX Installation
1. Login root 2. Type “arp -s IP address Print server‘s node ID”
SCO UNIX OpenServer
4. Type “tftp Print server‘s IP address”
a. Do you want to install or remove printing i/r/q ? q
i. Do you want to install or remove printing i/r/q? q ------- q
1. Login root 2. Type “arp -s IP address Print server‘s node ID”
SUN Solaris
11. Type “lpadmin -pprinter-1 -s Print server‘s IP address”
13. Type “enable printer-1” For example enable printer-1
IBM AIX
9. Type “tftp Print server‘s IP address”
e. Open Printer Configuration
Redhat Linux
5. Select Printer/Plotter 6. Select Printer Spooling
7. Select Add a Print Queue
f. Click New button g. Click Forward button
i. In the Queue Type field, choose Networked UNIX
h. In the Name field, type a user-defined name, click Forward
j. In the Server field, type the IP of print server
l. Click Forward button
m. In the Printer field, choose Postscript Printer
n. Choose the model of printer and click Forward o. Done
4. Select SCO Admin
5. Select Print Setup Manager from System Administration window
UnixWare
2. Run CDE Common Desktop Environment
Upgrading the print server from PSAdmin
1. Upgrading the print server from PSAdmin
8.Upgrading Print Server
Upgrading the print server from Windows NT/2000/XP Through TCP/IP
3. Type “tftp print server’s IP address”
Upgrading the print server from UNIXThrough TCP/IP
Upgrading the print server from Browser
4. Click Upgrade form Browser and select the firmware file
5. Click Upgrade 6. Done
9. Troubleshooting
General Troubleshooting Overview
Power Related Problems
Print Port Related Problems
Windows 95/98/Me/NT/2000/XP Troubleshooting
Multi-Segment Frame Type 802.2 Installation
RIP for NWLink IPX/SPX compatible transport Installation Procedure
3. Select Control Panel
Print Server Reconfiguration Procedure on Windows 95/98/Me
Print server Reconfiguration Procedure on Windows NT
Moving the print server to A New Segment
12. Restart the computer
Moving Your Computer to A New Segment
Novell NetWare Troubleshooting
TCP/IP Troubleshooting
a.If the gateway computer is a NT/UNIX server
5. Type edit config.txt to modify this configuration file
8. Move the print server back to the Segment B 9. Done
Diagnostic Mode
Appendix
Load Default Value
Question C
Frequently Asked Questions
Question B
Question D
The Status LED light keeps blinking after POST
Question E
Question F
Additional Installation Instructions
Panasonic KX-P6100/6300/6500