4.The following data must be provided.
Port Name | Enter a descriptive name (e.g. "WAN") for the new |
| printer port. |
|
|
Remote Printer | The |
jobs will be sent to this | |
Mail Server Name | This is the name or IP Address of your Mail Server. If |
or IP Address | you are on a LAN, ask the LAN Administrator. If using |
| a |
|
|
Your Internet | The normal address that people use to send you |
| |
|
|
Retry Interval | If unable to connect to the |
(Seconds) | time period (1 to 255 seconds, 30 is usually OK). |
|
|
Reply Notification | Check to receive an |
been processed. |
5.On completion, a new printer port will have been created.
Using the new Port
The Windows Control Panel is used to connect the correct printer to the InterNet Printing Port. In Windows 95/NT, the procedure is:
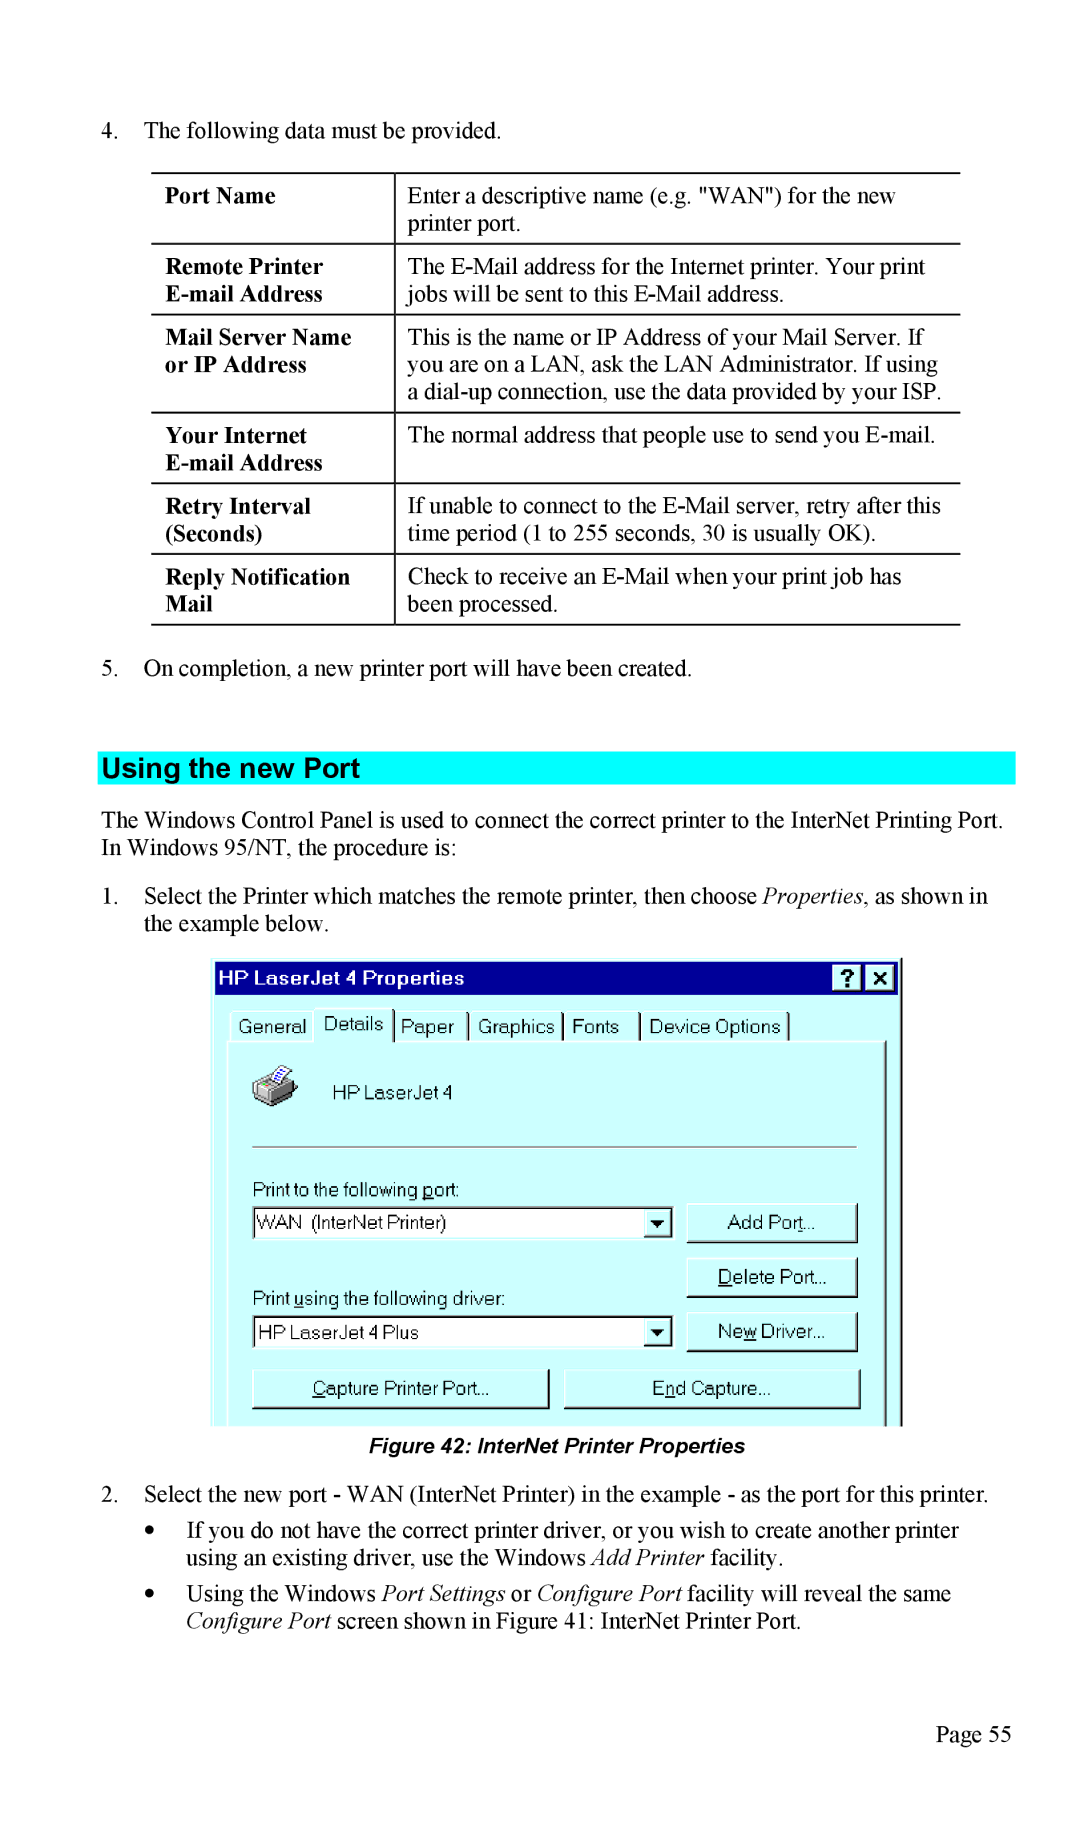
1.Select the Printer which matches the remote printer, then choose Properties, as shown in the example below.
Figure 42: InterNet Printer Properties
2.Select the new port - WAN (InterNet Printer) in the example - as the port for this printer.
•If you do not have the correct printer driver, or you wish to create another printer using an existing driver, use the Windows Add Printer facility.
•Using the Windows Port Settings or Configure Port facility will reveal the same Configure Port screen shown in Figure 41: InterNet Printer Port.
Page 55