• Make sure the equipment is unplugged before carrying out any assembly or maintenance procedures.
• Do not attempt any servicing or adjustments other than those described in this guide. Everything else must
be left to someone familiar with the maintenance of electromechanical equipments and authorised under the laws of the country in question to carry out maintenance and repair work.
• This product must be grounded. If it should malfunction or breakdown, grounding provides a path of least resistance for electric current to reduce the risk of electric shock. This product is equipped with a cord having an
DANGER: Improper connection of the
SAVE THIS INSTRUCTION MANUAL
WELCOME TO THE WORLD
OF TUNTURI EXERCISING!
Your choice shows that you really want to invest in your well being and condition; it also shows you really value high quality and style. With Tunturi Fitness Equipment, you’ve chosen a high quality, safe and motivating product as your training partner. Whatever your goal in training, we are certain this is the training equipment to get you there. You’ll find information about using your exercise equipment and what makes for efficient training at Tunturi’s website at
WWW.TUNTURI.COM .
O W N E R ' S M A N U A L • E 6 0 R G B
A S S E M B LY
Open the transport package on its side. Take the parts out of the package and make sure the package includes all the following parts:
1.Front frame
2. Lower frame
3. Seat frame
4. Seat (2 pcs)
5.Handlebar
6. Meter
7.Feet (2 pcs)
8. Pedals (2 pcs)
9.Assembly kit (contents marked with in the spare part list): keep the assembly tools, as you may need them e.g. for adjusting the equipment.
If necessary, please contact your dealer with the model, equipment serial no. and spare part no. of the missing part. You’ll find a spare part list at the back of this guide. The packaging includes a silicate bag for absorbing moisture during storage and transportation. Please dispose of the bag once you have unpacked the equipment. The directions left, right, front and back are defined as seen from the exercising position.
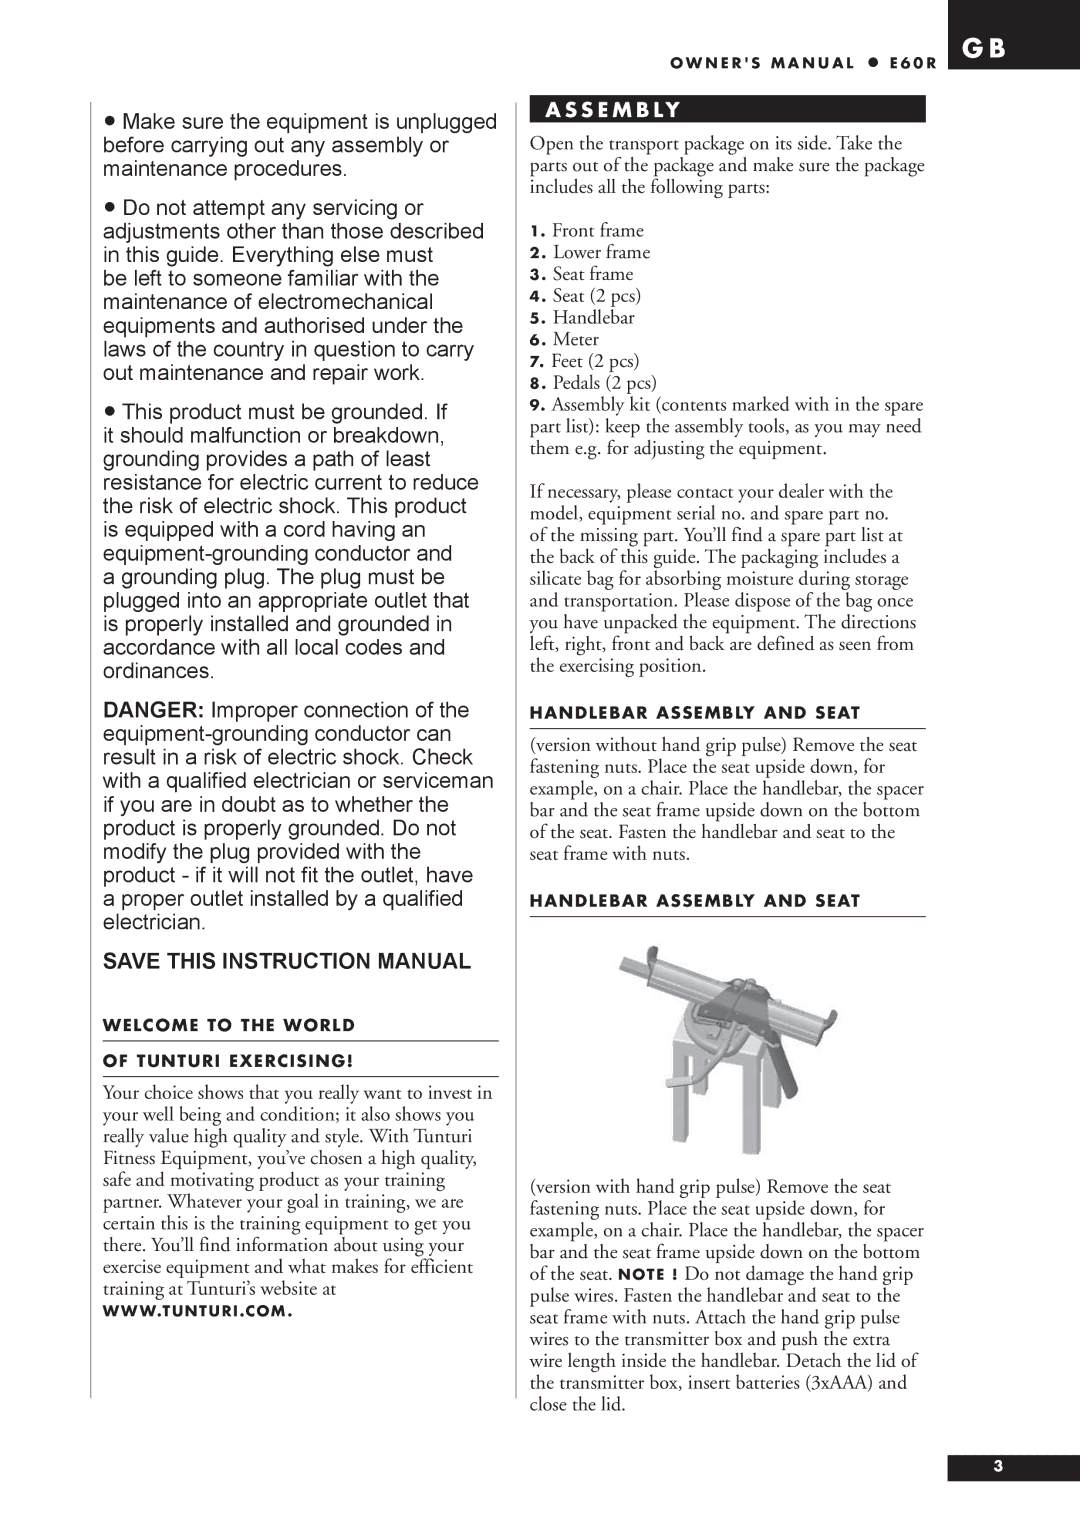
HANDLEBAR ASSEMBLY AND SEAT
(version without hand grip pulse) Remove the seat fastening nuts. Place the seat upside down, for example, on a chair. Place the handlebar, the spacer bar and the seat frame upside down on the bottom of the seat. Fasten the handlebar and seat to the seat frame with nuts.
HANDLEBAR ASSEMBLY AND SEAT
(version with hand grip pulse) Remove the seat fastening nuts. Place the seat upside down, for example, on a chair. Place the handlebar, the spacer bar and the seat frame upside down on the bottom of the seat. NOTE ! Do not damage the hand grip pulse wires. Fasten the handlebar and seat to the seat frame with nuts. Attach the hand grip pulse wires to the transmitter box and push the extra wire length inside the handlebar. Detach the lid of the transmitter box, insert batteries (3xAAA) and close the lid.
3