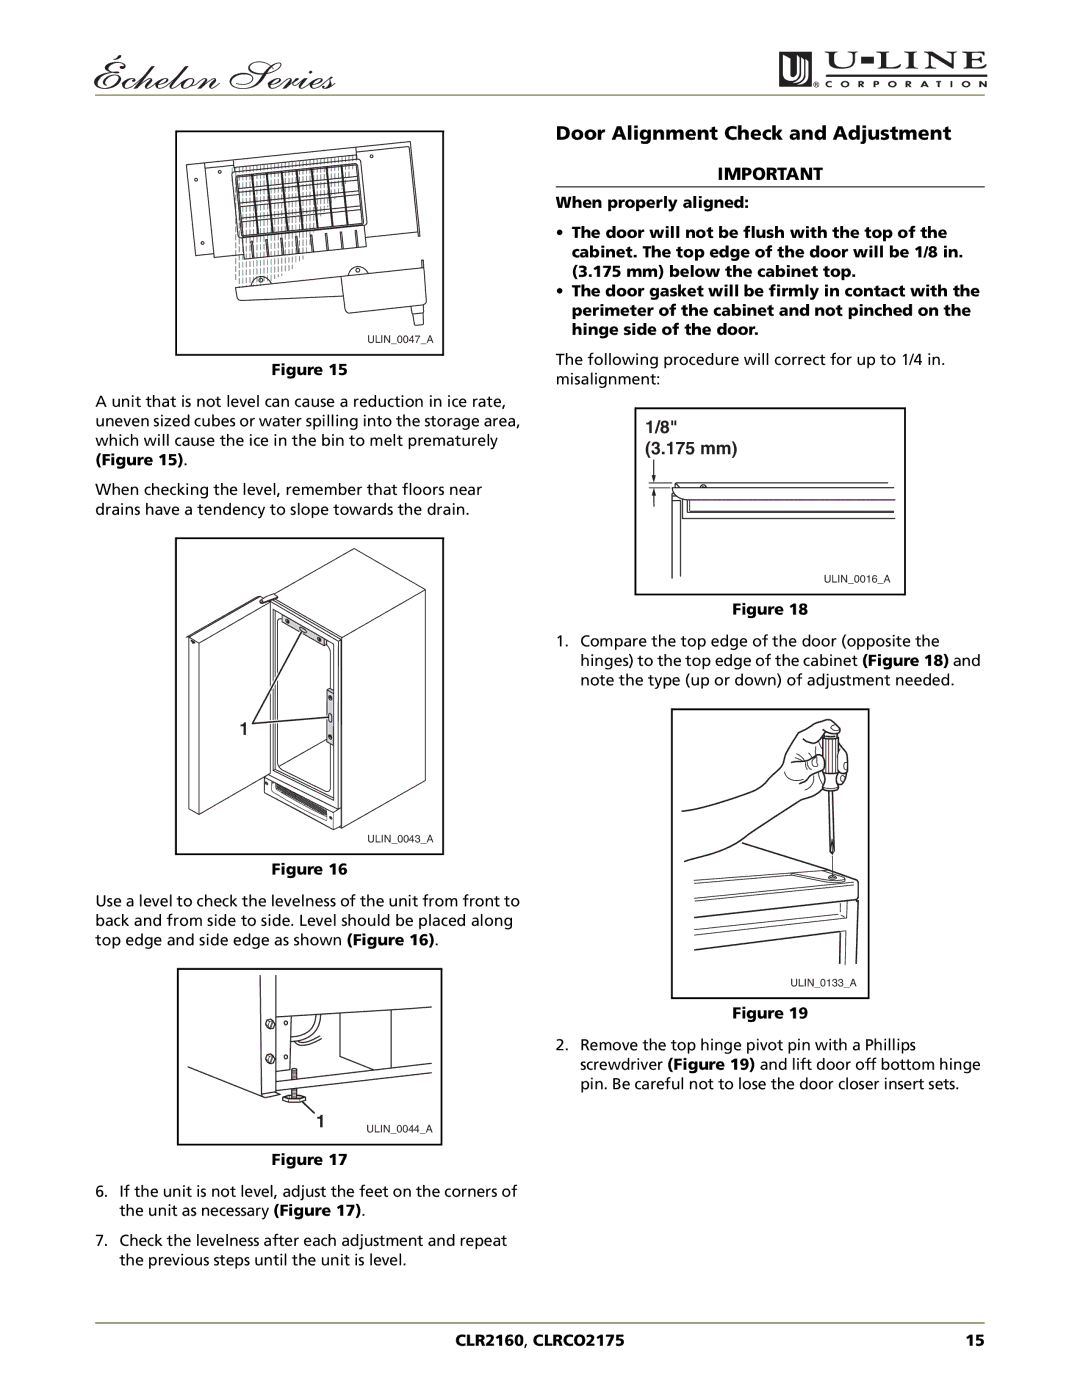
CLR2160, CLRCO2175 specifications
The U-Line CLRCO2175 and CLR2160 are standout models in the world of compact refrigeration solutions, offering remarkable features tailored for modern living. Known for their slim design and efficient performance, these models are perfect for homeowners seeking added convenience without sacrificing space or style.The U-Line CLRCO2175 boasts a capacity of 5.3 cubic feet, providing ample storage while maintaining a sleek profile. Its glass door is a key highlight, featuring Low-E argon gas-filled glass which not only enhances visibility but also provides energy efficiency by minimizing heat transfer. The model includes a built-in ice maker, delivering a continuous supply of fresh ice, which is ideal for entertaining or everyday use.
On the other hand, the CLR2160 offers a slightly smaller capacity of 3.4 cubic feet, perfectly suited for tighter spaces while still delivering on performance. It features the same stylish glass door and energy-efficient insulation, ensuring that your favorite beverages and snacks are kept at optimal temperatures.
Both models are equipped with a digital control panel that allows for precise temperature adjustments, catering to the specific needs of various items from wine to soft drinks. The internal shelving is adjustable, making it easy to customize the interior configuration to accommodate different bottle shapes and sizes.
Energy efficiency is a driving consideration in these models, as they are designed to consume less power compared to traditional refrigerators. This not only helps in reducing utility bills but also minimizes the environmental impact. Furthermore, U-Line has implemented noise-reducing technologies, ensuring quiet operation—ideal for placement in living spaces or open floor plans.
The sleek aesthetic of the CLRCO2175 and CLR2160 can seamlessly blend into various decor styles, from contemporary to traditional. With their stainless-steel finishes and elegant edge-to-edge glass doors, they serve not just as appliances but also as stylish additions to home interiors.
In conclusion, the U-Line CLRCO2175 and CLR2160 offer exceptional features and technologies tailored for modern living. Their space-saving designs, energy-efficient performance, and stylish aesthetics make these models essential choices for those looking to enhance their home with versatile refrigeration solutions. Whether entertaining guests or enjoying a quiet evening at home, these appliances provide the reliability and functionality needed in today’s fast-paced lifestyle.

