CONNECTING AIR PRESSURE
Attach the shop air line to the robot at the air line hose con- nection. Air pressure should be 80 PSI working pressure and 100 PSI maximum pressure. Do not connect and turn on the air until AFTER setting the gripper position and strip move- ment.
ADJUSTING THE
SPRUE
VERIFICATION
SWITCH
To ensure proper part/sprue verification, adjust the
1 Press the Manual button
to place the robot in manual mode.
2 Press the Grip (On/Off) button
to cycle the gripper open and closed.
3
Place a sprue into the open gripper
jaws and press the Grip button to grip the sprue. The grip- per should grip the sprue enough to be able to lift it, but not deform or break it.
4
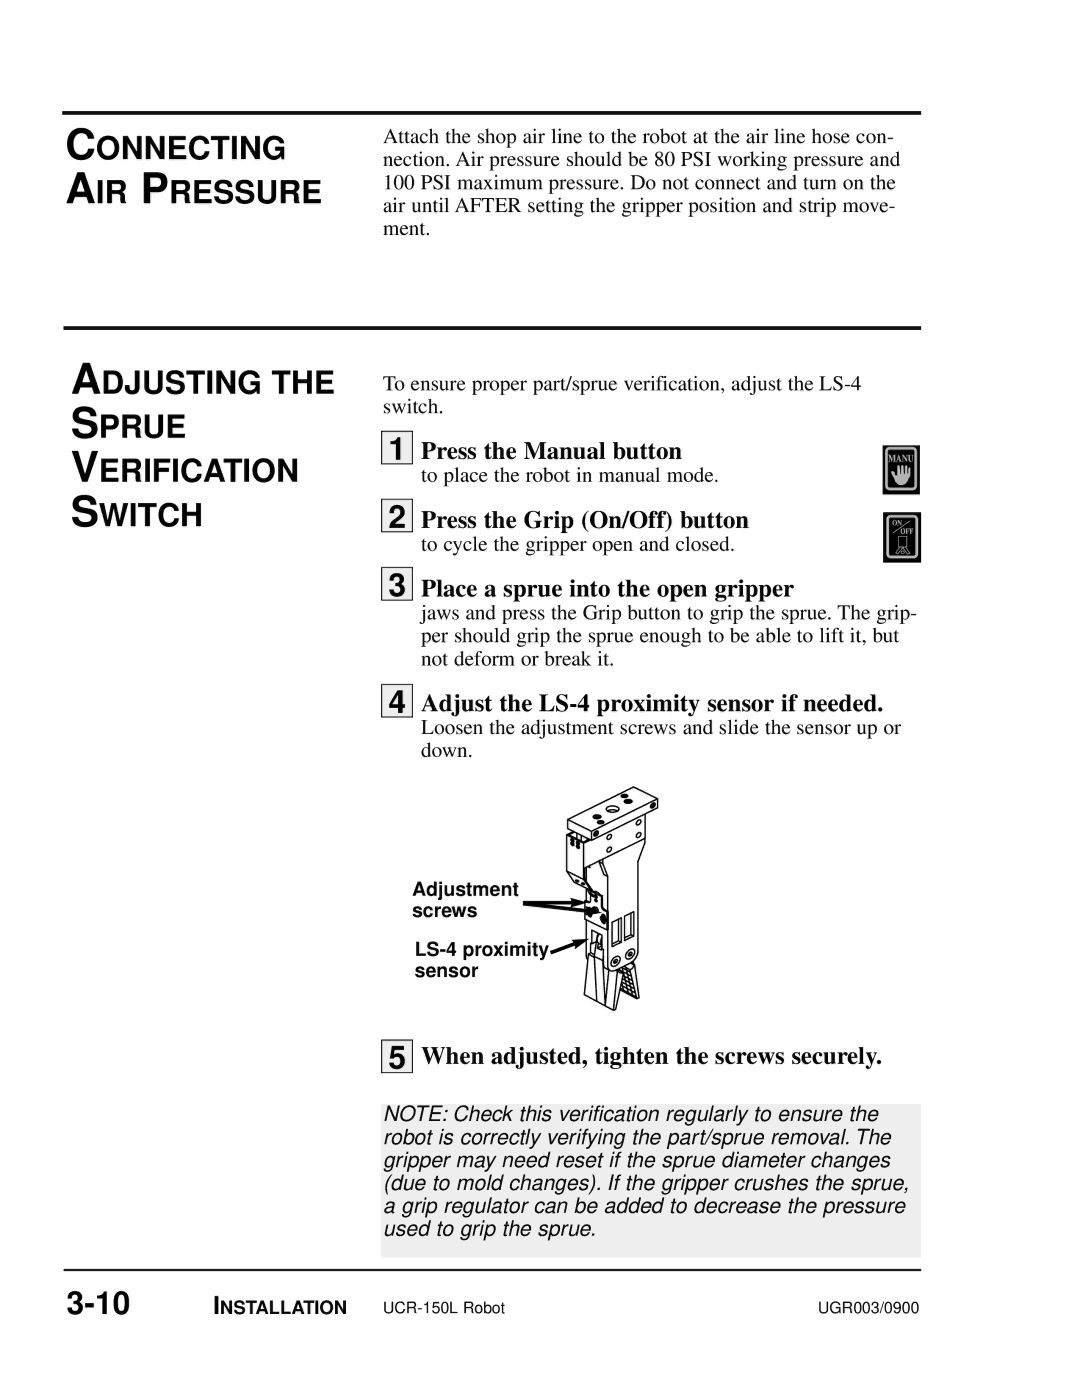
Adjust the LS-4 proximity sensor if needed.
Loosen the adjustment screws and slide the sensor up or down.
Adjustment screws
![]() sensor
sensor
5
When adjusted, tighten the screws securely.
NOTE: Check this verification regularly to ensure the robot is correctly verifying the part/sprue removal. The gripper may need reset if the sprue diameter changes (due to mold changes). If the gripper crushes the sprue, a grip regulator can be added to decrease the pressure used to grip the sprue.
INSTALLATION | UGR003/0900 |
