EN-1
FCC Statement
EN-2
Read this First
EN-3
Do not disassemble, change or repair the camera
Do not place the camera on inclined or unstable surfaces
Keep the batteries out of the reach of children
EN-4
Do not subject the LCD monitor to impact
Before you move the camera, disconnect cords and cables
EN-5
Contents
EN-7
Playback Mode Advanced Features
Introduction
Package Contents
EN-10
Getting to Know Your Vivicam
Front View
EN-11
Rear View
EN-12
Mode Dial
Mode Description
EN-13
Camera Mode
LCD Monitor Information
EN-14
Video Mode
Image Playback
Video Playback
EN-15
Installing the Batteries
Preparing the Vivicam
EN-16
Using the AC Power Adapter Optional Accessory
EN-17
Inserting and Removing an SD Memory Card Optional Accessory
EN-18
LED Indicators
Indicator State Description/Activity
Attaching the Camera Strap
EN-19
Turning the Power On/Off
Getting Started
Choosing the Screen Language
EN-20
Setting the Date and Time
EN-21
Formatting an SD Memory Card or Internal Memory
EN-22
Using the LCD Monitor
EN-23
Photography Mode
Shooting Images The Basics
EN-24
Setting Image Resolution and Quality
EN-25
Using the Zoom Function
EN-26
Setting Focus
Focus mode Description
EN-27
Using the Flash
Flash mode Description
EN-28
Using the Self-Timer
OFF 2 10 10+2 No Indication
EN-29
Adjusting the Exposure EV Compensation
EN-30
Setting White Balance
Program Mode P
Using the Mode Dial
Simple Mode a
EN-32
Shutter Speed Priority Mode Tv
Aperture Priority Mode Av
EN-33
Manual Mode M
Scene Mode Scene
EN-34
Advanced Shooting
Burst
EN-35
Auto Exposure Bracketing AEB
EN-36
Selecting the Metering Mode
EN-37
Playback Mode the Basics
Viewing Images
EN-38
Magnifying Images
EN-39
Thumbnail Display
EN-40
Slideshow Display
EN-41
Resizing an Image
EN-42
Video Mode
Recording Video Clips
EN-43
Playing Back Video Clips
EN-44
Playing Back Still Images/Video Clips on TV
EN-45
Deleting Images/Video Clips
EN-46
Protecting Images/Video Clips
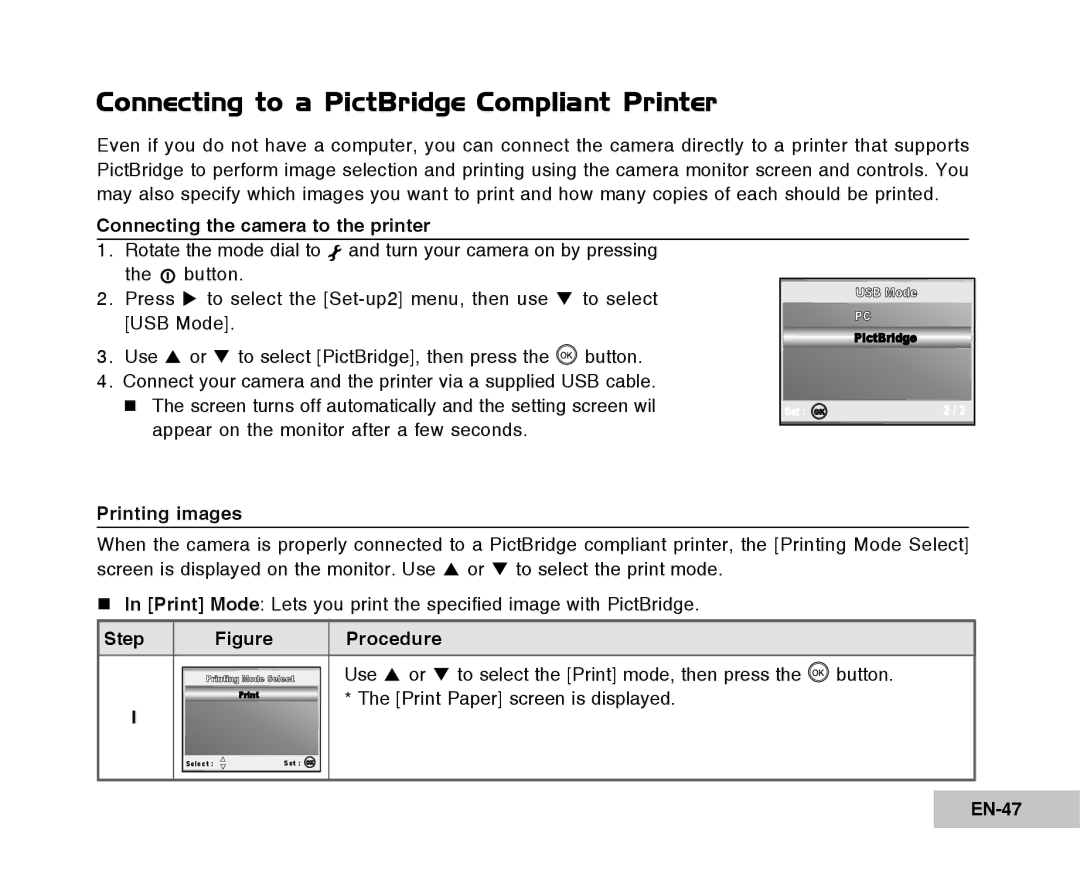
Connecting to a PictBridge Compliant Printer
EN-48
Button to print
Transferring screen is displayed
To cancel printing
Selecting whether to Continue or Cancel printing
Use S or T to select Print, then press Button to confirm
Transferring Files from Your Vivicam 8400 to Your Computer
EN-51
Install the USB driver
Installation on Windows 98 & 98SE
Installation on MAC OS
EN-52
Connect the ViviCam 8400 to your computer
EN-53
Download images or video clips
EN-54
Editing Software Installation
Installing Photo Explorer
EN-55
Installing Photo Express
EN-56
Installing Adobe Acrobat Reader
Click Install Acrobat Reader
EN-57
EN-58
Menu Options
Camera Menu
Functional Description
EN-59
Mode1 Functional Description
EN-60
Mode2 Functional Description
EN-61
Mode3 Functional Description
EN-62
Video Menu
EN-63
Playback1 settings Functional Description
Playback Menu
EN-64
Playback2 settings Functional Description
EN-65
Setup Menu
Set-up1 settings Functional Description
EN-66
Set-up2 settings Functional Description
Set-up3 settings
EN-67
Connecting the Vivicam 8400 to Other Devices
EN-68
Vivicam 8400 Specifications
EN-69
Appendix
EN-70
„ Possible Number of Recordable Images