FULL SIZE ELECTRIC CONVECTION OVEN - REMOVAL AND REPLACEMENT OF PARTS
REMOVAL AND REPLACEMENT OF PARTS
COVERS AND PANELS
WARNING: DISCONNECT THE ELECTRICAL POWER TO THE MACHINE AT THE MAIN CIRCUIT BOX. PLACE A TAG ON THE CIRCUIT BOX INDICATING THE CIRCUIT IS BEING SERVICED.
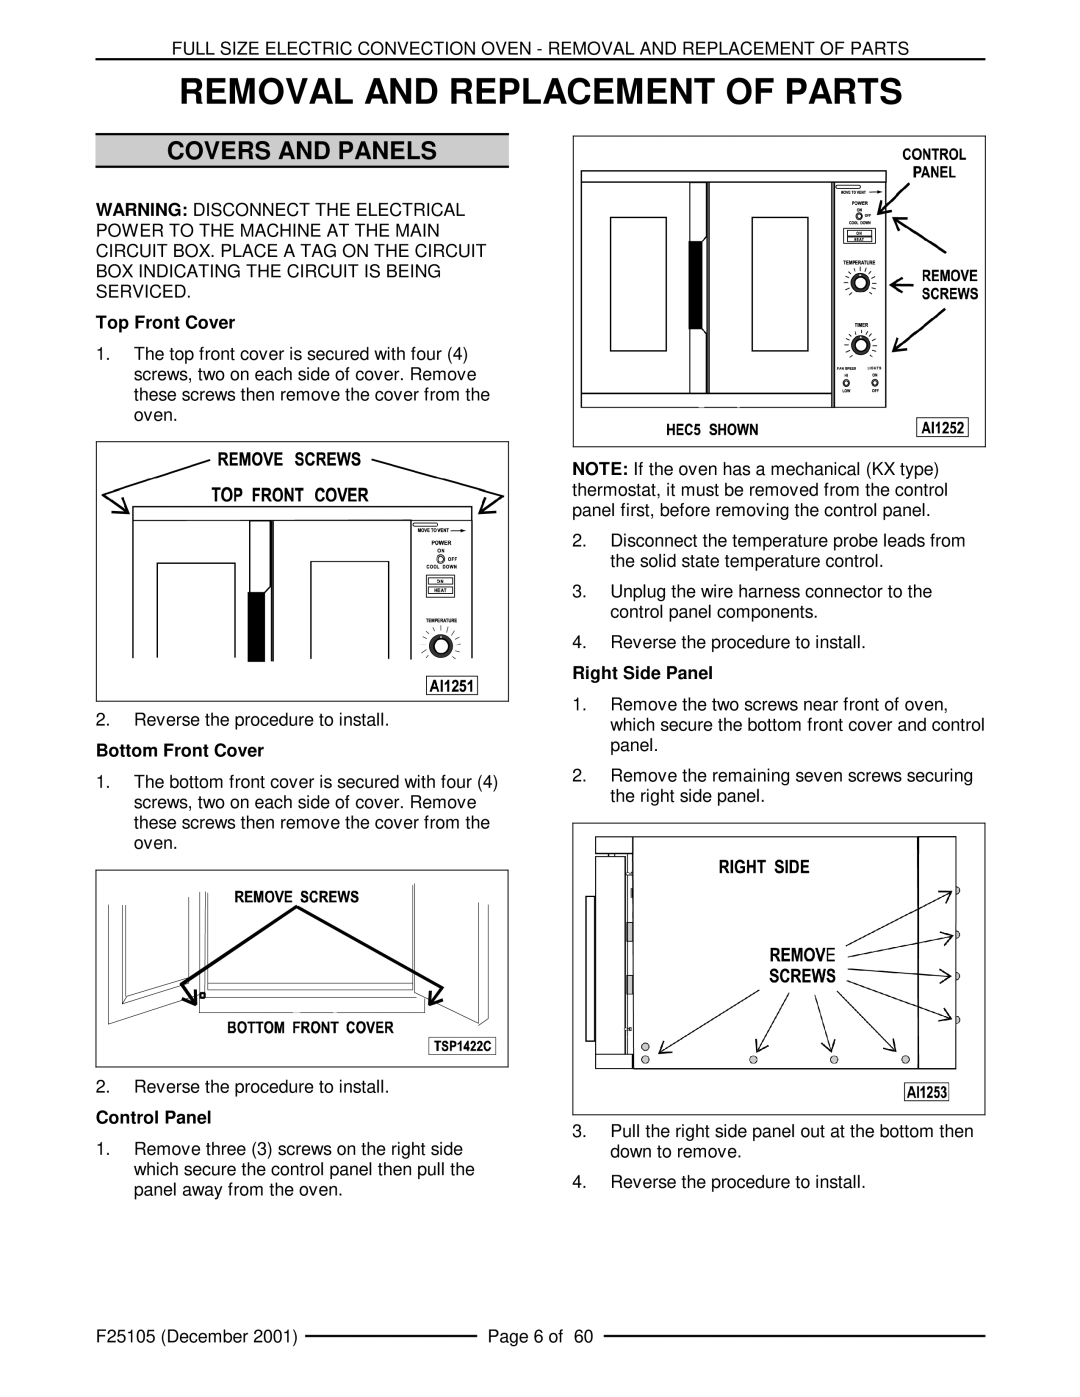
Top Front Cover
1.The top front cover is secured with four (4) screws, two on each side of cover. Remove these screws then remove the cover from the oven.
2.Reverse the procedure to install.
Bottom Front Cover
1.The bottom front cover is secured with four (4) screws, two on each side of cover. Remove these screws then remove the cover from the oven.
2.Reverse the procedure to install.
Control Panel
1.Remove three (3) screws on the right side which secure the control panel then pull the panel away from the oven.
NOTE: If the oven has a mechanical (KX type) thermostat, it must be removed from the control panel first, before removing the control panel.
2.Disconnect the temperature probe leads from the solid state temperature control.
3.Unplug the wire harness connector to the control panel components.
4.Reverse the procedure to install.
Right Side Panel
1.Remove the two screws near front of oven, which secure the bottom front cover and control panel.
2.Remove the remaining seven screws securing the right side panel.
3.Pull the right side panel out at the bottom then down to remove.
4.Reverse the procedure to install.
F25105 (December 2001) |
| Page 6 of 60 |
|