The
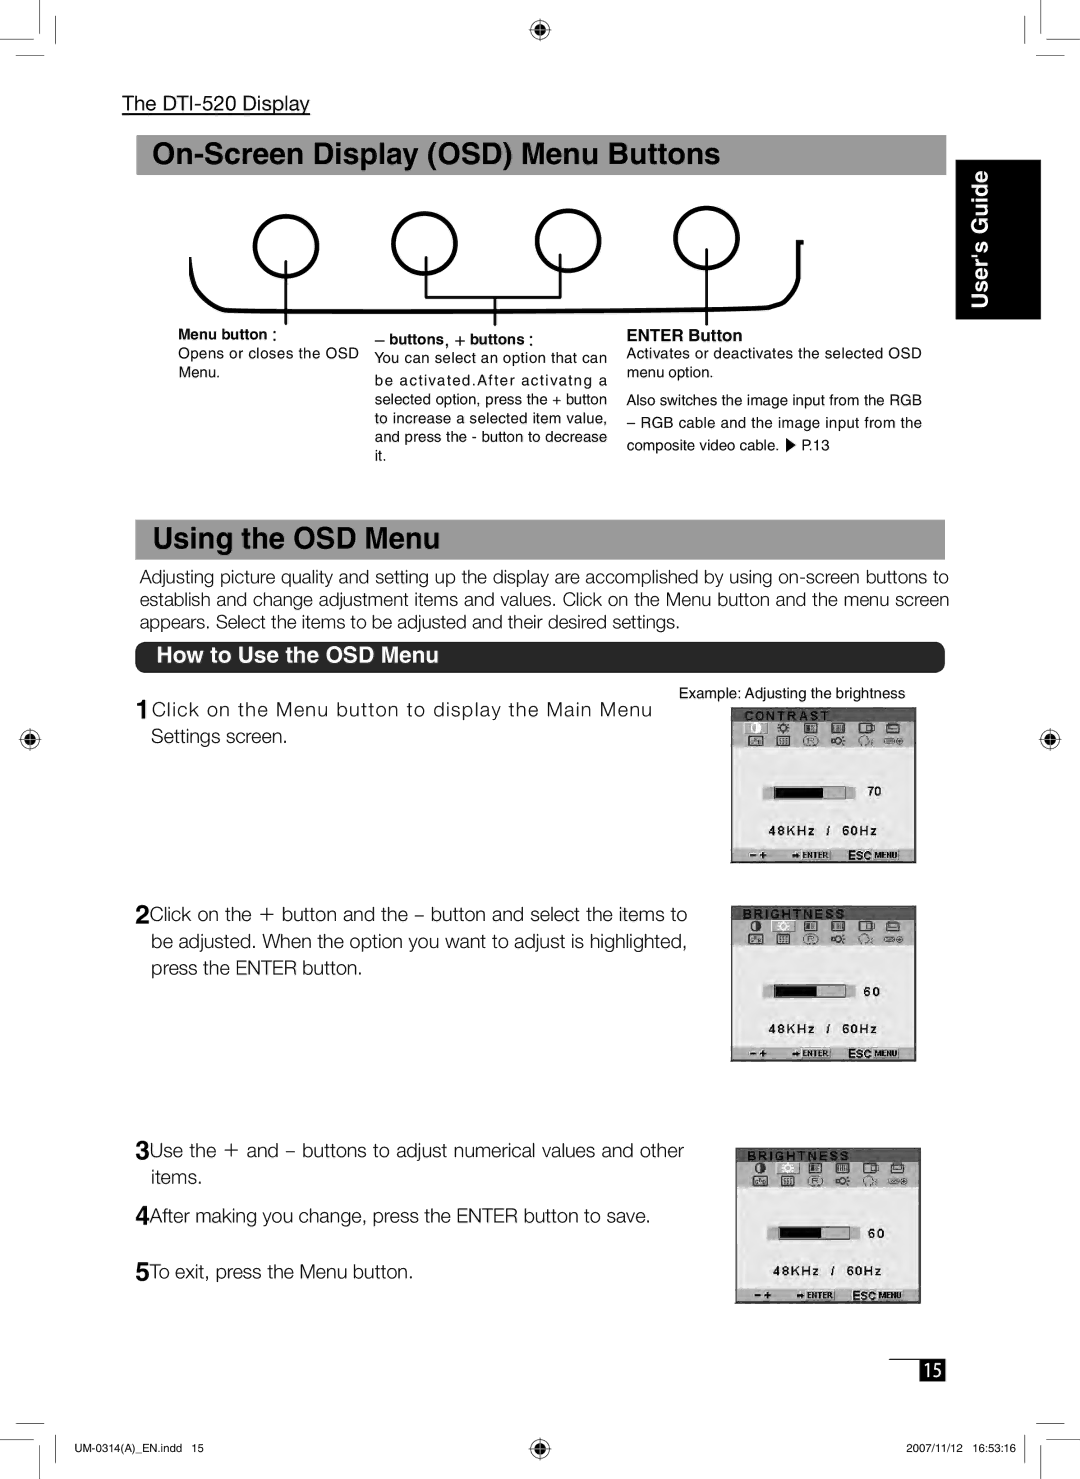
On-Screen Display (OSD) Menu Buttons
Menu button :
Opens or closes the OSD Menu.
−buttons, + buttons :
You can select an option that can
be activated.After activatng a selected option, press the + button to increase a selected item value, and press the - button to decrease it.
User's Guide
ENTER Button
Activates or deactivates the selected OSD menu option.
Also switches the image input from the RGB
–RGB cable and the image input from the composite video cable. ▶ P.13
Using the OSD Menu
Adjusting picture quality and setting up the display are accomplished by using
How to Use the OSD Menu
1Click on the Menu button to display the Main Menu Settings screen.
Example: Adjusting the brightness
2Click on the + button and the − button and select the items to be adjusted. When the option you want to adjust is highlighted, press the ENTER button.
3Use the + and − buttons to adjust numerical values and other items.
4After making you change, press the ENTER button to save.
5To exit, press the Menu button.
15
2007/11/12 16:53:16