Control Panel Basics
Open the Tablet control panel to begin customizing your product. Experiment with different settings to find what works best for you. Any changes you make will take effect immediately, but you can always click DEFAULT to return to the factory settings. Additionally, your keyboard tab and arrow keys can be used to navigate the control panel.
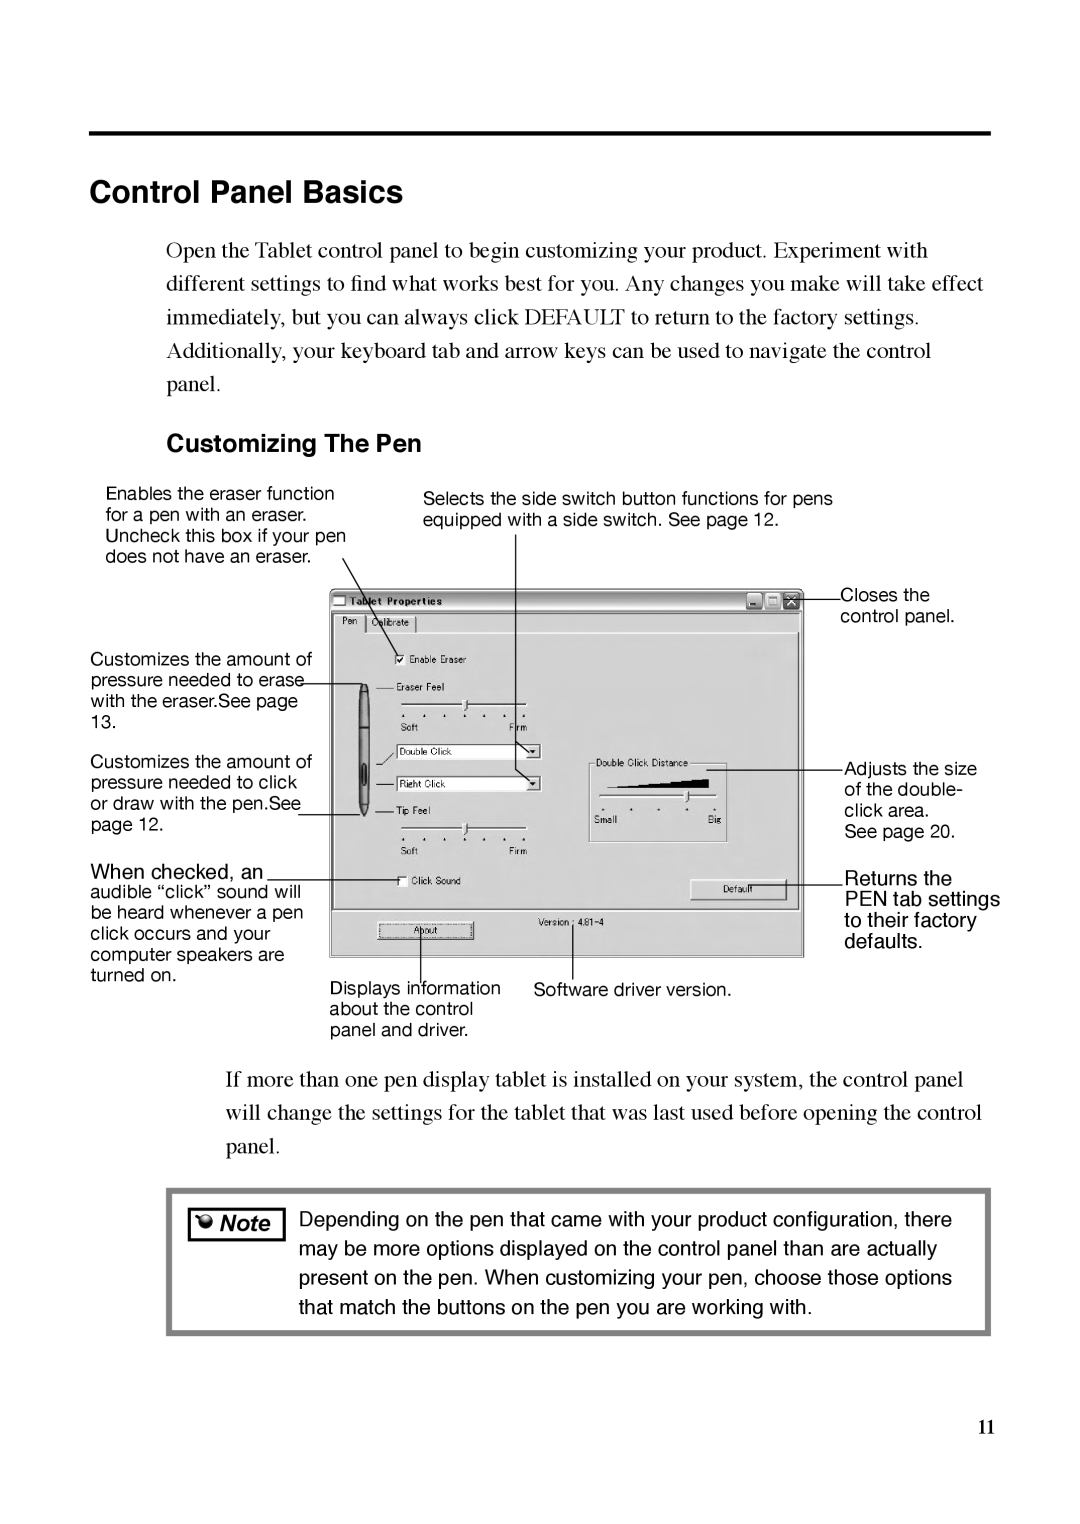
Customizing The Pen
Enables the eraser function for a pen with an eraser. Uncheck this box if your pen does not have an eraser.
Customizes the amount of pressure needed to erase with the eraser.See page 13.
Customizes the amount of pressure needed to click or draw with the pen.See page 12.
Selects the side switch button functions for pens equipped with a side switch. See page 12.
Closes the control panel.
Adjusts the size of the double- click area.
See page 20.
When checked, an audible “click” sound will
be heard whenever a pen |
|
|
|
|
|
click occurs and your |
|
|
|
|
|
|
|
|
|
| |
computer speakers are |
|
|
|
|
|
turned on. | Displays |
| information |
|
|
|
| Software driver version. | |||
| about the control |
|
| ||
| panel and driver. |
|
| ||
Returns the PEN tab settings to their factory defaults.
If more than one pen display tablet is installed on your system, the control panel will change the settings for the tablet that was last used before opening the control panel.
![]()
![]() Note
Note
Depending on the pen that came with your product configuration, there may be more options displayed on the control panel than are actually present on the pen. When customizing your pen, choose those options that match the buttons on the pen you are working with.
11