Assembly Instructions
DOZER BLADE
Dozer Blade Assembly
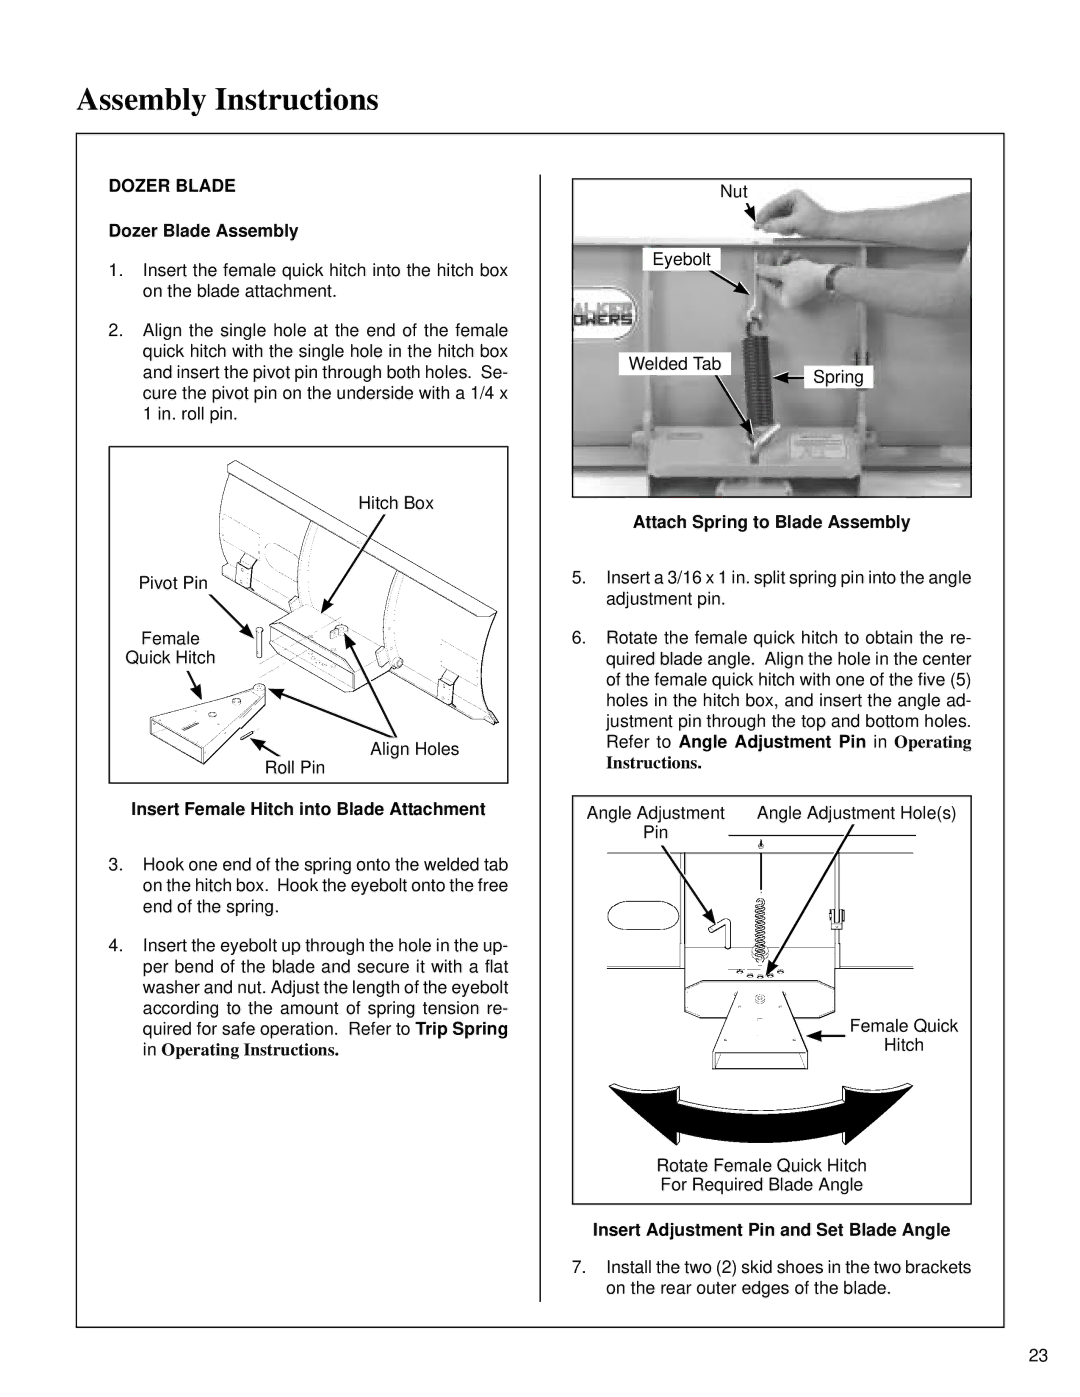
1.Insert the female quick hitch into the hitch box on the blade attachment.
2.Align the single hole at the end of the female quick hitch with the single hole in the hitch box and insert the pivot pin through both holes. Se- cure the pivot pin on the underside with a 1/4 x 1 in. roll pin.
Hitch Box
Pivot Pin
Female
Quick Hitch
Align Holes
Roll Pin
Insert Female Hitch into Blade Attachment
3.Hook one end of the spring onto the welded tab on the hitch box. Hook the eyebolt onto the free end of the spring.
4.Insert the eyebolt up through the hole in the up- per bend of the blade and secure it with a flat washer and nut. Adjust the length of the eyebolt according to the amount of spring tension re- quired for safe operation. Refer to Trip Spring in Operating Instructions.
Nut
Eyebolt
Welded Tab
Spring
Attach Spring to Blade Assembly
5.Insert a 3/16 x 1 in. split spring pin into the angle adjustment pin.
6.Rotate the female quick hitch to obtain the re- quired blade angle. Align the hole in the center of the female quick hitch with one of the five (5) holes in the hitch box, and insert the angle ad- justment pin through the top and bottom holes. Refer to Angle Adjustment Pin in Operating
Instructions.
Angle Adjustment |
| Angle Adjustment Hole(s) |
Pin |
|
|
| ||
|
|
|
Female Quick
Hitch
Rotate Female Quick Hitch
For Required Blade Angle
Insert Adjustment Pin and Set Blade Angle
7.Install the two (2) skid shoes in the two brackets on the rear outer edges of the blade.
23
