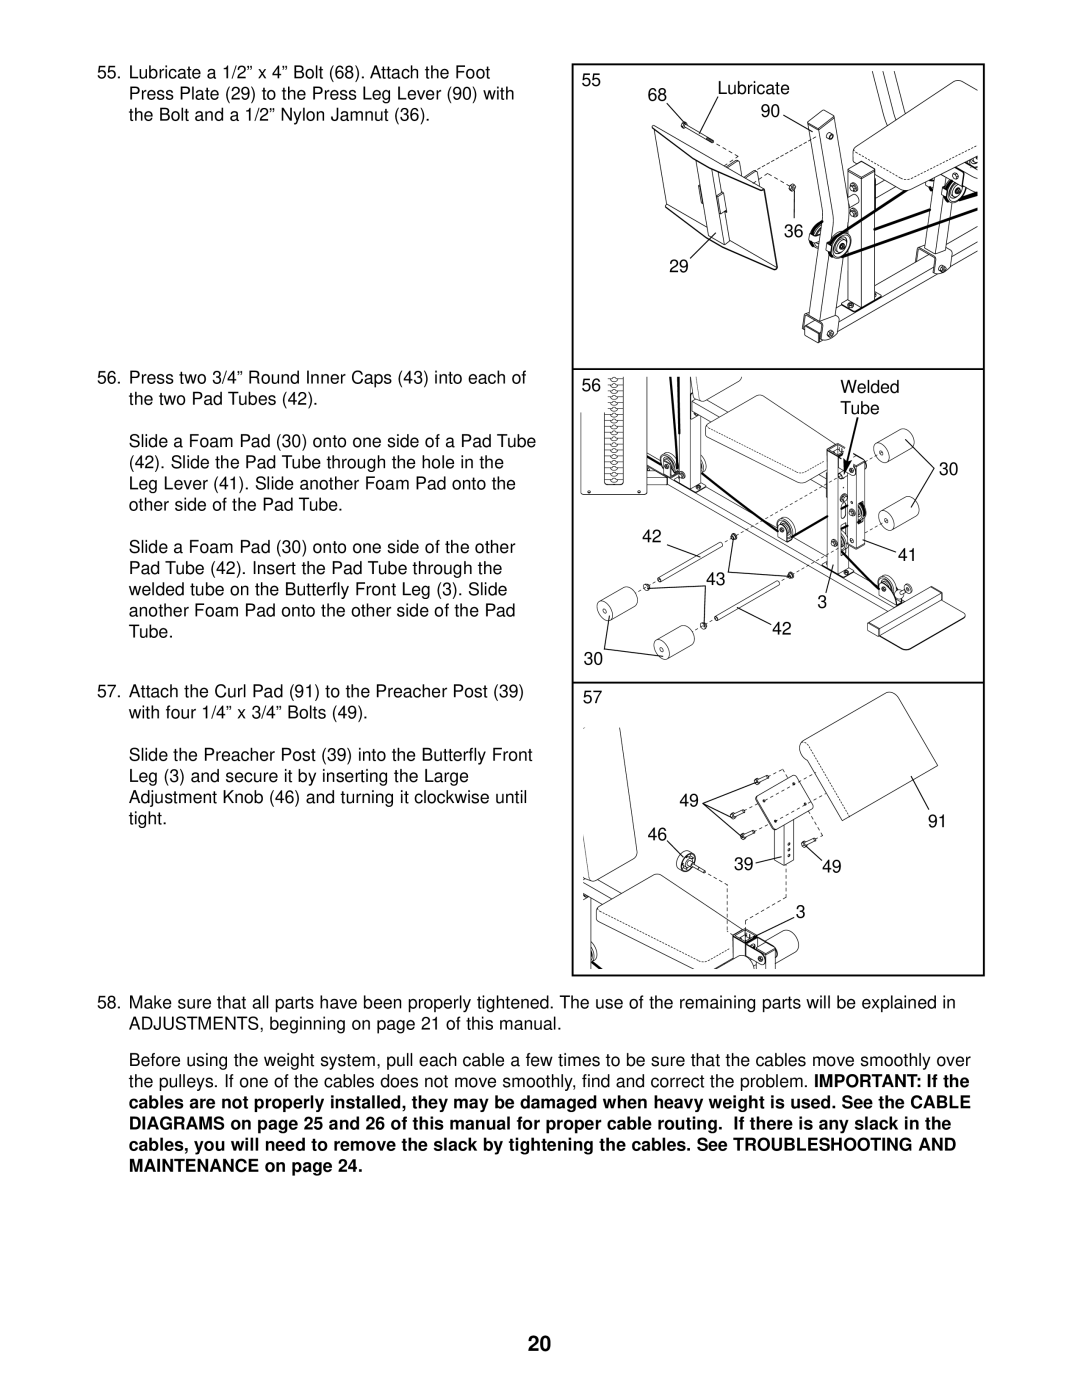
55.Lubricate a 1/2” x 4” Bolt (68). Attach the Foot Press Plate (29) to the Press Leg Lever (90) with the Bolt and a 1/2” Nylon Jamnut (36).
56.Press two 3/4” Round Inner Caps (43) into each of the two Pad Tubes (42).
Slide a Foam Pad (30) onto one side of a Pad Tube (42). Slide the Pad Tube through the hole in the Leg Lever (41). Slide another Foam Pad onto the other side of the Pad Tube.
Slide a Foam Pad (30) onto one side of the other Pad Tube (42). Insert the Pad Tube through the welded tube on the Butterfly Front Leg (3). Slide another Foam Pad onto the other side of the Pad Tube.
57.Attach the Curl Pad (91) to the Preacher Post (39) with four 1/4” x 3/4” Bolts (49).
Slide the Preacher Post (39) into the Butterfly Front Leg (3) and secure it by inserting the Large Adjustment Knob (46) and turning it clockwise until tight.
55 | 68 | Lubricate |
|
|
| ||
| 90 |
| |
|
|
| |
|
|
| 36 |
| 29 |
|
|
56 |
|
| Welded |
|
|
| Tube |
|
|
| 30 |
| 42 |
| 41 |
|
|
| |
|
| 43 |
|
|
|
| 3 |
|
|
| 42 |
30 |
|
|
|
57 |
|
|
|
| 49 |
|
|
| 46 |
| 91 |
|
|
| |
|
| 39 | 49 |
|
|
| 3 |
58. Make sure that all parts have been properly tightened. The use of the remaining parts will be explained in
ADJUSTMENTS, beginning on page 21 of this manual. |
|
Before using the weight system, pull each cable a few times to be sure that the cables move smoothly over |
|
the pulleys. If one of the cables does not move smoothly, find and correct the problem. | IMPORTANT: If the |
cables are not properly installed, they may be damaged when heavy weight is used. See the CABLE |
|
DIAGRAMS on page 25 and 26 of this manual for proper cable routing. If there is any slack in the |
|
cables, you will need to remove the slack by tightening the cables. See TROUBLESHOOTING AND |
|
MAINTENANCE on page 24. |
|
20