3.To confirm your choices, press the EXIT key choose OK when prompted to delete the items that have been flagged.
Note: You can also choose to Delete All which will flag all the items in your scheduled list for deletion.
4.6 Operation while recording
4.6.1 View/ Modify Recording Information
While recording a program, you can view recording information, rename files and modify recording duration if needed.
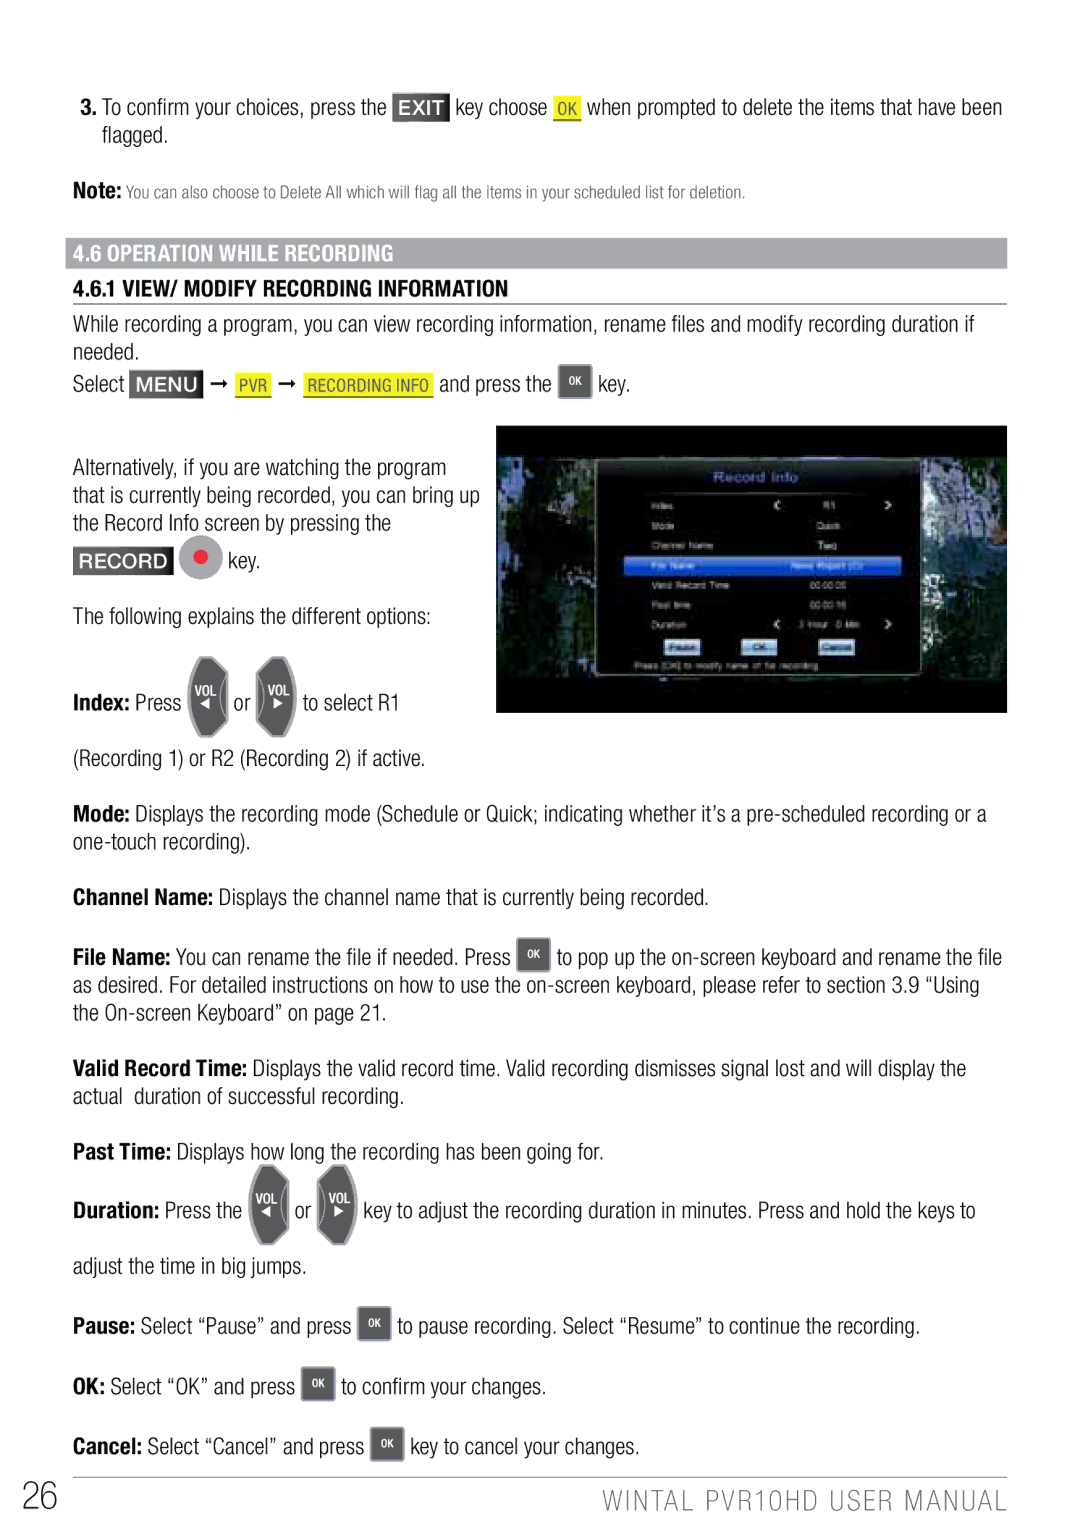
Select Menu PVR Recording Info and press the ![]() key.
key.
Alternatively, if you are watching the program that is currently being recorded, you can bring up the Record Info screen by pressing the
record ![]() key.
key.
The following explains the different options:
Index: Press | or | to select R1 |
(Recording 1) or R2 (Recording 2) if active.
Mode: Displays the recording mode (Schedule or Quick; indicating whether it’s a
Channel Name: Displays the channel name that is currently being recorded.
File Name: You can rename the file if needed. Press ![]() to pop up the
to pop up the
Valid Record Time: Displays the valid record time. Valid recording dismisses signal lost and will display the actual duration of successful recording.
Past Time: Displays how long the recording has been going for.
Duration: Press the | or | key to adjust the recording duration in minutes. Press and hold the keys to |
adjust the time in big jumps.
Pause: Select “Pause” and press ![]() to pause recording. Select “Resume” to continue the recording.
to pause recording. Select “Resume” to continue the recording.
OK: Select “OK” and press ![]() to confirm your changes.
to confirm your changes.
Cancel: Select “Cancel” and press ![]() key to cancel your changes.
key to cancel your changes.
26 | WINTAL PVR10HD USER MANUAL |