ADJUSTMENTS
Cutterhead Alignment
The most critical adjustments made on your new planer are dependent on the cutterhead body being parallel to the table. Because of this alignment, checking the table is the first step to establishing an accurate planer.
There are two dimensions you should be concerned about when checking/aligning the
The cutterhead casting and the cutterhead body has been
To check the cutterhead-to-table alignment, do these steps:
1.UNPLUG THE PLANER!
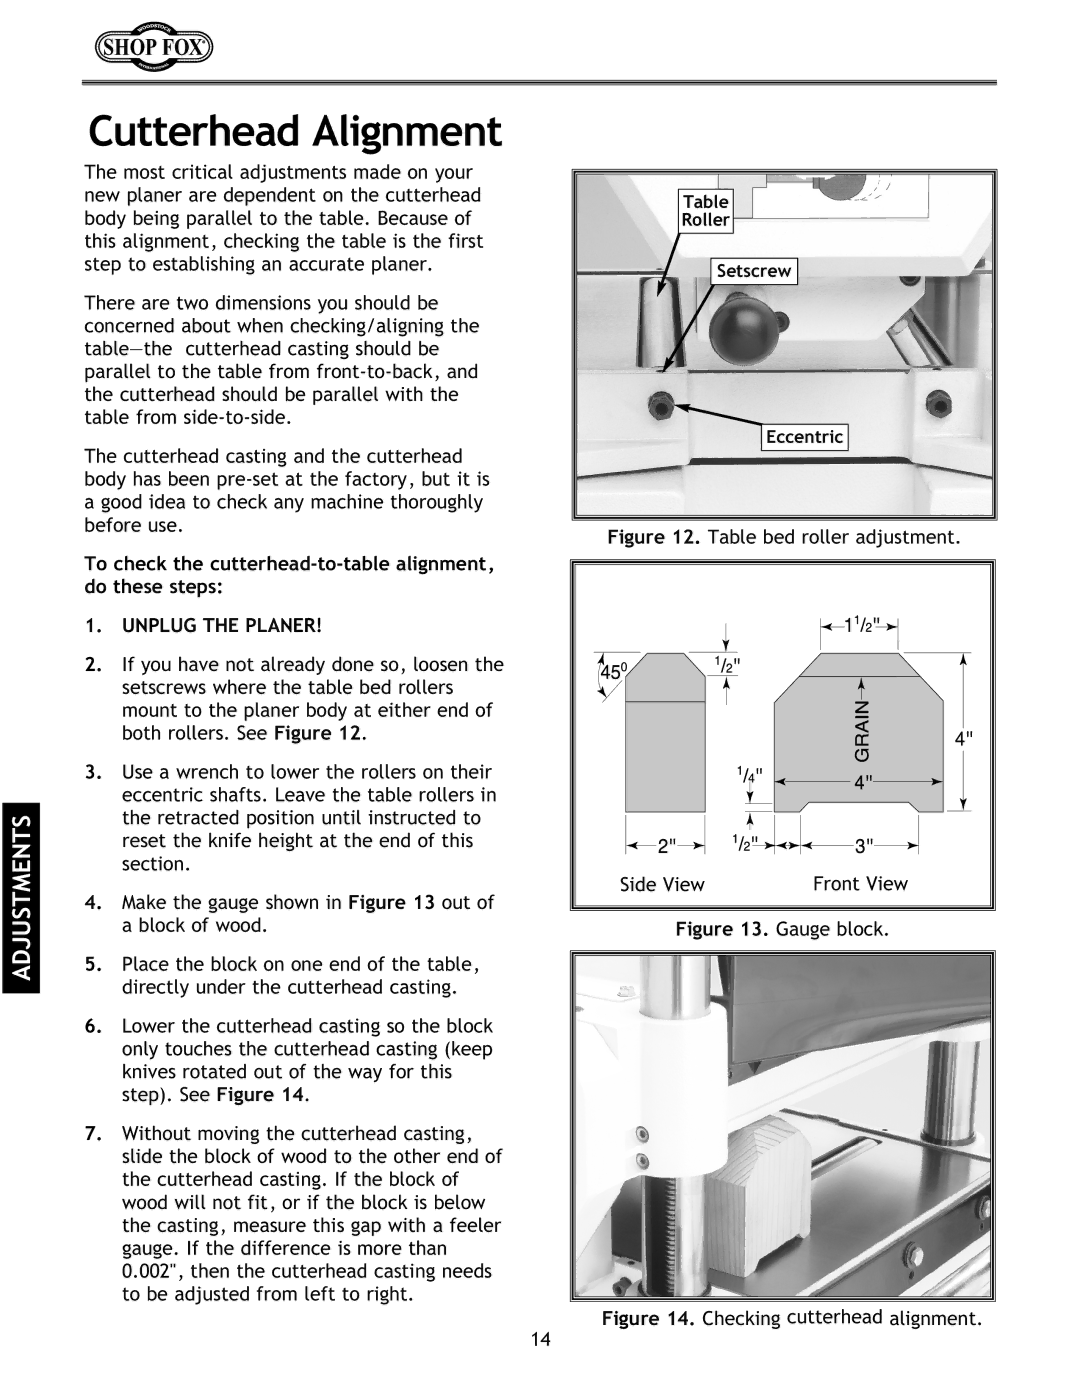
2.If you have not already done so, loosen the setscrews where the table bed rollers mount to the planer body at either end of both rollers. See Figure 12.
3.Use a wrench to lower the rollers on their eccentric shafts. Leave the table rollers in the retracted position until instructed to reset the knife height at the end of this section.
4.Make the gauge shown in Figure 13 out of a block of wood.
5.Place the block on one end of the table, directly under the cutterhead casting.
6.Lower the cutterhead casting so the block only touches the cutterhead casting (keep knives rotated out of the way for this step). See Figure 14.
7.Without moving the cutterhead casting, slide the block of wood to the other end of the cutterhead casting. If the block of wood will not fit, or if the block is below the casting, measure this gap with a feeler gauge. If the difference is more than 0.002", then the cutterhead casting needs to be adjusted from left to right.
Table
Roller
Setscrew
Eccentric
Figure 12. Table bed roller adjustment.
Side View | Front View |
Figure 13. Gauge block.
Figure 14. Checking cutterhead alignment.
14