ADJUSTMENTS
Knife Replacement
(W1723)
The Model W1723 Planer is equipped with both springs and jack screws for knife adjustment. Springs allow adjustments to be made quickly, while jack screws are more accurate. Both methods are covered below. The W1724 does not use adjustable knives.
WEAR thick gloves when working near planer knives. Otherwise you can be severely cut!
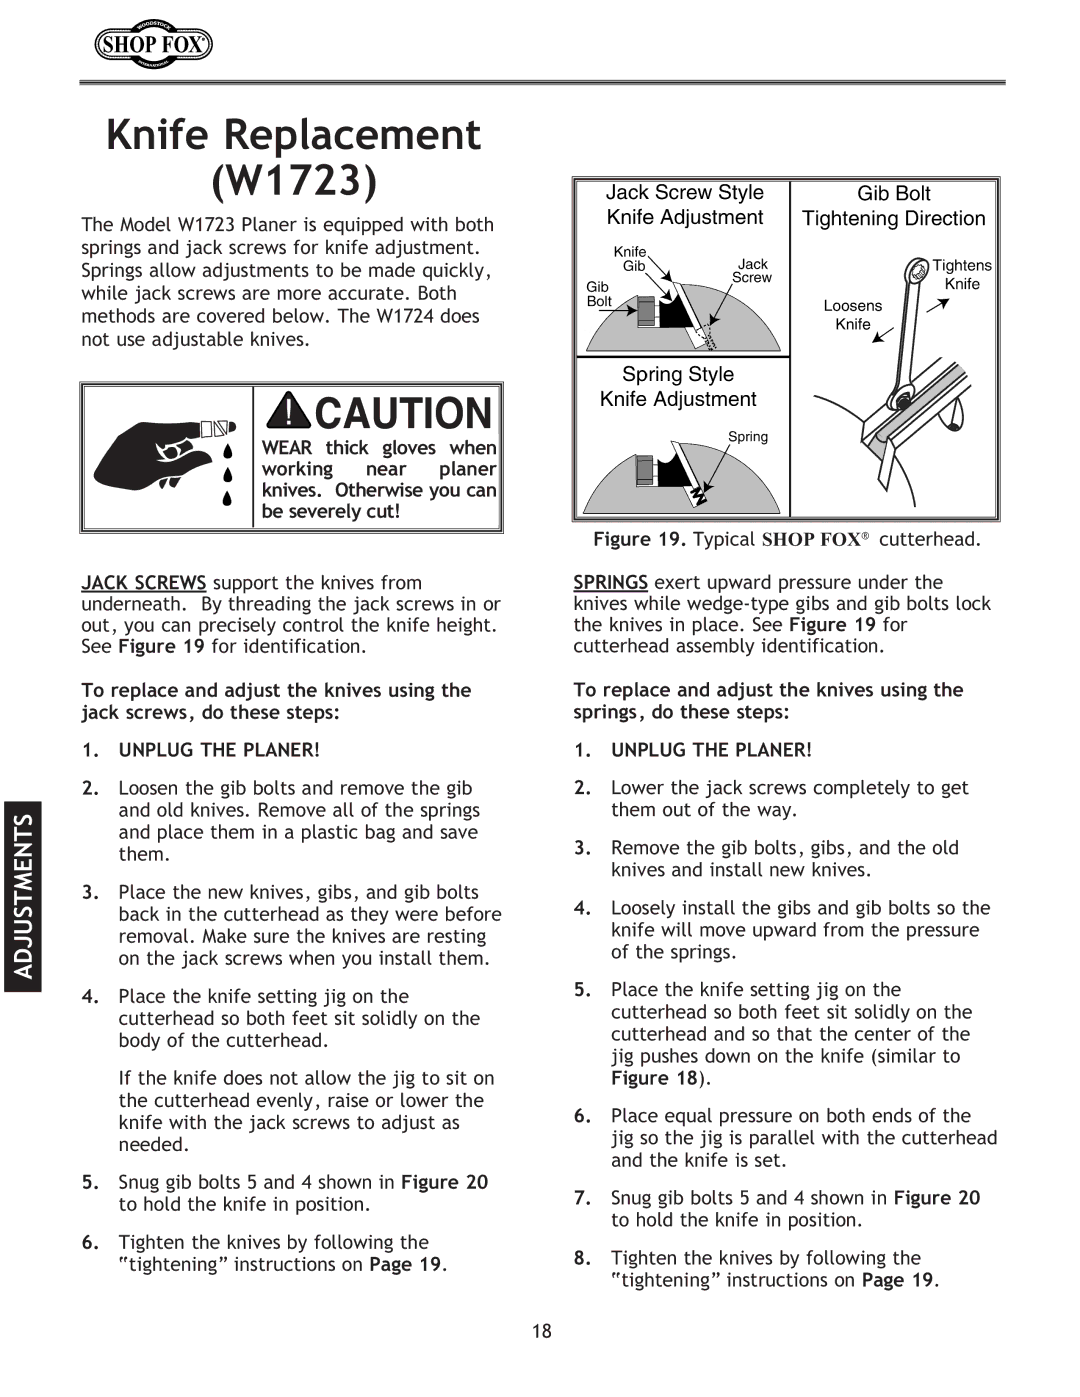
JACK SCREWS support the knives from underneath. By threading the jack screws in or out, you can precisely control the knife height. See Figure 19 for identification.
To replace and adjust the knives using the jack screws, do these steps:
1.UNPLUG THE PLANER!
2.Loosen the gib bolts and remove the gib and old knives. Remove all of the springs and place them in a plastic bag and save them.
3.Place the new knives, gibs, and gib bolts back in the cutterhead as they were before removal. Make sure the knives are resting on the jack screws when you install them.
4.Place the knife setting jig on the cutterhead so both feet sit solidly on the body of the cutterhead.
If the knife does not allow the jig to sit on the cutterhead evenly, raise or lower the knife with the jack screws to adjust as needed.
5.Snug gib bolts 5 and 4 shown in Figure 20 to hold the knife in position.
6.Tighten the knives by following the “tightening” instructions on Page 19.
Figure 19. Typical SHOP FOX® cutterhead.
SPRINGS exert upward pressure under the knives while
To replace and adjust the knives using the springs, do these steps:
1.UNPLUG THE PLANER!
2.Lower the jack screws completely to get them out of the way.
3.Remove the gib bolts, gibs, and the old knives and install new knives.
4.Loosely install the gibs and gib bolts so the knife will move upward from the pressure of the springs.
5.Place the knife setting jig on the cutterhead so both feet sit solidly on the cutterhead and so that the center of the jig pushes down on the knife (similar to
Figure 18).
6.Place equal pressure on both ends of the jig so the jig is parallel with the cutterhead and the knife is set.
7.Snug gib bolts 5 and 4 shown in Figure 20 to hold the knife in position.
8.Tighten the knives by following the “tightening” instructions on Page 19.
18