8.Place the block under the front of the head casting to either side of the depth stop.
9.Lower the cutterhead casting so the block barely touches the casting.
10.Remove the block and place it between the
11.There are two methods to adjust the table on your planer. The first is for adjustments smaller than 0.016" and the second is for adjustments larger than 0.016".
To adjust the cutterhead casting less than 0.016", do these steps:
NOTE: This adjustment may require some trial and error and two people. One person holds the head casting in position with the
1.Loosen the cutterhead casting mounting screws and lift/lower the casting with a long
2.Adjust each column on both sides until the cutterhead casting is properly set. While adjusting the columns, tighten each screw after each step to ensure accurate results.
To adjust the cutterhead casting more than 0.016", do these steps:
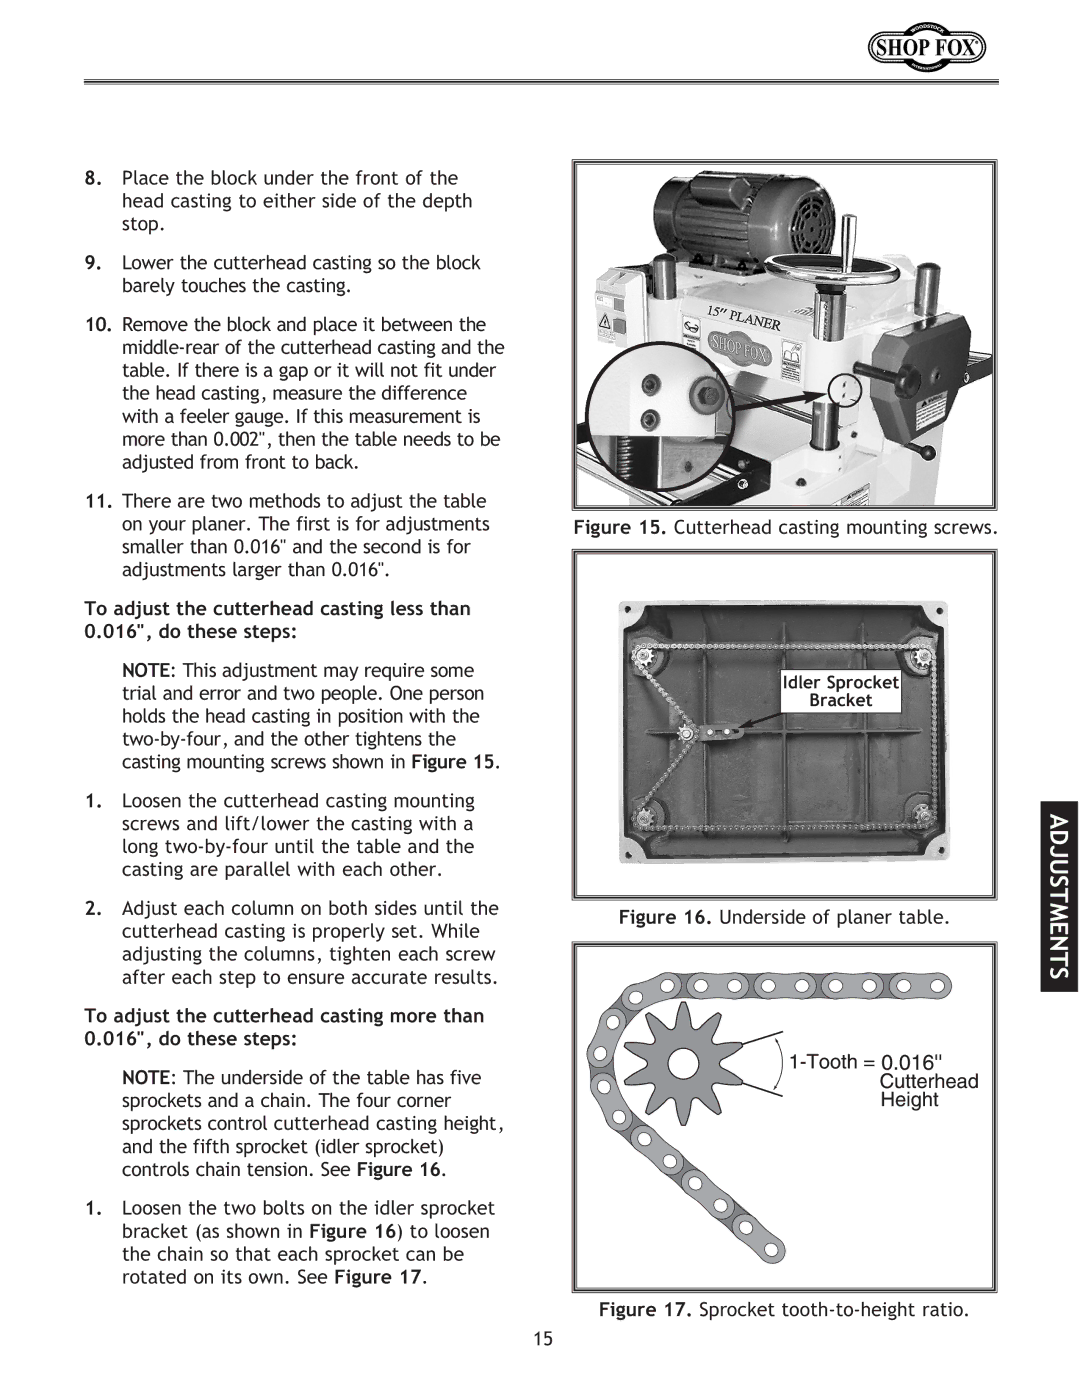
NOTE: The underside of the table has five sprockets and a chain. The four corner sprockets control cutterhead casting height, and the fifth sprocket (idler sprocket) controls chain tension. See Figure 16.
1.Loosen the two bolts on the idler sprocket bracket (as shown in Figure 16) to loosen the chain so that each sprocket can be rotated on its own. See Figure 17.
Figure 15. Cutterhead casting mounting screws.
Idler Sprocket
Bracket
Figure 16. Underside of planer table. | ADJUSTMENTS |
|
Figure 17. Sprocket tooth-to-height ratio.
15