Connecting the Projector
Connecting the Projector for a Video and Audio Display
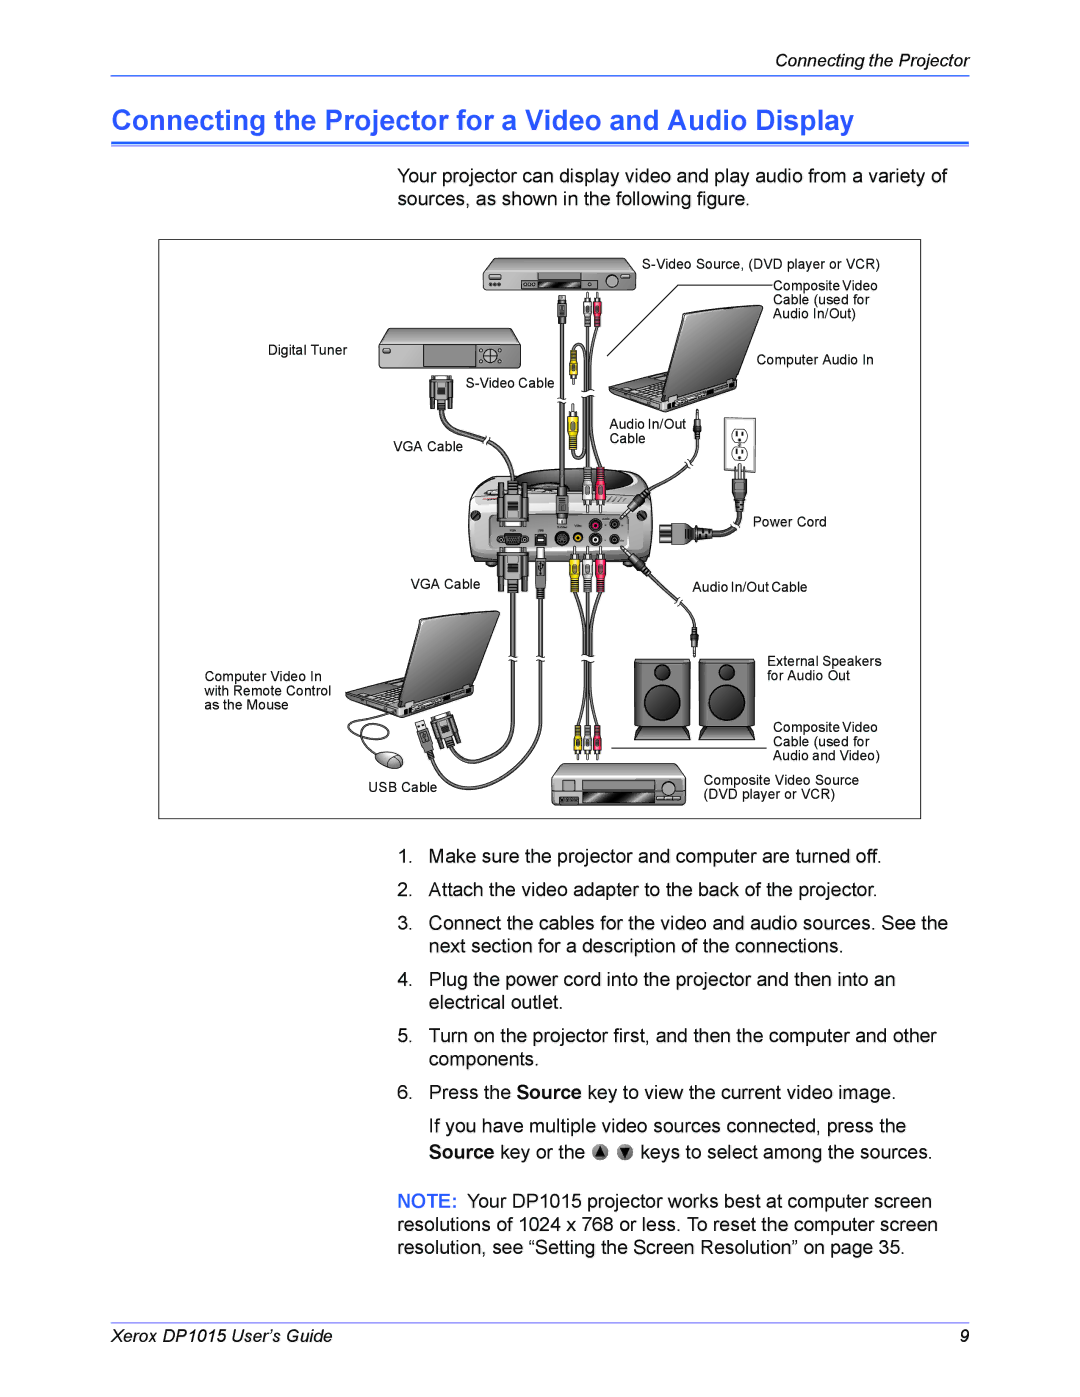
Your projector can display video and play audio from a variety of sources, as shown in the following figure.
![]()
![]()
Composite Video
|
| Cable (used for |
|
| Audio In/Out) |
Digital Tuner |
| Computer Audio In |
|
| |
|
| |
|
| Audio In/Out |
| VGA Cable | Cable |
|
| |
|
| Power Cord |
VGA Cable
Audio In/Out Cable
Computer Video In with Remote Control as the Mouse
USB Cable
External Speakers for Audio Out
Composite Video Cable (used for Audio and Video)
Composite Video Source (DVD player or VCR)
1.Make sure the projector and computer are turned off.
2.Attach the video adapter to the back of the projector.
3.Connect the cables for the video and audio sources. See the next section for a description of the connections.
4.Plug the power cord into the projector and then into an electrical outlet.
5.Turn on the projector first, and then the computer and other components.
6.Press the Source key to view the current video image.
If you have multiple video sources connected, press the
Source key or the ![]()
![]() keys to select among the sources.
keys to select among the sources.
NOTE: Your DP1015 projector works best at computer screen resolutions of 1024 x 768 or less. To reset the computer screen resolution, see “Setting the Screen Resolution” on page 35.
Xerox DP1015 User’s Guide | 9 |
