Generating the Core
R
4.Set the project options:
From the Part tab, select the following options:
•Family: Virtex5
•Device: xc5vlx50t
•Package: ff1136
•Speed Grade: -1
Note: If an unsupported silicon device is selected, the core is dimmed (unavailable) in the list of cores.
From the Generation tab, select the following parameters, and then click OK.
•Design Entry. Select either VHDL or Verilog.
•Vendor. Select Synplicity® or ISE (for XST).
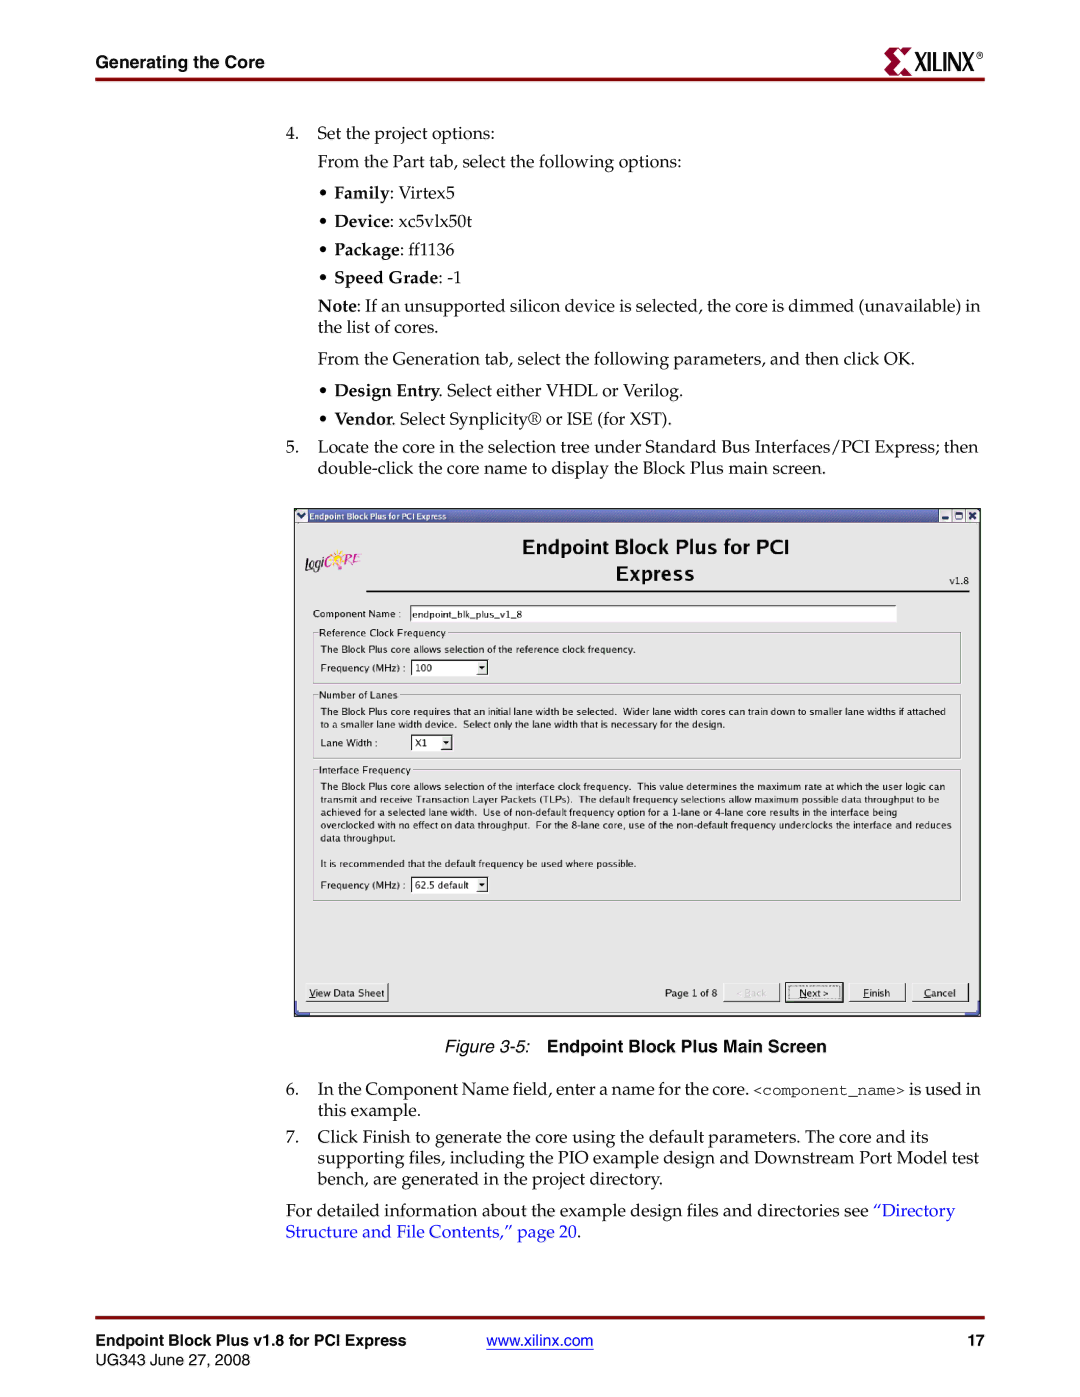
5.Locate the core in the selection tree under Standard Bus Interfaces/PCI Express; then
Figure 3-5: Endpoint Block Plus Main Screen
6.In the Component Name field, enter a name for the core. <component_name> is used in this example.
7.Click Finish to generate the core using the default parameters. The core and its supporting files, including the PIO example design and Downstream Port Model test bench, are generated in the project directory.
For detailed information about the example design files and directories see “Directory Structure and File Contents,” page 20.
Endpoint Block Plus v1.8 for PCI Express | www.xilinx.com | 17 |
UG343 June 27, 2008