
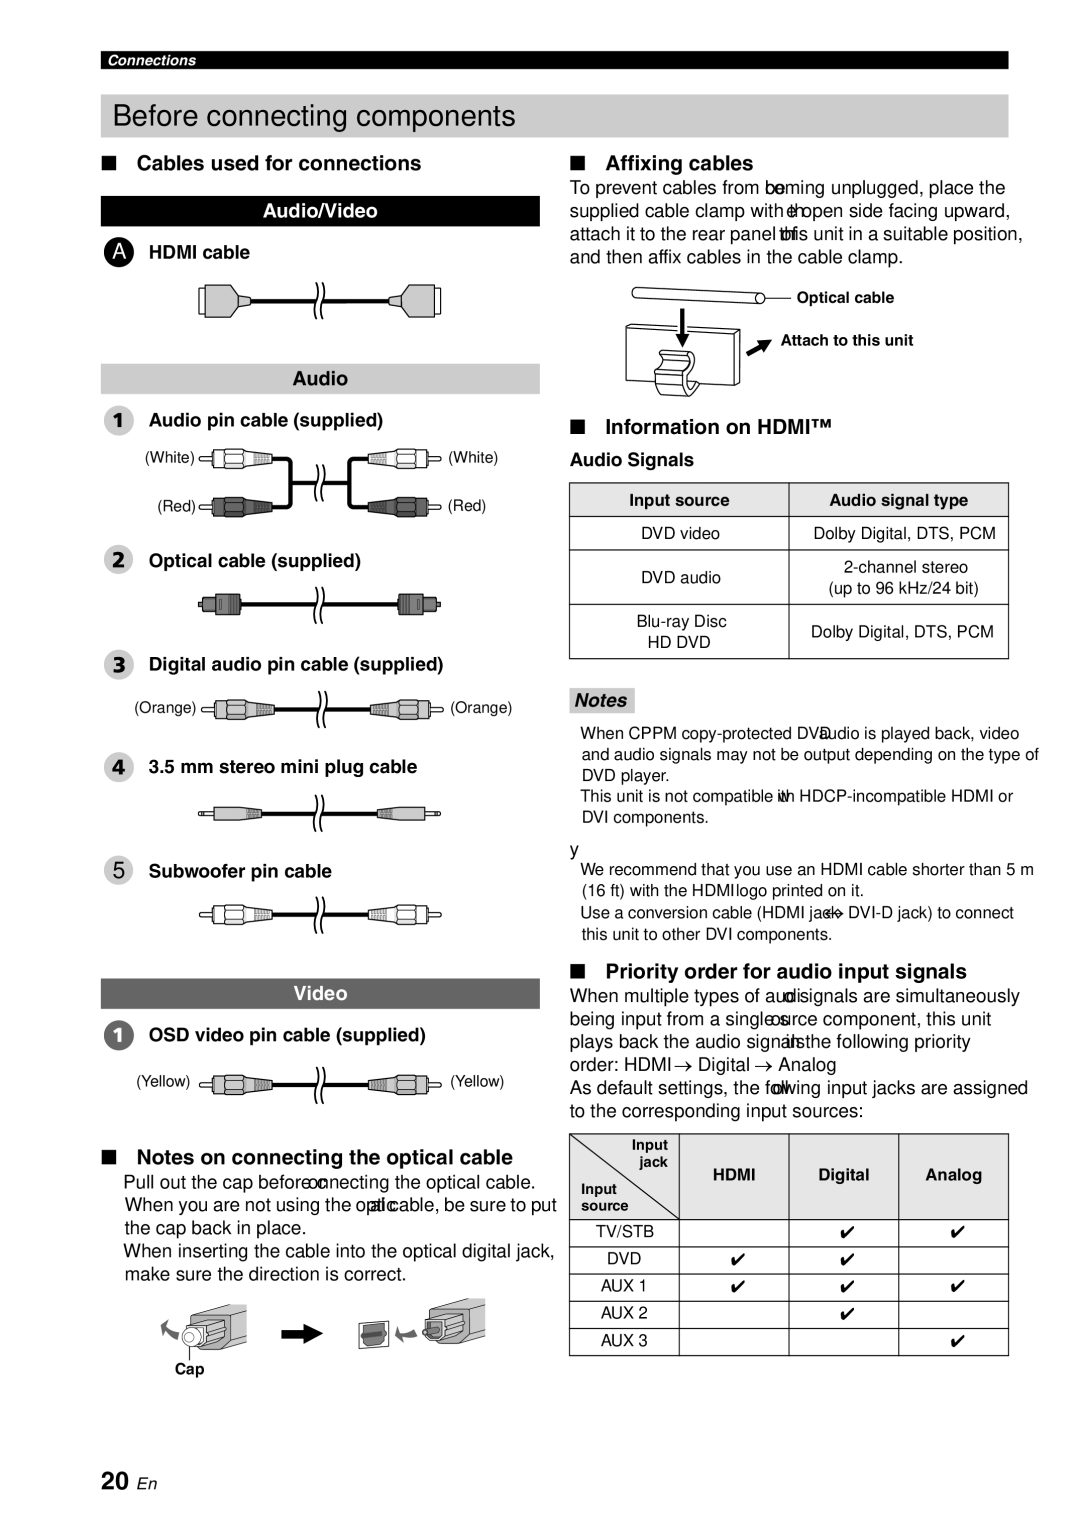
YSP-3000 specifications
The Yamaha YSP-3000 is a revolutionary digital sound projector that has carved a niche for itself in the realm of home theater audio systems. Launched as a versatile sound solution, the YSP-3000 integrates cutting-edge technology to deliver an immersive audio experience that mimics that of traditional multi-speaker surround sound systems.One of the main features of the YSP-3000 is its unique Digital Sound Projector technology. It utilizes a series of miniature speakers arranged in an array to create a broad sound stage. This allows the YSP-3000 to project sound around the room, simulating the effect of surround sound without the need for additional speakers positioned throughout the space. The system employs sophisticated digital signal processing, which fine-tunes the audio output to achieve optimal acoustics tailored to the room’s characteristics.
An impressive characteristic of the YSP-3000 is the inclusion of 7-channel surround sound capabilities. This configuration ensures that users receive an immersive audio experience with clear dialogue and rich sound effects, ideal for movies, music, and gaming. The built-in subwoofer further enhances the low-end frequencies, providing deep bass that adds a layer of excitement to any audio playback.
The YSP-3000 also features Yamaha’s proprietary YSP sound field processing, which allows users to choose from multiple sound field modes to match their audio content. From gaming to music listening, users can select the option that best complements their experience. The system also supports various audio codecs including Dolby Digital and DTS, ensuring compatibility with a wide range of media formats.
Connectivity options are another strong point of the YSP-3000. It includes multiple HDMI inputs, enabling seamless integration with various devices such as Blu-ray players and gaming consoles. Additionally, it features optical and analog audio inputs, making it versatile enough for older audio devices. The included remote control offers intuitive navigation through settings and modes, making operation easy for users of all levels.
Overall, the Yamaha YSP-3000 stands out as a user-friendly and feature-rich solution for anyone looking to elevate their home theater audio experience without the hassle of multiple speakers and complex wiring. With innovation at its core, the YSP-3000 delivers a sound experience that is both convenient and captivating.