Nikon Camera manual Filming Movies, Starting and Ending Recording

Page 62

Filming Movies

Starting and Ending Recording

Press the movie-record button to start Recording

recording. If Record movies is selected indicator for Custom Setting g4 (Assign shutter button), you can start and end movie recording by pressing the shutter-re-

lease button all the way down. If the camera is mounted on a tripod, you

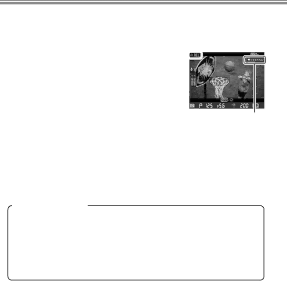
can reduce camera shake by using the Time remaining release on an optional MC-36 or MC-30

remote cord to start and end recording (movie live view can also be started by pressing the shutter-release button on the remote cord halfway).

Taking Photographs

If Live frame grab is selected for Custom Setting g4 (As- sign shutter button), you can press the shutter-release button all the way down to take photographs without in- terrupting movie recording. The resulting photos are about 2.1 megapixels in size and have an aspect ratio of 16 : 9.

58

Image 62
Contents Setting Guide Table of Contents Movies Autofocus TipsFirst-Time Users Taking Photographs Dynamic-Area AF Improving Camera ResponseContinuous-Servo AF AF-C ACustom Settings My Menu, highlight Add items and press Custom Settings BanksSelect Add items Add itemsLens Vibration Reduction VR DPlayback MenuSettings by Subject SituationTion See alsoLock-on ReleaseTaking Photographs Tion and camera AF-area modeTion Lock-onSituation Settings by Subject Reducing Camera Blur Vibration Reduction Matching Settings to Your GoalFrame rates may drop at settings other than OFF SituationPreserving Natural Contrast Active D-Lighting Extended Menu Banks Quick Setting Selection Shooting Menu BanksShooting Menu Banks Shooting Menu Bank SelectionReducing Noise at High ISO Sensitivities Standby TimerFinding Controls in the Dark Button Backlights DescriptionTips Live view Release modeReducing Shutter Noise Quiet and Silent Release Choosing a Setting Optimizing White BalanceChoosing a Color Temperature Ubutton Sub-command dial Rear control panelPreset Manual White Balance Check the results Choosing a White Balance PresetMeasure white balance Varying White Balance White Balance Bracketing Choose the number of copiesSelect a bracketing increment Programs with increments of 1 are shown belowFrame a photograph, focus, and shoot Cancelling Bracketing White Balance BracketingChoose Select image Copying White Balance from a PhotographSelect a destination Highlight Select image and pressUsing the Copied Value Copy white balanceCreating a Multiple Exposure Record from 2 to 10 exposures in a single photoMultiple exposure icon n Adjust gainSelect Auto gain and choose from the following options Interrupting Multiple Exposures Copying Pictures Between Memory Cards Tilt Keeping the Camera Level Virtual HorizonMonitor Pitch ViewfinderRoll Resizing Photographs for Upload Resize Resized CopiesChoosing the Number of Focus Points Focusing with the AF-ON ButtonAutofocus Tips Taking Photographs Subject not in focus Point dynamic-area AF 3D-tracking Auto-area AF AF-Area ModeAF-area modes are described below Description Sor at the center of the display, 4 line Focus Point Selection and ApertureOn either side Focus Point Selection and Camera Orientation Digits of the lens serial number Adjusting Autofocus to the Lens AF Fine-TuneOff Turn AF tuning off Checking Focus Focus Tracking with Lock-On Movies Sound HeadphonesBefore Filming External MicrophonesMovie Settings Frame Size, Frame Rate, and Movie QualityImage Area Destination ISO Sensitivity RangeStart live view Starting Movie Live View Select movie live viewRotate the live view selector to Press the abuttonExposure Mode White BalanceChoosing a Focus Mode Using AutofocusTo focus using autofocus Choosing an AF-Area Mode Tripod Mode Lens Vibration Reduction VRAdjusting Settings During Live View Information Display Checking Focus Subject TrackingFilming Movies Starting and Ending RecordingEditing Movies Choose the interval Time-Lapse MoviesTime-Lapse Movies Choose the shooting time Start shootingInterrupting Time-Lapse Photography Selecting Start Off for Time-lapse photographyTime Lapse Photography Advanced Output ResolutionHdmi Output Output display size 100% Live view on-screen display OffHdmi Recording Page First-Time Users Reversing Indicators Customizing the Command DialsCustom Setting f10 Customize Command Dials Custom Setting f13 Reverse IndicatorsSensor Adjusting Monitor BrightnessChoosing the Primary Slot Reduced brightnessMetering Page CS SB####