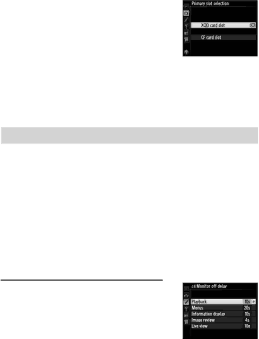
Nikon Camera Choosing the Primary Slot, Adjusting Monitor Brightness, Sensor, Reduced brightness

Page 73

First-Time Users

Choosing the Primary Slot

When using two memory cards, you can choose one as the primary card using the Primary slot selection item in the shooting menu.

Adjusting Monitor Brightness

The Monitor brightness option in the setup menu can be used to adjust monitor brightness for playback, menus, and the information display.

Option

Description


When the monitor is on, monitor brightness is automati-

Auto

cally adjusted according to ambient lighting conditions.


Care should be taken not to cover the ambient brightness


sensor.


Press 1 or 3 to choose monitor brightness. Choose

Manual

higher values for increased brightness, lower values for


reduced brightness.


Choosing the Monitor off Delay Custom Setting c4: Monitor off Delay Choose how long the monitor remains on when no operations are performed.

69

Image 73
Contents Setting Guide Table of Contents Autofocus Tips MoviesFirst-Time Users Taking Photographs Continuous-Servo AF AF-C Improving Camera ResponseDynamic-Area AF ACustom Settings Select Add items Custom Settings BanksMy Menu, highlight Add items and press Add itemsDPlayback Menu Lens Vibration Reduction VRSituation Settings by SubjectLock-on See alsoTion ReleaseTaking Photographs Tion AF-area modeTion and camera Lock-onSituation Settings by Subject Frame rates may drop at settings other than OFF Matching Settings to Your GoalReducing Camera Blur Vibration Reduction SituationPreserving Natural Contrast Active D-Lighting Shooting Menu Banks Quick Setting Selection Shooting Menu BanksExtended Menu Banks Shooting Menu Bank SelectionFinding Controls in the Dark Button Backlights Standby TimerReducing Noise at High ISO Sensitivities DescriptionTips Reducing Shutter Noise Quiet and Silent Release Release modeLive view Optimizing White Balance Choosing a SettingUbutton Sub-command dial Rear control panel Choosing a Color TemperaturePreset Manual White Balance Measure white balance Choosing a White Balance PresetCheck the results Choose the number of copies Varying White Balance White Balance BracketingPrograms with increments of 1 are shown below Select a bracketing incrementFrame a photograph, focus, and shoot White Balance Bracketing Cancelling BracketingSelect a destination Copying White Balance from a PhotographChoose Select image Highlight Select image and pressCopy white balance Using the Copied ValueRecord from 2 to 10 exposures in a single photo Creating a Multiple ExposureSelect Auto gain and choose from the following options Adjust gainMultiple exposure icon n Interrupting Multiple Exposures Copying Pictures Between Memory Cards Monitor Keeping the Camera Level Virtual HorizonTilt Roll ViewfinderPitch Resized Copies Resizing Photographs for Upload ResizeAutofocus Tips Focusing with the AF-ON ButtonChoosing the Number of Focus Points Taking Photographs Subject not in focus AF-area modes are described below AF-Area ModePoint dynamic-area AF 3D-tracking Auto-area AF Description On either side Focus Point Selection and ApertureSor at the center of the display, 4 line Focus Point Selection and Camera Orientation Off Turn AF tuning off Adjusting Autofocus to the Lens AF Fine-TuneDigits of the lens serial number Checking Focus Focus Tracking with Lock-On Movies Before Filming HeadphonesSound External MicrophonesFrame Size, Frame Rate, and Movie Quality Movie SettingsImage Area ISO Sensitivity Range DestinationRotate the live view selector to Starting Movie Live View Select movie live viewStart live view Press the abuttonWhite Balance Exposure ModeTo focus using autofocus Using AutofocusChoosing a Focus Mode Choosing an AF-Area Mode Lens Vibration Reduction VR Tripod ModeAdjusting Settings During Live View Information Display Subject Tracking Checking FocusStarting and Ending Recording Filming MoviesEditing Movies Time-Lapse Movies Time-Lapse MoviesChoose the interval Start shooting Choose the shooting timeSelecting Start Off for Time-lapse photography Interrupting Time-Lapse PhotographyTime Lapse Photography Hdmi Output Output ResolutionAdvanced Output display size 100% Live view on-screen display OffHdmi Recording Page First-Time Users Custom Setting f10 Customize Command Dials Customizing the Command DialsReversing Indicators Custom Setting f13 Reverse IndicatorsChoosing the Primary Slot Adjusting Monitor BrightnessSensor Reduced brightnessMetering Page CS SB####