Nikon Camera manual Time-Lapse Movies, Choose the interval

Page 64

Time-Lapse Movies

Time-Lapse Movies

Follow the steps below to create silent
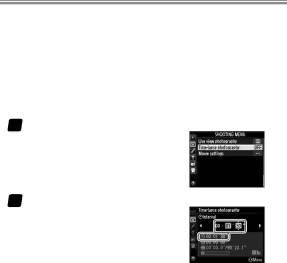
 time-lapse movies from photos taken automatically at selected intervals. The resulting movie is recorded at the settings currently select- ed for Movie settings in the shooting menu. We recom- mend that you connect the camera to an AC power supply using an optional EH-6b AC adapter and EP-6 power con- nector to ensure that shooting is not interrupted.

1Select Time-lapse photography. Select Time-lapse photography in the shooting menu.

2Choose the interval.

The dialog at right will be displayed. Choose an interval of from 1 s to 10 minutes (the selected setting is shown in the bottom section of the dialog) and press 2 to proceed to the next step.

60

Image 64
Contents Setting Guide Table of Contents Movies Autofocus TipsFirst-Time Users Taking Photographs Continuous-Servo AF AF-C Improving Camera ResponseDynamic-Area AF ACustom Settings Custom Settings Banks Select Add itemsMy Menu, highlight Add items and press Add itemsLens Vibration Reduction VR DPlayback MenuSettings by Subject SituationSee also Lock-onTion ReleaseTaking Photographs AF-area mode TionTion and camera Lock-onSituation Settings by Subject Matching Settings to Your Goal Frame rates may drop at settings other than OFFReducing Camera Blur Vibration Reduction SituationPreserving Natural Contrast Active D-Lighting Quick Setting Selection Shooting Menu Banks Shooting Menu BanksExtended Menu Banks Shooting Menu Bank SelectionStandby Timer Finding Controls in the Dark Button BacklightsReducing Noise at High ISO Sensitivities DescriptionTips Reducing Shutter Noise Quiet and Silent Release Release modeLive view Choosing a Setting Optimizing White BalanceChoosing a Color Temperature Ubutton Sub-command dial Rear control panelPreset Manual White Balance Measure white balance Choosing a White Balance PresetCheck the results Varying White Balance White Balance Bracketing Choose the number of copiesSelect a bracketing increment Programs with increments of 1 are shown belowFrame a photograph, focus, and shoot Cancelling Bracketing White Balance BracketingCopying White Balance from a Photograph Select a destinationChoose Select image Highlight Select image and pressUsing the Copied Value Copy white balanceCreating a Multiple Exposure Record from 2 to 10 exposures in a single photoSelect Auto gain and choose from the following options Adjust gainMultiple exposure icon n Interrupting Multiple Exposures Copying Pictures Between Memory Cards Monitor Keeping the Camera Level Virtual HorizonTilt Roll ViewfinderPitch Resizing Photographs for Upload Resize Resized CopiesAutofocus Tips Focusing with the AF-ON ButtonChoosing the Number of Focus Points Taking Photographs Subject not in focus AF-area modes are described below AF-Area ModePoint dynamic-area AF 3D-tracking Auto-area AF Description On either side Focus Point Selection and ApertureSor at the center of the display, 4 line Focus Point Selection and Camera Orientation Off Turn AF tuning off Adjusting Autofocus to the Lens AF Fine-TuneDigits of the lens serial number Checking Focus Focus Tracking with Lock-On Movies Headphones Before FilmingSound External MicrophonesMovie Settings Frame Size, Frame Rate, and Movie QualityImage Area Destination ISO Sensitivity RangeStarting Movie Live View Select movie live view Rotate the live view selector toStart live view Press the abuttonExposure Mode White BalanceTo focus using autofocus Using AutofocusChoosing a Focus Mode Choosing an AF-Area Mode Tripod Mode Lens Vibration Reduction VRAdjusting Settings During Live View Information Display Checking Focus Subject TrackingFilming Movies Starting and Ending RecordingEditing Movies Time-Lapse Movies Time-Lapse MoviesChoose the interval Choose the shooting time Start shootingInterrupting Time-Lapse Photography Selecting Start Off for Time-lapse photographyTime Lapse Photography Output Resolution Hdmi OutputAdvanced Output display size 100% Live view on-screen display OffHdmi Recording Page First-Time Users Customizing the Command Dials Custom Setting f10 Customize Command DialsReversing Indicators Custom Setting f13 Reverse IndicatorsAdjusting Monitor Brightness Choosing the Primary SlotSensor Reduced brightnessMetering Page CS SB####