Tracking a Subject Automatically (continued)
4 Press the START/STOP button to activate the AT function.
Try moving the subject to see if the frame tracks it automatically.
If you have selected the ENTRY 3, the frame flashes for about 5 seconds after the START/STOP button is pressed. Within that period, repeat changing the angle of the subject so that the camera recognizes the various brightness of the subject.
Notes
•If you use the ENTRY 2 or 4 mode for a subject that can be recognized even in the ENTRY 1 mode, the subject might be hardly recognized. This is because the color and brightness the camera can recognize are limited in the ENTRY 2 and 4 modes.
•Even if you try changing the ENTRY mode, a subject still might not be recognized depending on its characteristics. In such a case, try changing the subject to the one whose color is more bright or the one whose color is different from that of its backdrop, or changing the lighting.
•There might be a case in which the AT function will not activated in any way depending on the size, color, brightness and so on of a subject.
Detecting the
Change Taking Place
in the Picture
— MD (Motion Detector) function
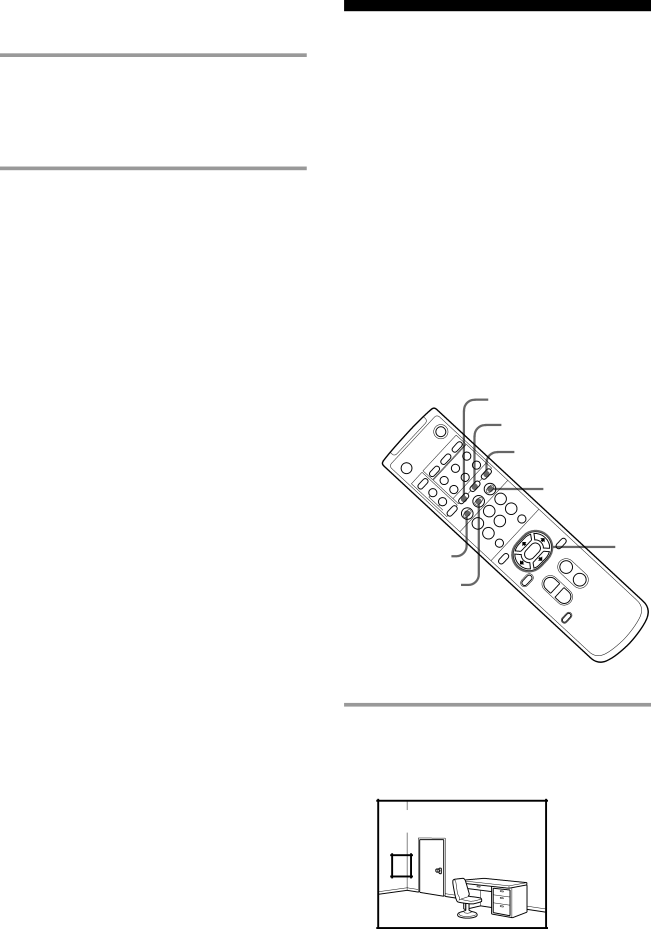
If the position of the camera is fixed, you can set the camera to detect a change taking place in a picture. When the camera detects a change taking place in the picture, the frame appears, showing the portion in which the change takes place, and the lamp at the side of the lens lights up red. (At that time, the detection signal is output from the VISCA IN.)
You can specify up to two portions in which the change is detected, by using the two frames (FRAME 1 and FRAME 2) that you can change in position and size as desired.
|
|
|
|
|
|
|
|
|
|
|
|
| 1 MD ON/OFF | ||||||
|
| POWER |
|
|
|
|
|
|
|
|
|
| 2,3,4 |
|
| ||||
|
|
|
| SELECT | 3 | ENTRY |
|
|
|
|
|
|
| 5 |
|
|
|
| |
BACK | LIGHT |
| CAMRA |
| 2 |
| AUTO | ZOOM |
|
|
|
|
|
|
|
|
| ||
|
| 1 |
| OFFSET |
| DETECT |
|
|
|
|
|
|
|
| |||||
|
|
|
|
|
| AE |
|
| DISPLAY |
|
|
|
|
|
| ||||
| FOCUS |
| ON/OFF |
|
|
|
|
|
|
|
|
|
|
|
|
| |||
|
|
| AT |
|
| ERAME |
|
|
|
|
|
|
|
|
|
| |||
| AUTO |
|
| CHASE |
|
|
| FRAME |
|
|
|
| FRAME DISPLAY | ||||||
|
| FAR | NEAR |
|
|
| START/STOP |
|
|
|
|
| |||||||
|
|
|
|
|
| MD |
|
| 3 |
|
| ||||||||
|
|
|
|
|
| ON/OFF |
|
|
|
|
|
|
|
|
|
|
|
| |
|
|
|
| MANUAL |
| SCREEN |
|
| REV | 2 | 6 | RESET |
|
|
|
| |||
|
|
|
|
| DETA |
|
|
|
|
|
|
|
| ||||||
|
|
|
|
|
|
|
|
| 5 |
|
|
|
|
| |||||
|
|
|
|
|
|
|
| STD | 1 |
|
|
|
|
|
| ||||
|
|
|
|
|
|
|
|
|
|
|
|
|
|
| |||||
|
|
|
|
|
|
|
|
|
|
|
|
| PAN |
|
|
| |||
|
|
|
|
|
|
|
|
|
|
|
|
|
|
|
|
| |||
|
|
|
|
|
|
|
|
|
|
| 4 | PRESET | POSITION |
| 3,4 | ||||
|
|
|
|
|
|
|
|
|
|
|
|
| PAN | HOME | RESET |
| |||
DATA SCREEN |
|
|
|
|
|
|
| MENU |
|
|
| ||||||||
|
|
|
|
|
|
|
| ZOOM· | FAST |
| |||||||||
6 START/STOP |
|
|
|
|
|
|
|
| CURSOR |
| T | ||||||||
|
|
|
|
|
|
|
| SLOW· |
|
| W | ||||||||
|
|
|
|
|
|
|
|
| T |
|
| ||||||||
|
|
|
|
|
|
|
|
| W |
| |||||||||
|
|
|
|
|
|
|
|
|
|
|
|
|
|
|
|
| SET | ||
|
|
|
|
|
|
|
|
|
|
|
|
|
|
|
|
| DIRECTION | ||
|
|
|
|
|
|
|
|
|
|
|
|
|
|
|
|
| L/R |
|
|
1 Press the MD ON/OFF button to enter into the MD setting mode.
The frame and setting value appear.
MD MODE | DRIVE | |
SELECT FRAME |
|
|
FRAME 1 |
|
|