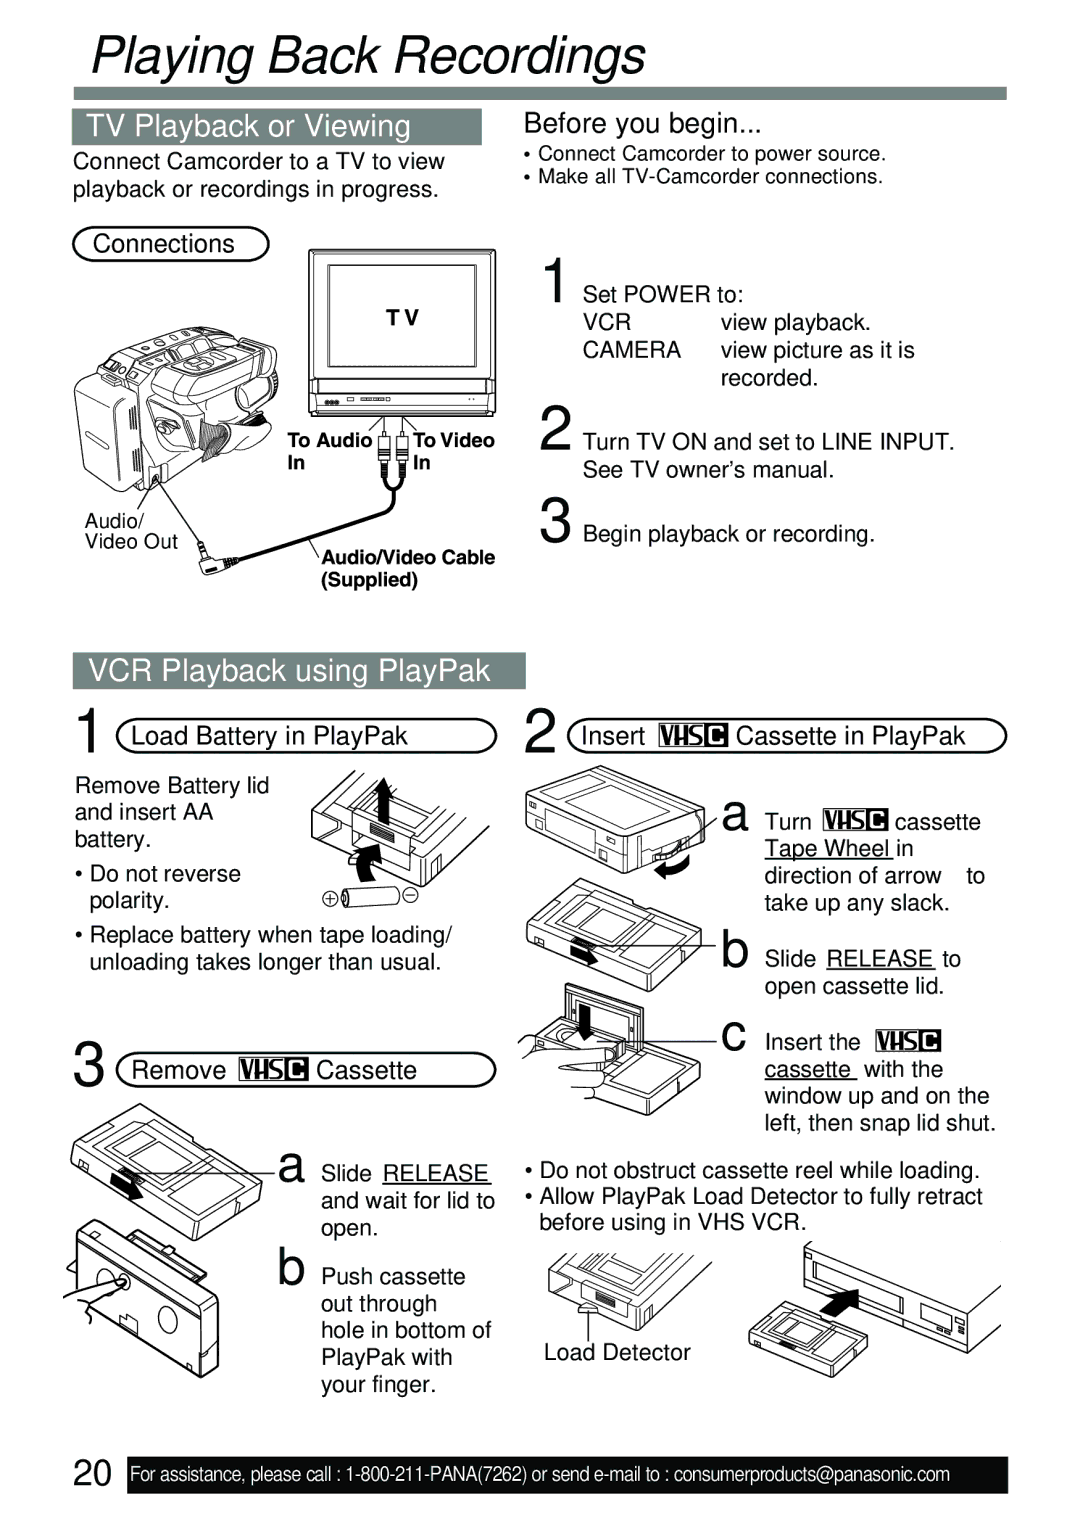
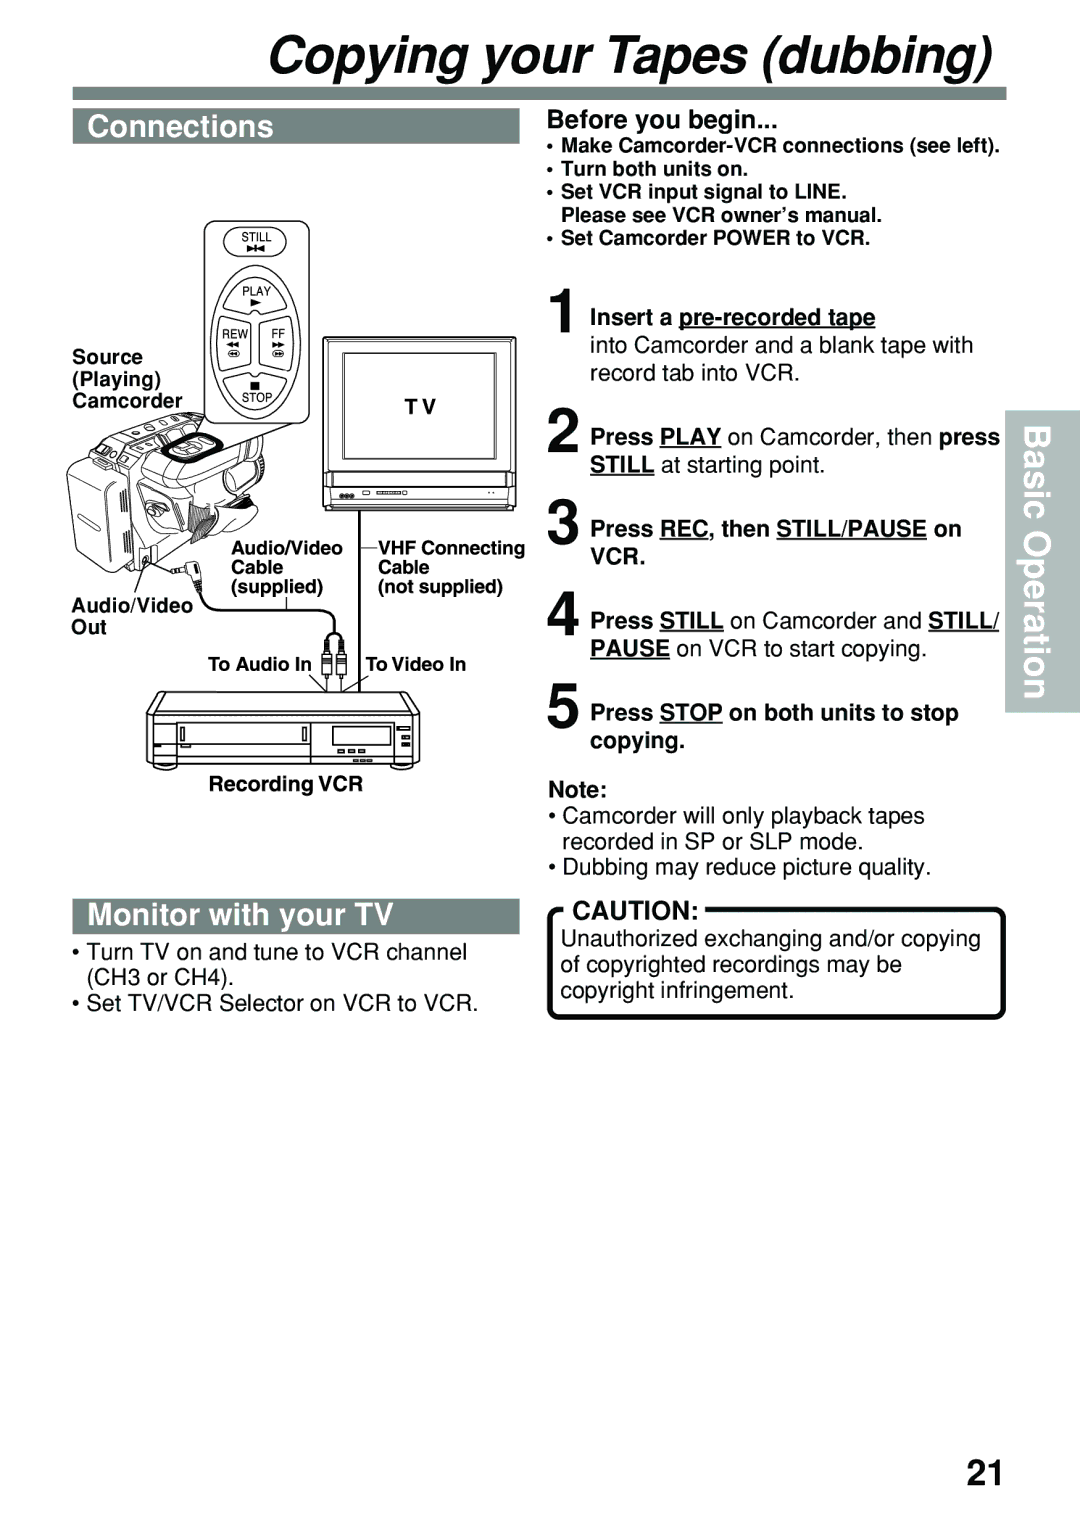
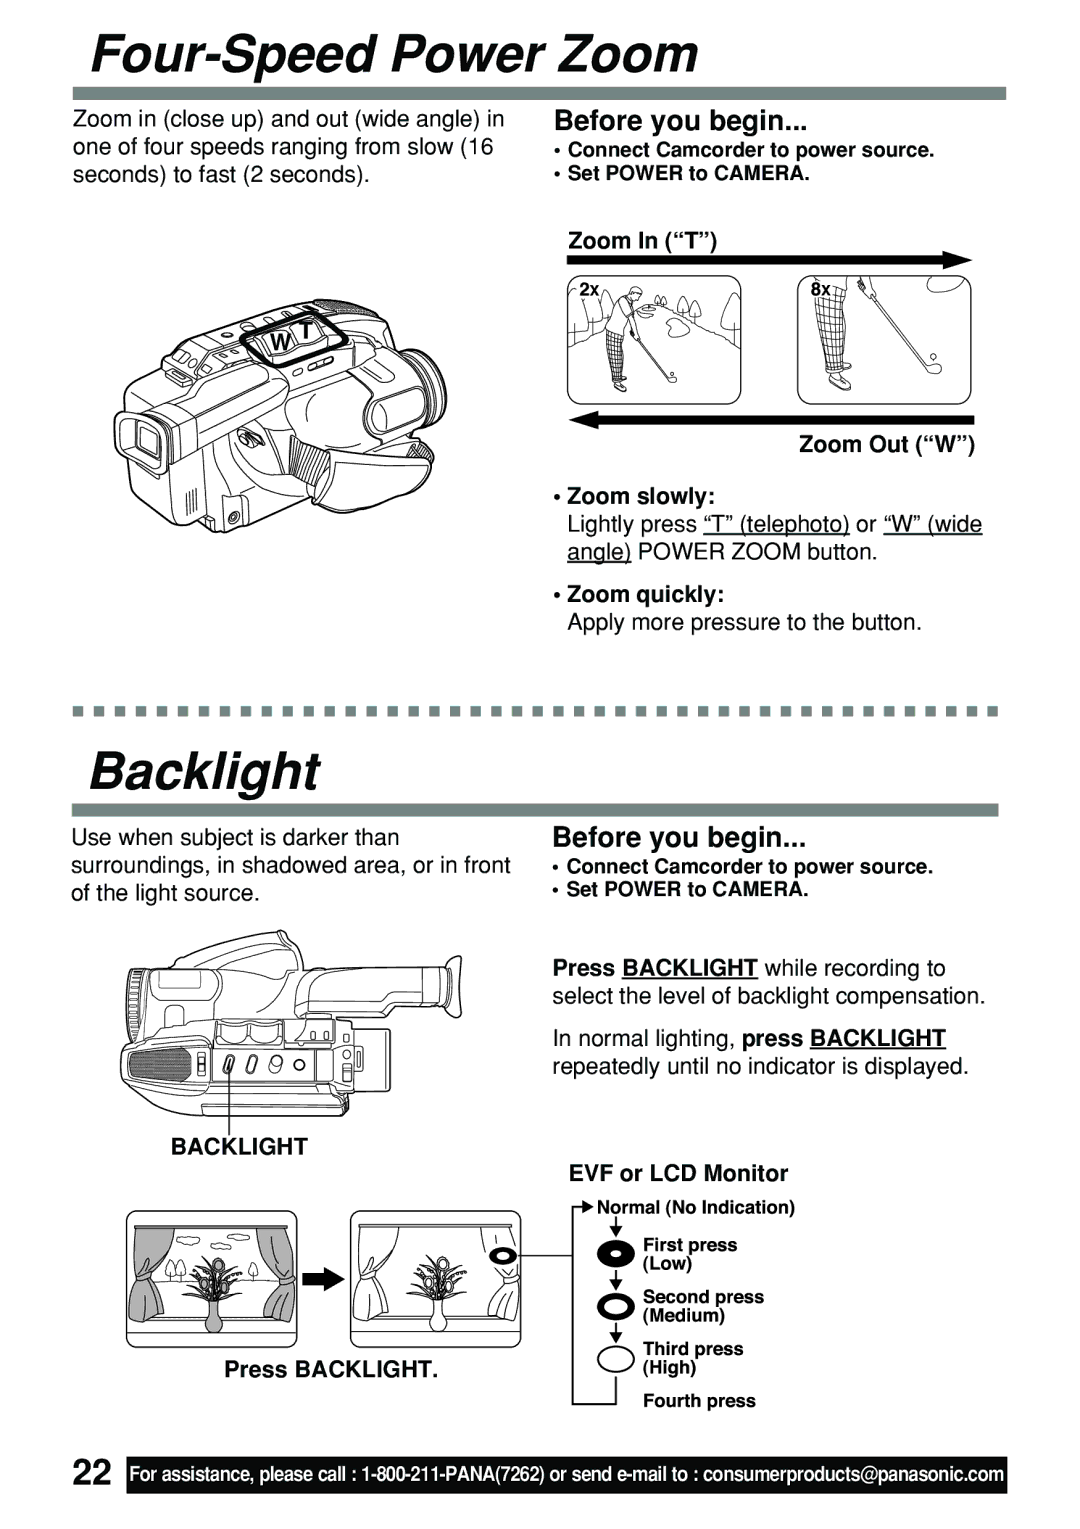
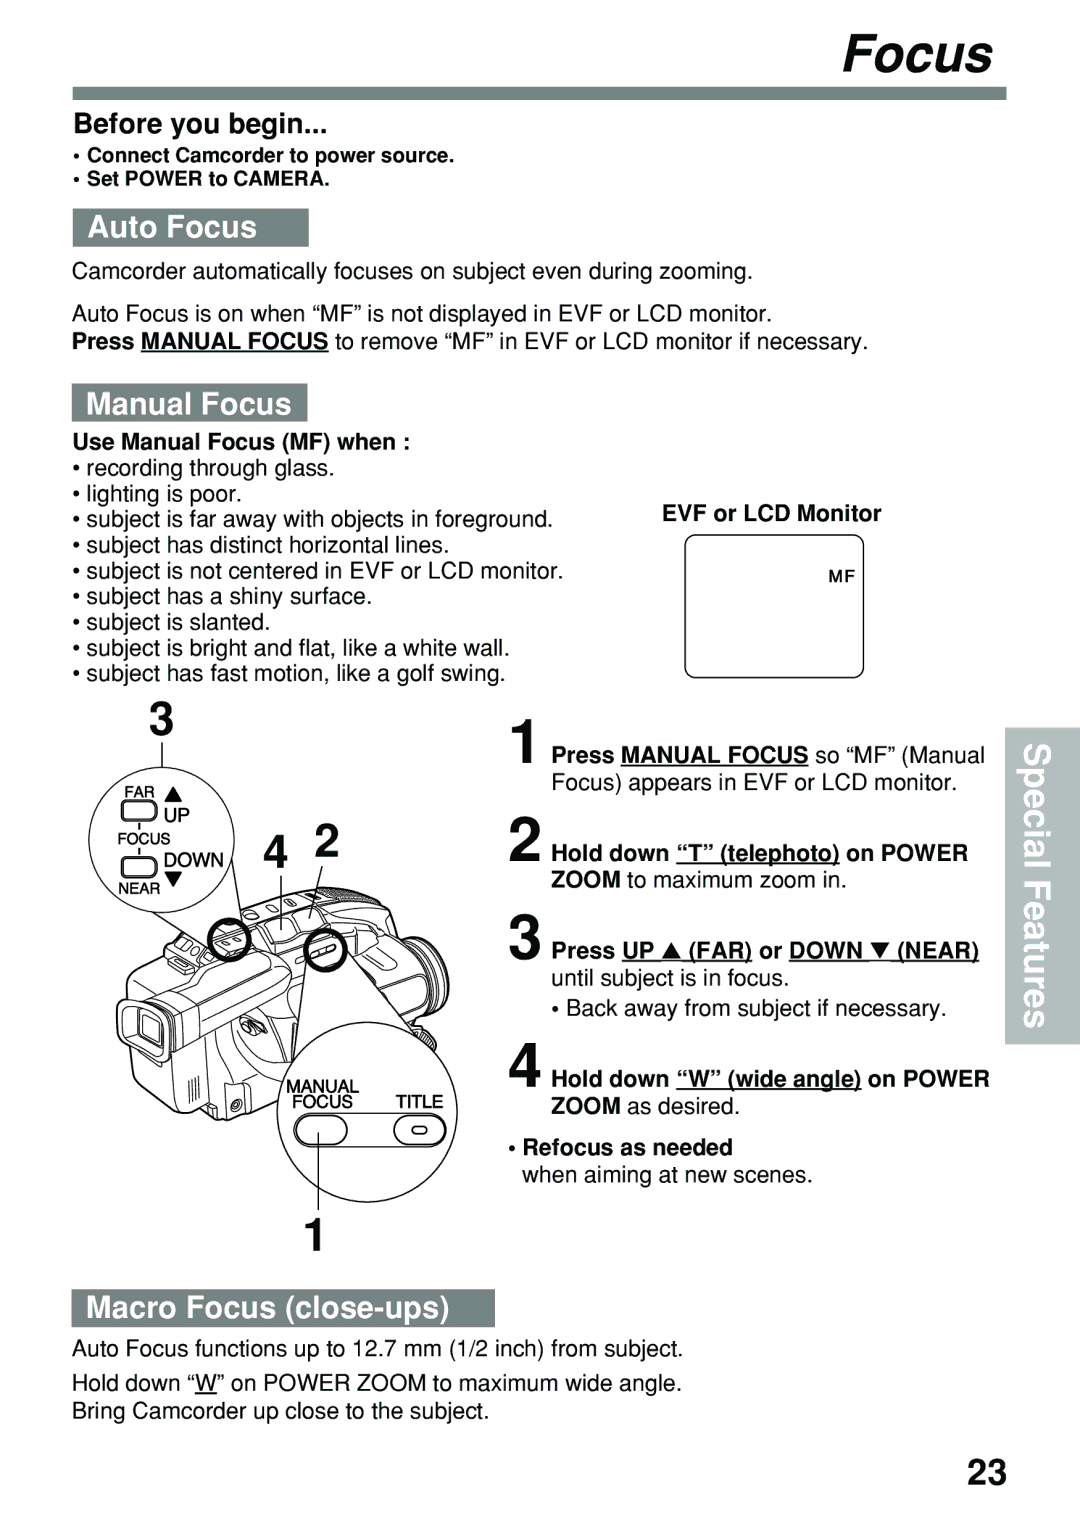
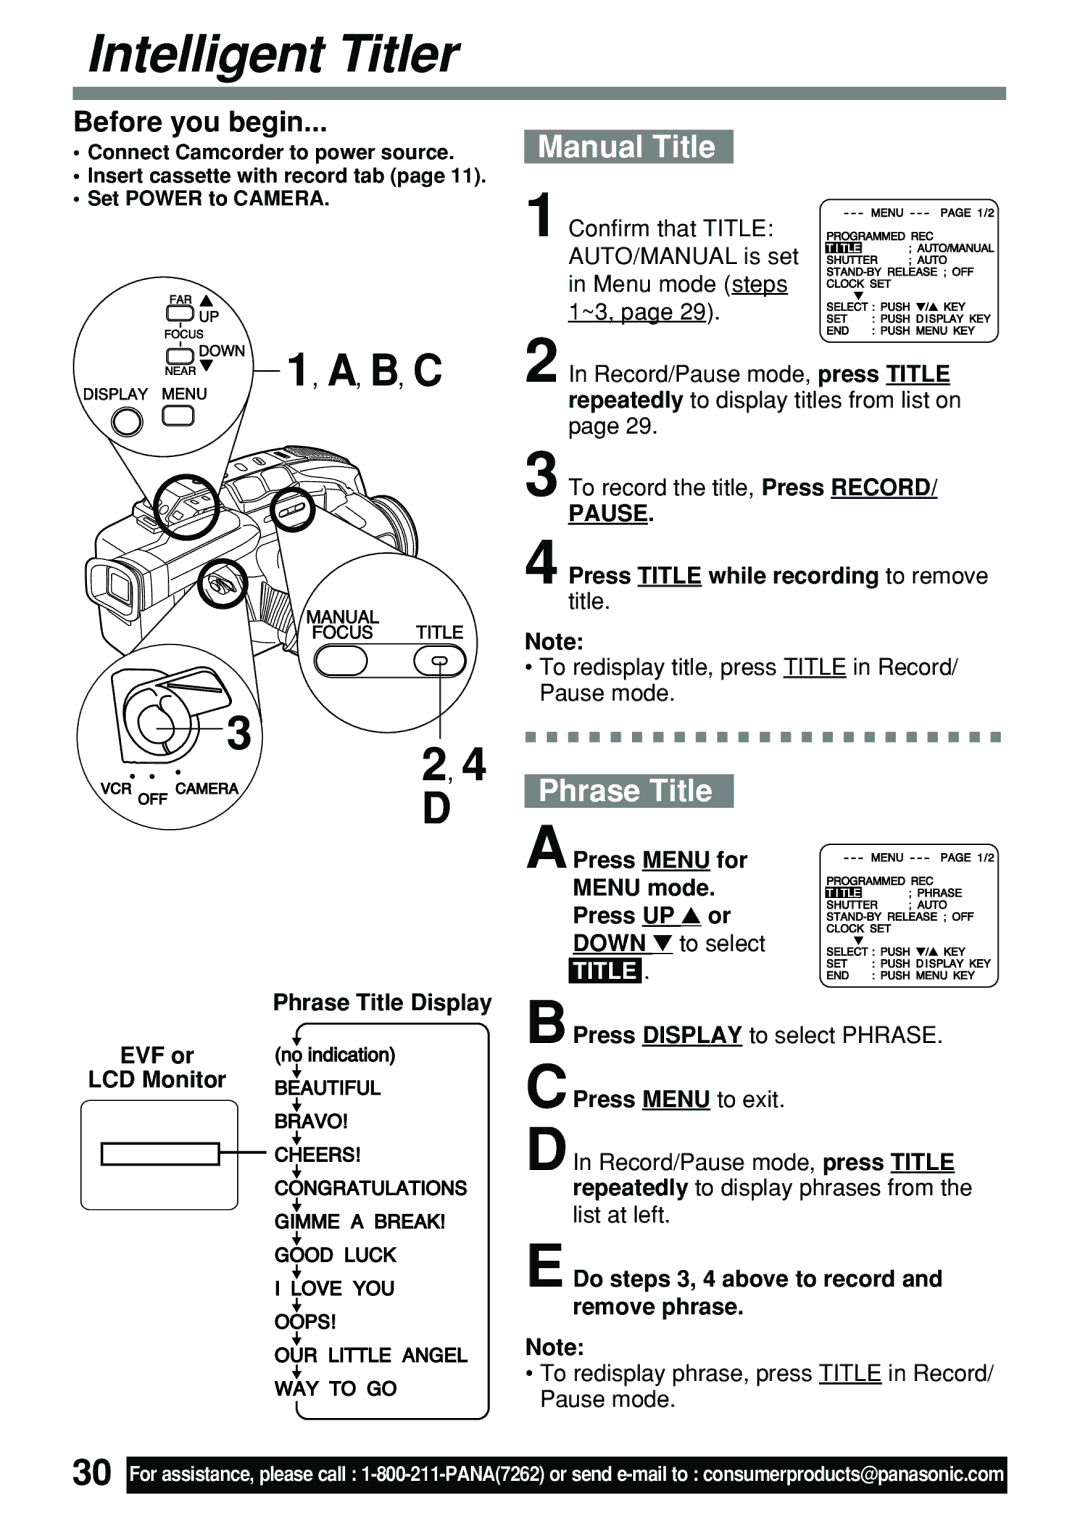
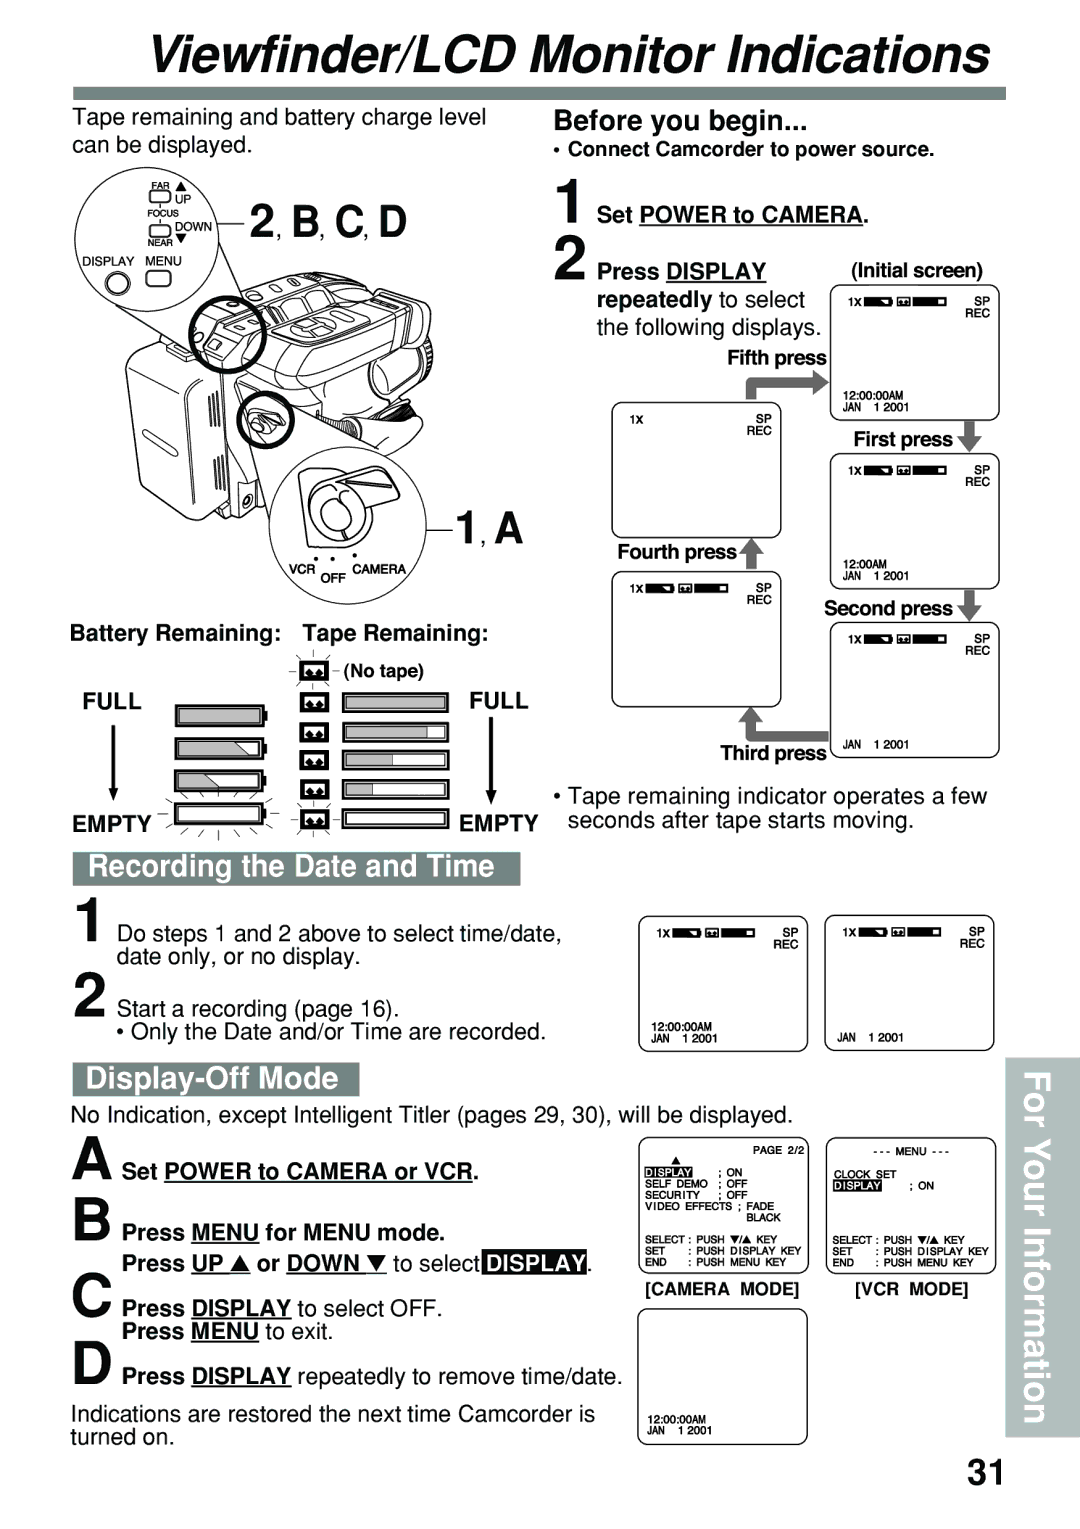
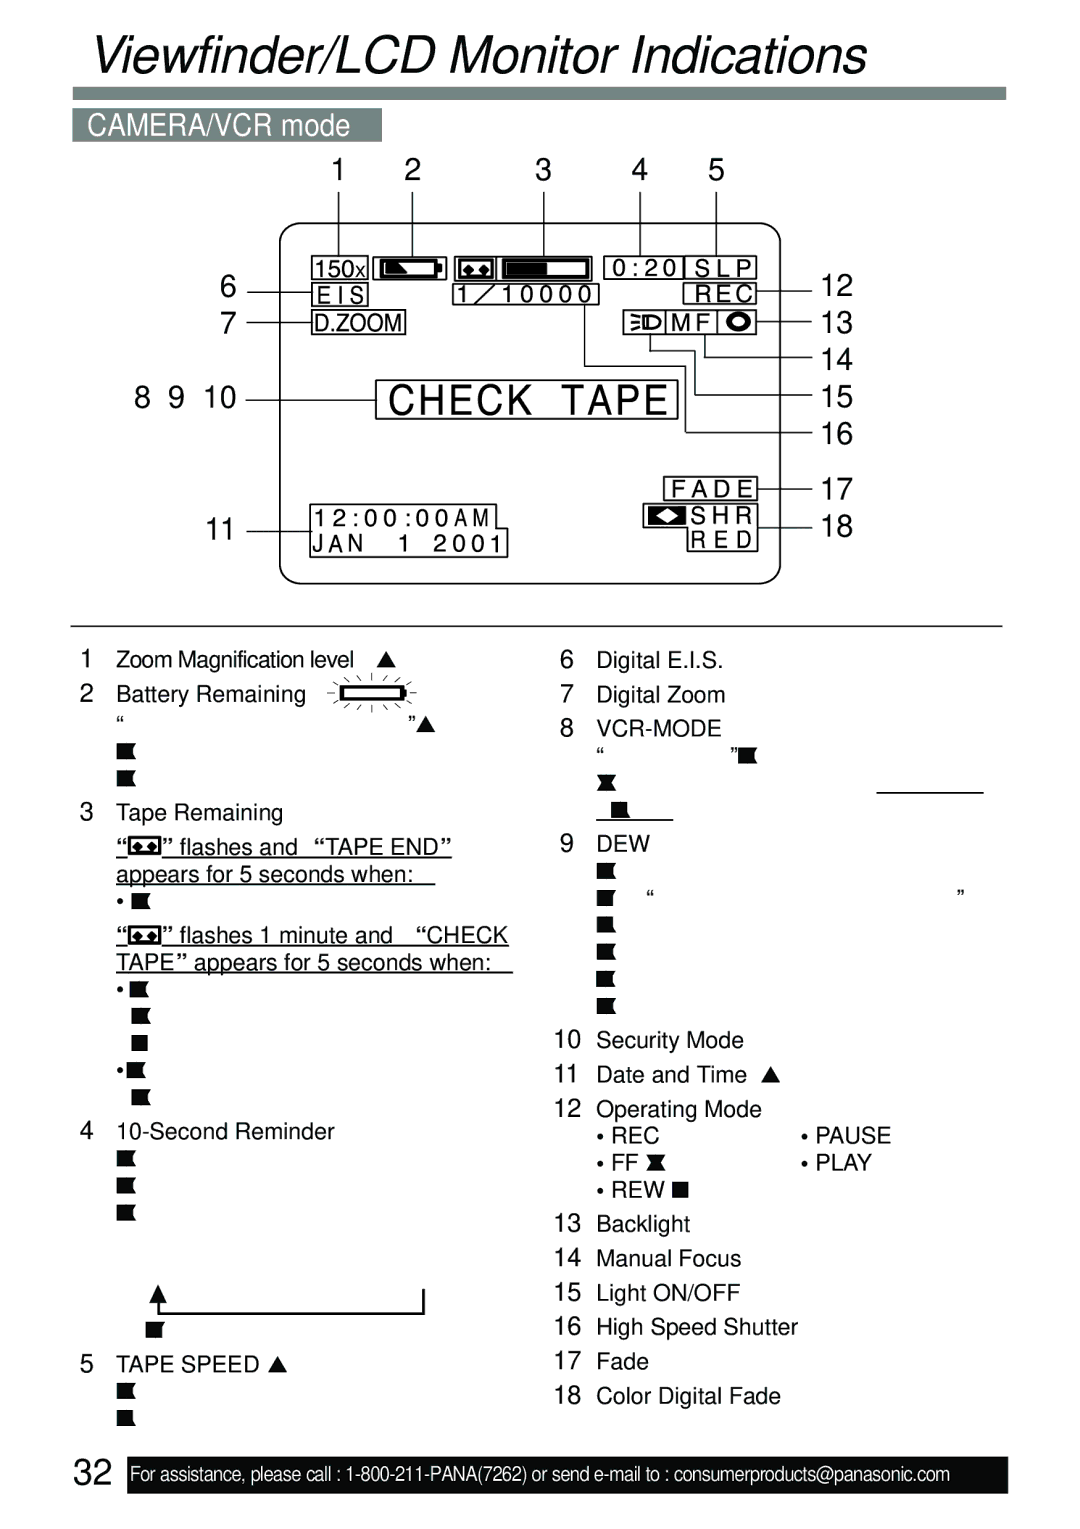
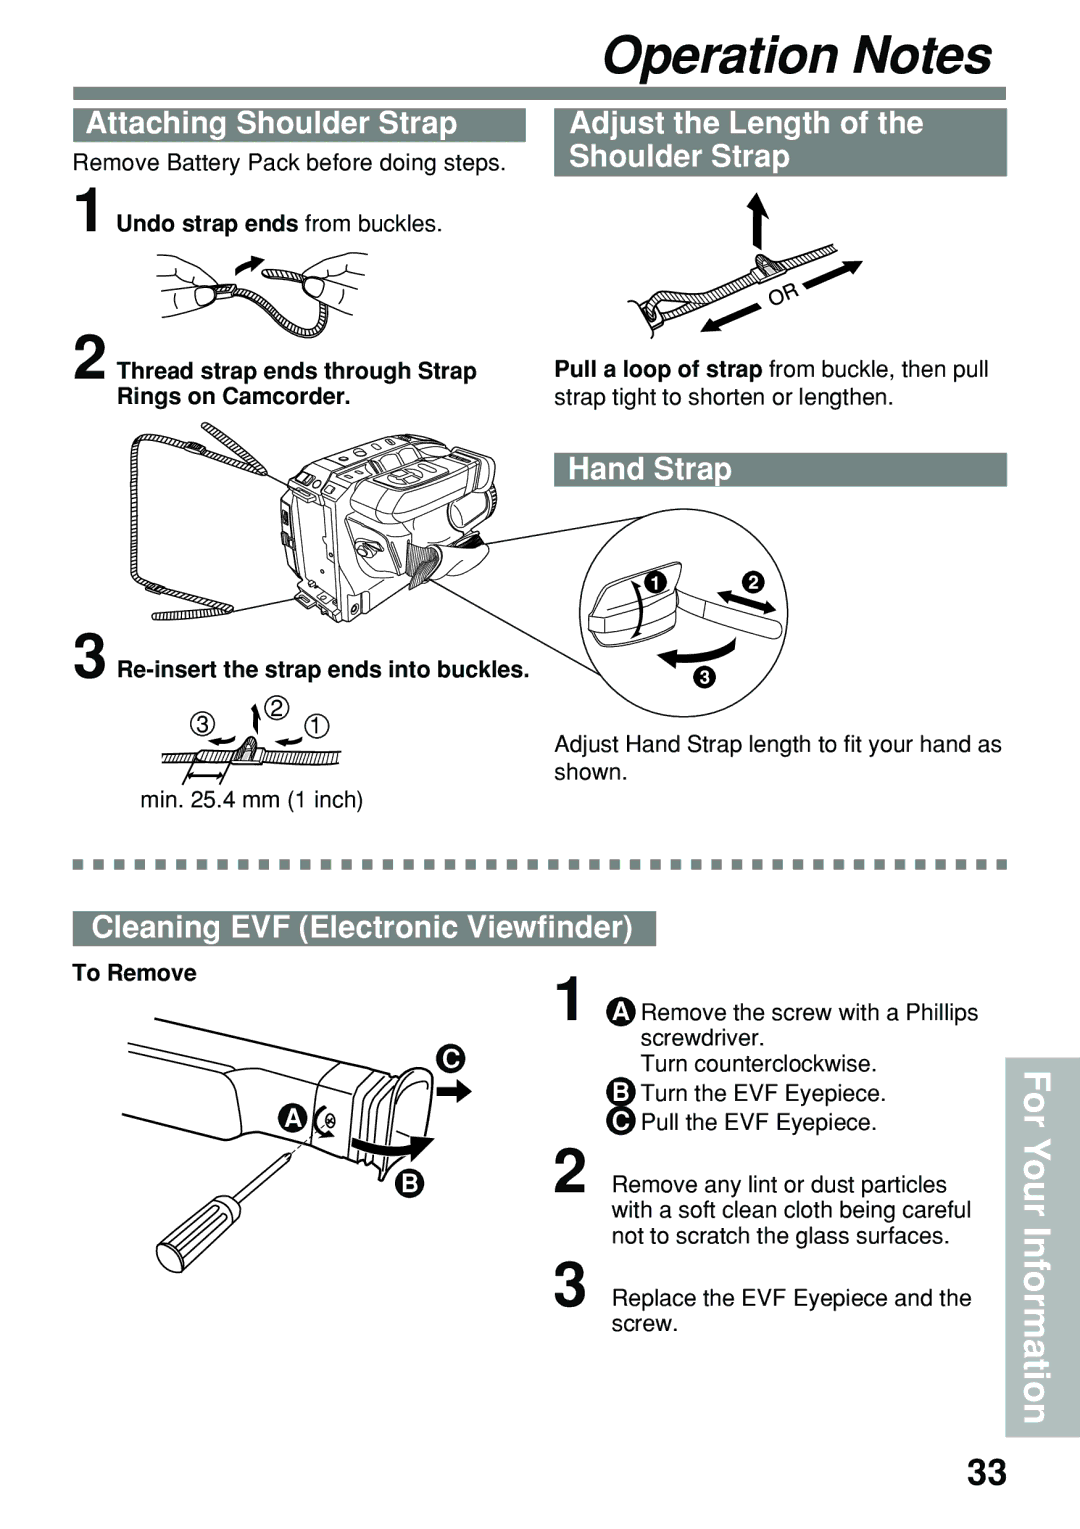
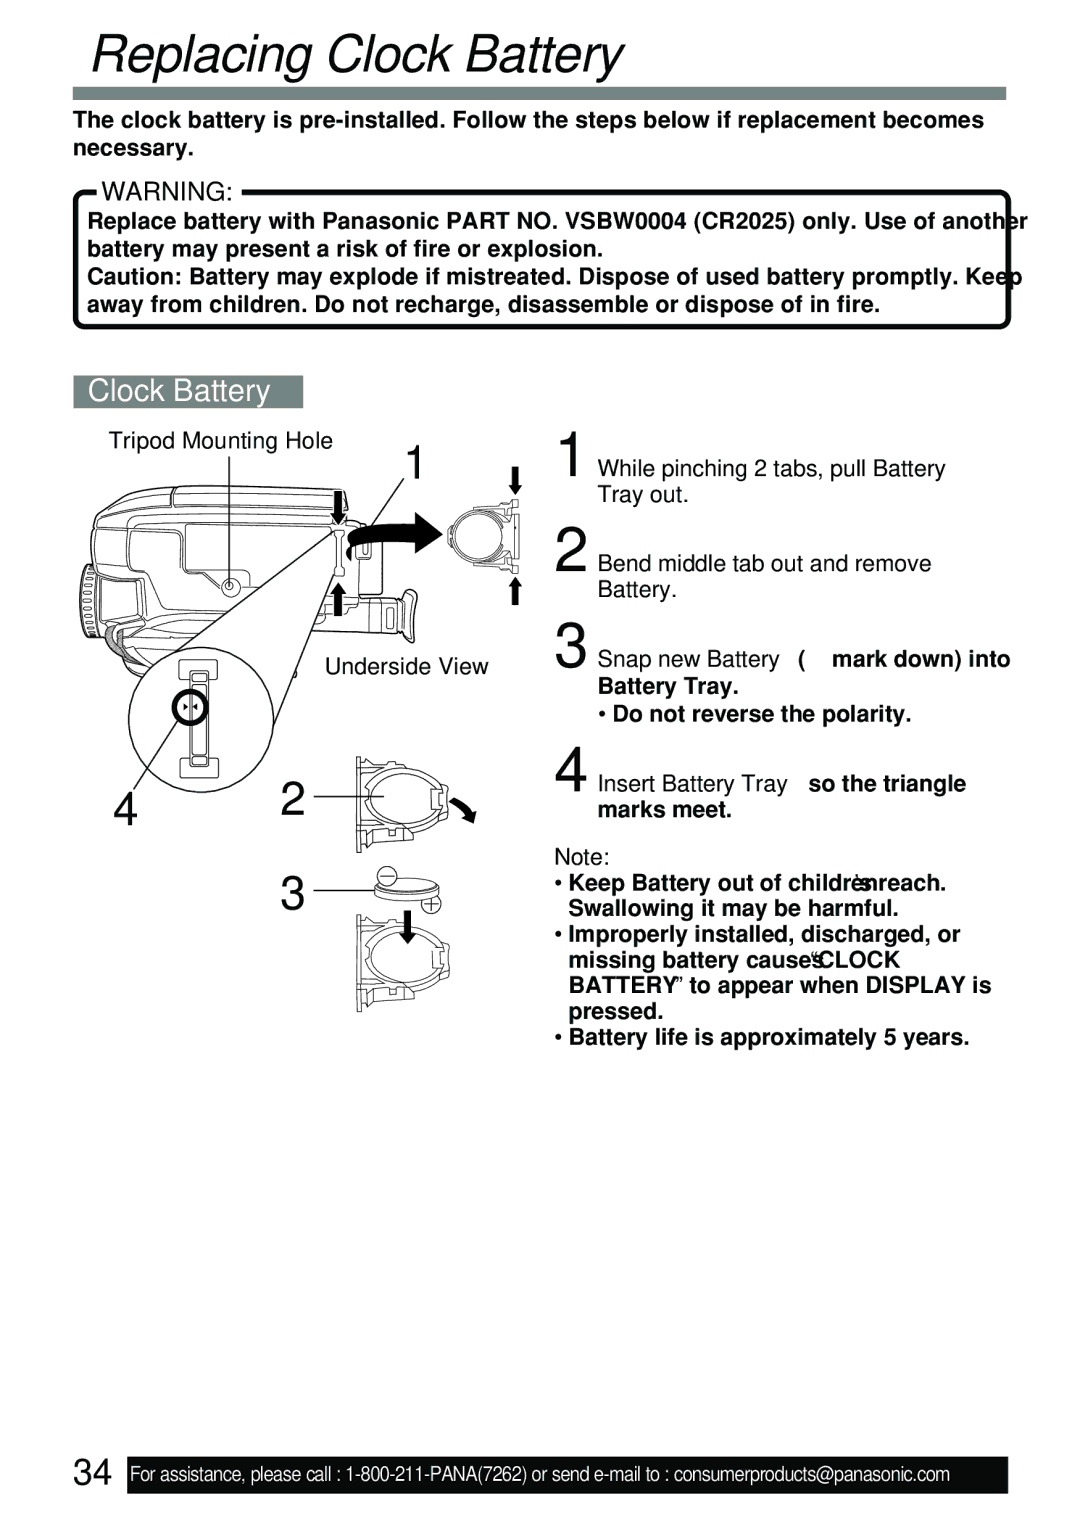
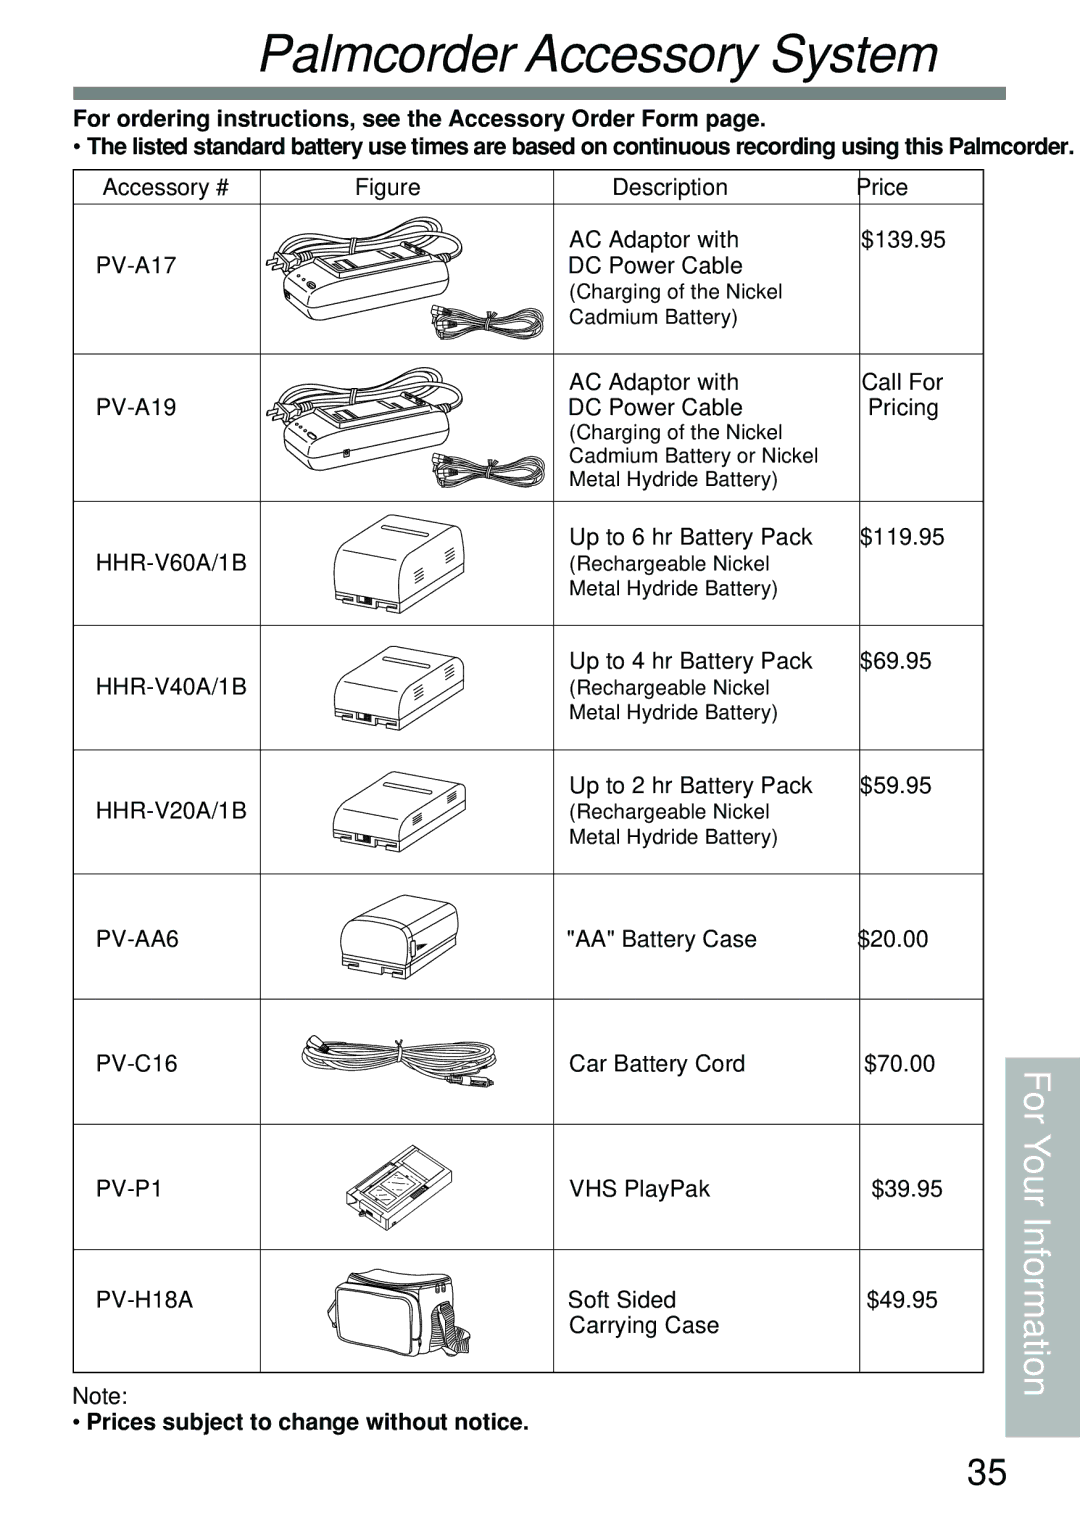
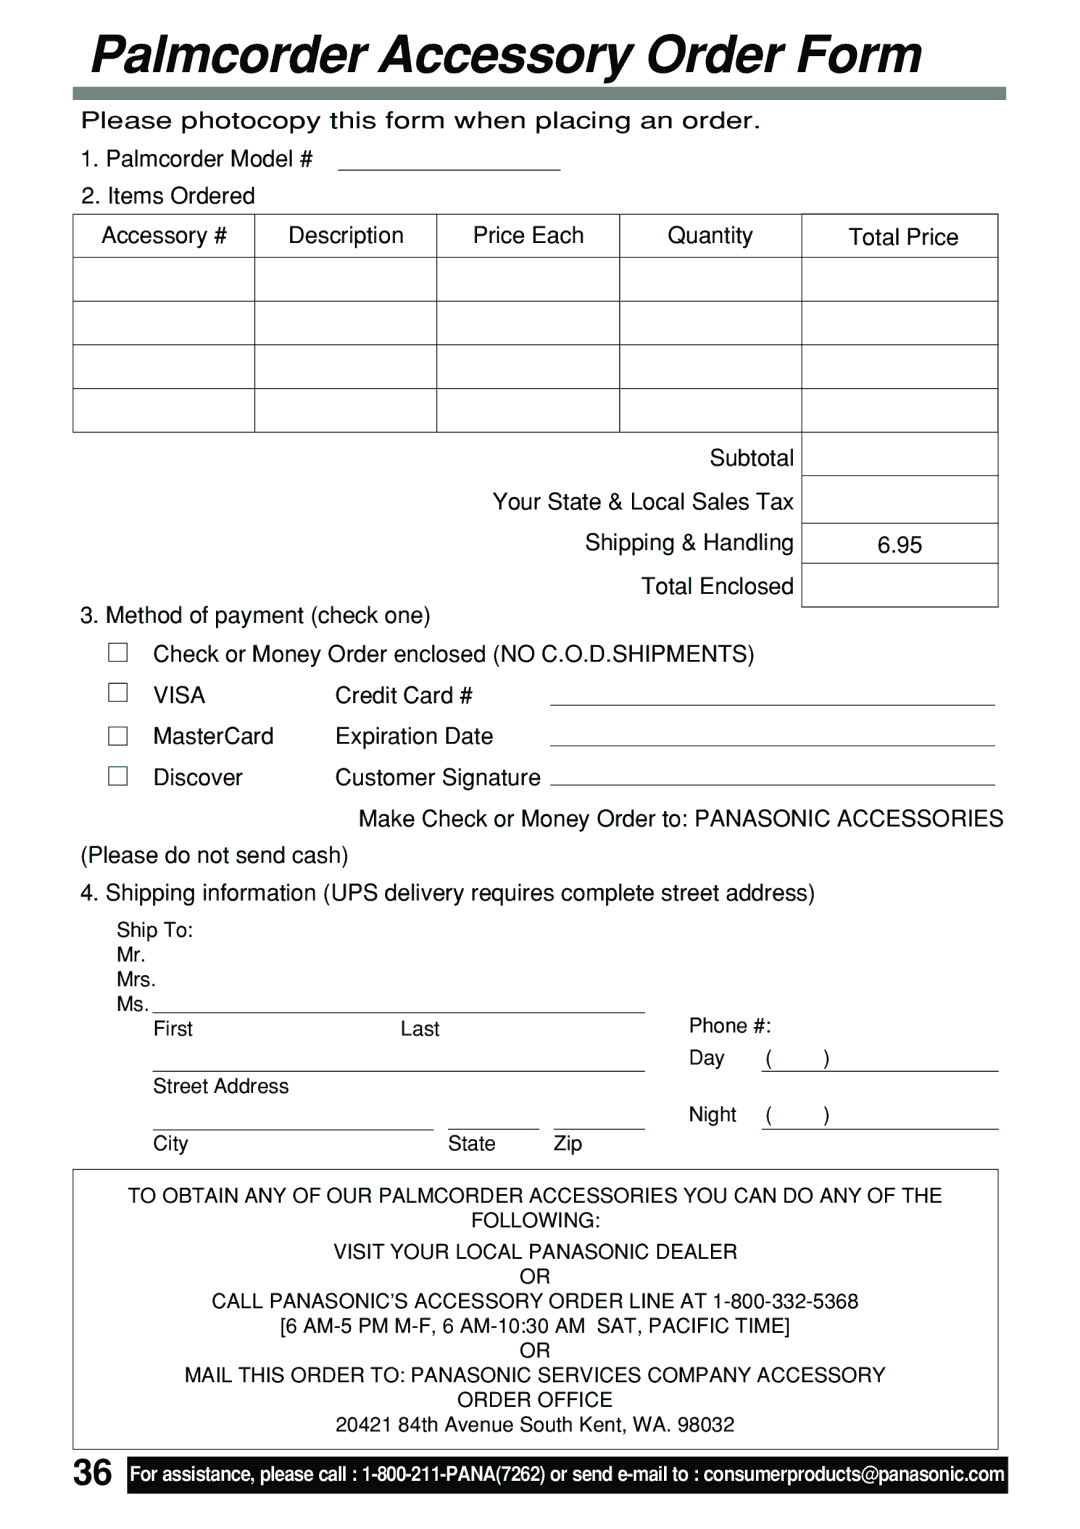
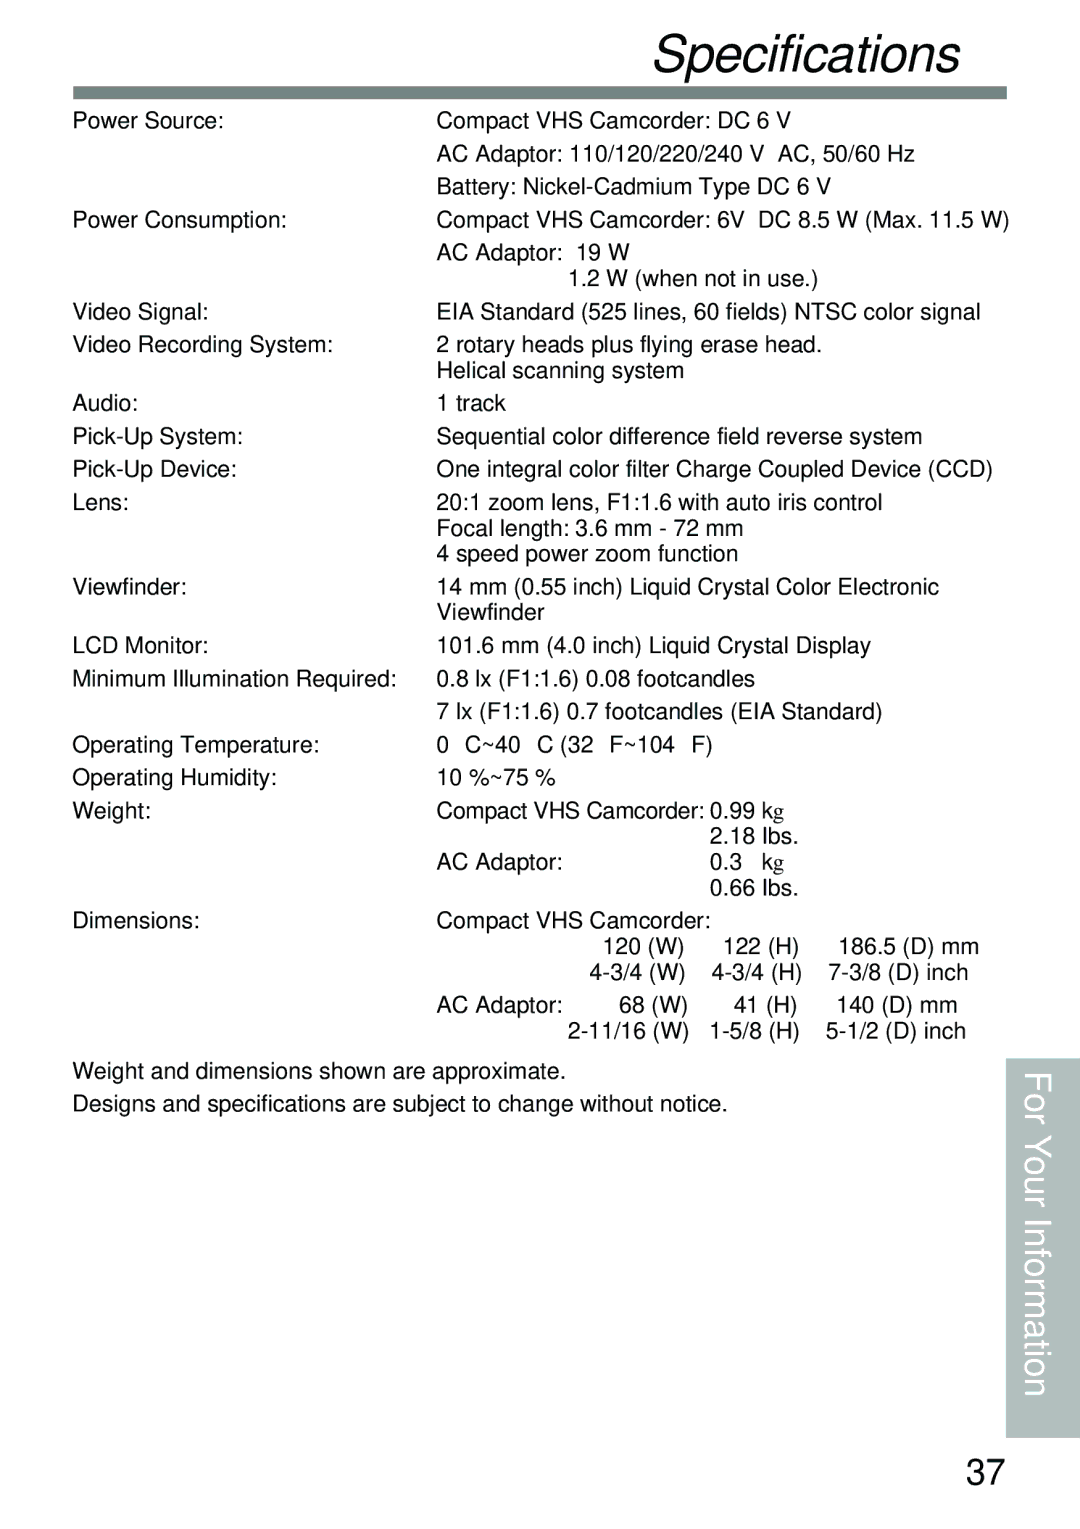
Panasonic PV-L591 3a Setting the Time Zone, 3b Auto Daylight Saving Time, Setting Date and Time

Page 14

Setting the Clock (continued)

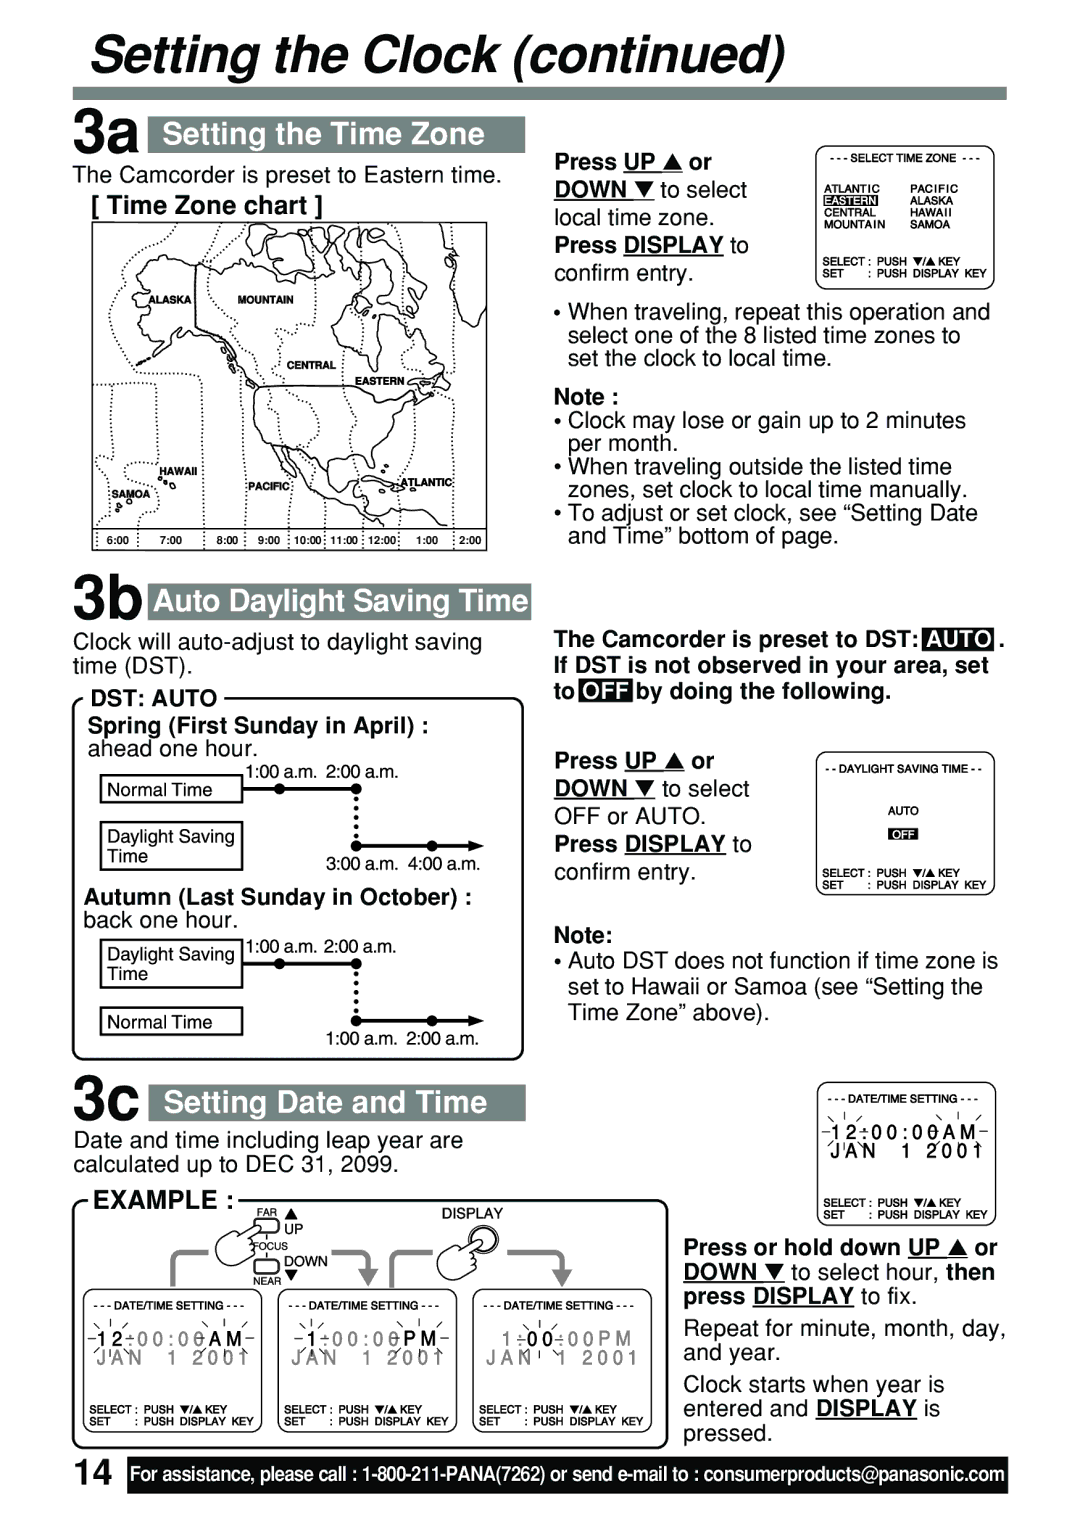
3a Setting the Time Zone

The Camcorder is preset to Eastern time.

[ Time Zone chart ]

ALASKA MOUNTAIN

CENTRAL

EASTERN

HAWAII

PACIFICATLANTIC

SAMOA

6:00

7:00

8:00

9:00

10:00 11:00

12:00

1:00

2:00

Press UP or DOWN to select local time zone.

Press DISPLAY to

confirm entry.

When traveling, repeat this operation and select one of the 8 listed time zones to set the clock to local time.

Note :

Clock may lose or gain up to 2 minutes per month.

When traveling outside the listed time zones, set clock to local time manually.

To adjust or set clock, see “Setting Date and Time” bottom of page.

3b Auto Daylight Saving Time

Clock will auto-adjust to daylight saving time (DST).

DST: AUTO

Spring (First Sunday in April) : ahead one hour.

Autumn (Last Sunday in October) : back one hour.

The Camcorder is preset to DST: AUTO . If DST is not observed in your area, set to OFF by doing the following.

Press UP or

DOWN to select

OFF or AUTO.

Press DISPLAY to

confirm entry.

Note:

Auto DST does not function if time zone is set to Hawaii or Samoa (see “Setting the Time Zone” above).

3c

Setting Date and Time

Date and time including leap year are calculated up to DEC 31, 2099.

EXAMPLE :

Press or hold down UP or DOWN to select hour, then press DISPLAY to fix.

Repeat for minute, month, day, and year.

Clock starts when year is entered and DISPLAY is pressed.

14

For assistance, please call : 1-800-211-PANA(7262) or send e-mail to : consumerproducts@panasonic.com
Image 14
Contents Operating Instructions Model No. PV-L591Thank you for choosing Panasonic Things You Should KnowUnpack your Camcorder Safety Precautions Above markings are located on the appliance’s bottom coverImportant Safeguards Precautions If the video unit has been exposed to rain or waterTable of Contents Self Demo Self Demo ModeBefore you begin Press Menu to exitQuick Operation Guide Using the Battery Pack Supplying PowerCharging the Battery Pack Battery RefreshVCR DC OUT Battery CareAC Adaptor Car Battery Cord Optional Erase Protection Tab Cassette InformationCassette Insertion/Removal Record/Playback Time SLPUsing Menu Mode Menu Mode Camera Screen Menu Mode VCR ScreenPress UP or Down to select Setting the ClockCamera Mode VCR Mode Clock SETTime Zone chart 3a Setting the Time ZoneSetting Date and Time 3b Auto Daylight Saving TimeReplacing the Bulb Using the LightBuilt-in Auto Light Recording via EVF or LCD Monitor VisionadjustmentCamera Recording CameraSTAND-BY Release CSet Power to Camera DPress RECORD/PAUSE to resumeTo resume recording, set Power to RecordingREC Time Press RECORD/PAUSE to place Camcorder in stand-by modeProgrammed Recording Programmed RECSpecial Effects Playing Back RecordingsTracking Control VCR Playback using PlayPak TV Playback or ViewingMonitor with your TV Copying your Tapes dubbingConnections Before you beginBacklight Four-Speed Power ZoomBacklight Manual Focus FocusAuto Focus Macro Focus close-upsManual Selection High Speed ShutterAuto Shutter ShutterFade Out Auto FadeFade FadeChoose from 7 fade effects in 8 different colors Press Menu for Menu mode Press UP orColor Digital Fade Down to selectDigital EIS on Hold down T on Power ZoomDigital Zoom Press D. ZoomMotion Security may not start when Security ModeMotion Security may mistakenly start when SecurityTitle Automatic TitleAutomatic/Manual Title Display List Phrase Title Intelligent TitlerManual Title Recording the Date and Time Display-Off ModeViewfinder/LCD Monitor Indications Full FullDEW CAMERA/VCR modeVCR-MODE Operation Notes Adjust the Length of the Shoulder StrapCleaning EVF Electronic Viewfinder Attaching Shoulder StrapInsert Battery Tray so the triangle marks meet Replacing Clock BatteryClock Battery Do not reverse the polarityPalmcorder Accessory System PV-AA6Palmcorder Accessory Order Form VisaSpecifications Symptom Correction Before Requesting ServiceVideo Head Cleaning Request for Service Notice Limited Warranty PANASONIC/QUASAR Video ProductsServicenter List Centralized Factory ServicenterIndex Manual de instrucciones Núm. de modelo PV-L591¡Gracias por haber elegido Panasonic Cosas que usted debe saberDesembalaje de la Palmcorder Precauciones para su seguridad Importante para su seguridad Importante para su seguridad Notas sobre el funcionamiento ContenidoReproducción de sus grabaciones Reproducción básica Copia de cintasSeleccionar Modo de demostraciónAntes de comenzar Para volver a activar la Auto DemostraciónGrabación con la cámara Guía de operación rápidaCarga de la batería Inserte el cassette Reproducción usando el monitor LCDUso de la batería Suministro de energíaCarga de la batería Refresco de la bateríaCuidado de la batería Adaptador de CALengüeta de protección contra borrados Información referente a los cassettesTiempo de grabación/reproducción Inserte el cassette tal como se indicaUtilización del modo Menu Pantalla de modo Menu VCRDATE/TIME Ajuste del relojTime ZONE, DST o Presione Menu dos veces para salir del modo Menu3b Hora veraniega Ajuste del reloj continuación3a Selección de huso horario Ajuste de la fecha y horaReemplazo de la bombilla Lámpara automática incorporadaUtilización de la lámpara Altes de comenzarAdvertencia Grabación con la cámaraGrabación a través del monitor LCD o del EVF Fácil edición en modo de espera Cancelación rápida de modo de esperaFácil edición manual Para reanudar la grabación, ajustePresione Display se Grabación programadaTiempo DE Grabacion Menu dos veces Presione RecordReproducción en el monitor LCD o en el EVF visor Reproducción de sus grabacionesControl de alineación Efectos EspecialesConexiones Reproducción o visión en un televisorReproducción en un VCR usando el PlayPak Carga de la pila en el PlayPakMonitoree con su televisor Copia de cintasConexiones Antes de comenzarPara un efecto zoom rápido Aplique más presión al botón Función de contraluzAcercamiento T Alejamiento W Para un efecto zoom lento ContraluzEnfoque manual EnfoqueEnfoque automático Enfoque macro para tomas de primer planoSelección manual Obturador de alta velocidadObturador automático Desvanecimiento Desvanecimiento AutomáticoAparición gradual de la imagen BlancoDesvanecimiento en 8 colores diferentes Desvanecimiento digital a colorElija uno de los 7 efectos de El audio no resulta afectado por el fundidoFunción EIS Mantenga presionado el lado T teleobjetivo del Power ZoomZoom Digital Presione Digital ZOOM. Modo D.ZOOM 150⋅ máxPresione Display para seleccionar on Modo de seguridadEl brillo cambia bruscamente Lista de indicación automática/manual de títulos Titulador inteligenteTítulo automático RECORD/ PauseVisualización de títulos de frase Monitor LCD o EVF Título manualFrase para título RECORD/PAUSELleno Modo de cancelación de indicaciónGrabación de la fecha y la hora Modo CAMERA/VCR Ajuste la longitud de la correa para el hombro Notas sobre el funcionamientoInstalación de la correa para el hombro Correa de manoCambio de la Pila del Reloj Pila del Reloj· Los precios están sujetos a cambio sin previo aviso Sistema de Accesorio del PalmcorderNúm. de accesorio Formulario para pedido de accesorios Descripción Precio unitario Cantidad Precio total SubtotalEspecificaciones Síntoma Corrección Antes de solicitar servicioLimpieza de las cabezas de vídeo Cabezales de video suciosSolicitud de servicio Garantía Limitada Productos de vídeo PANASONIC/QUASARLista de Centros de Servicio Centro de servicio de fábrica centralizadoÍndice