Meco Bonza Series manual Install Bottom Body PANEL/GREASE TRAY- ALL Models, #8 X 1/2 Screw 2pcs

Page 18

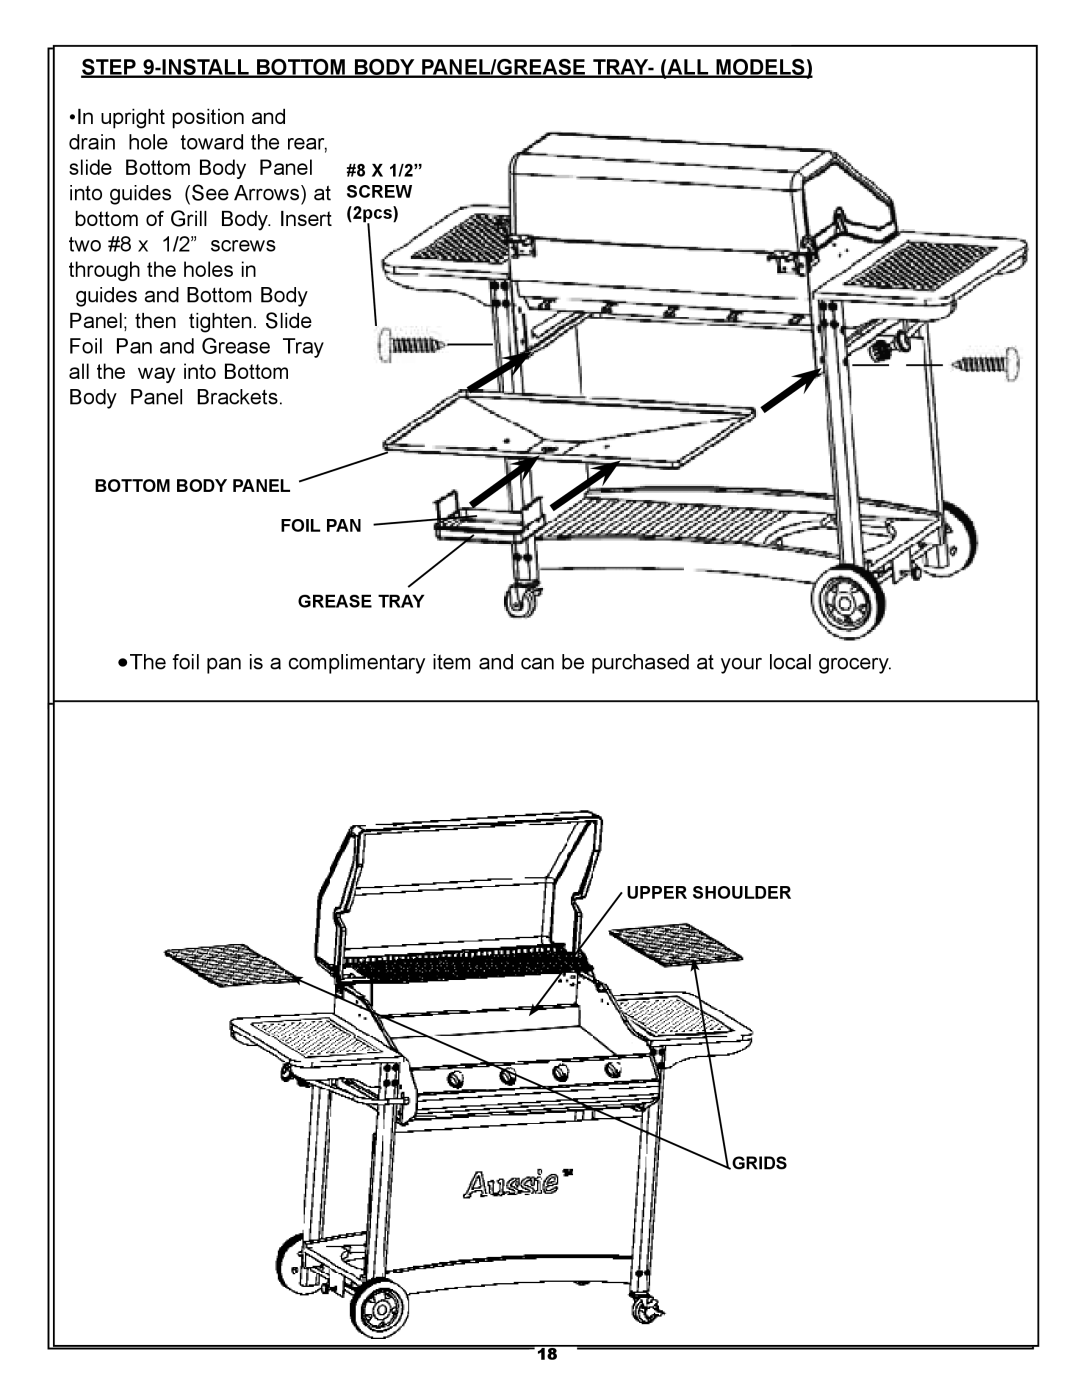
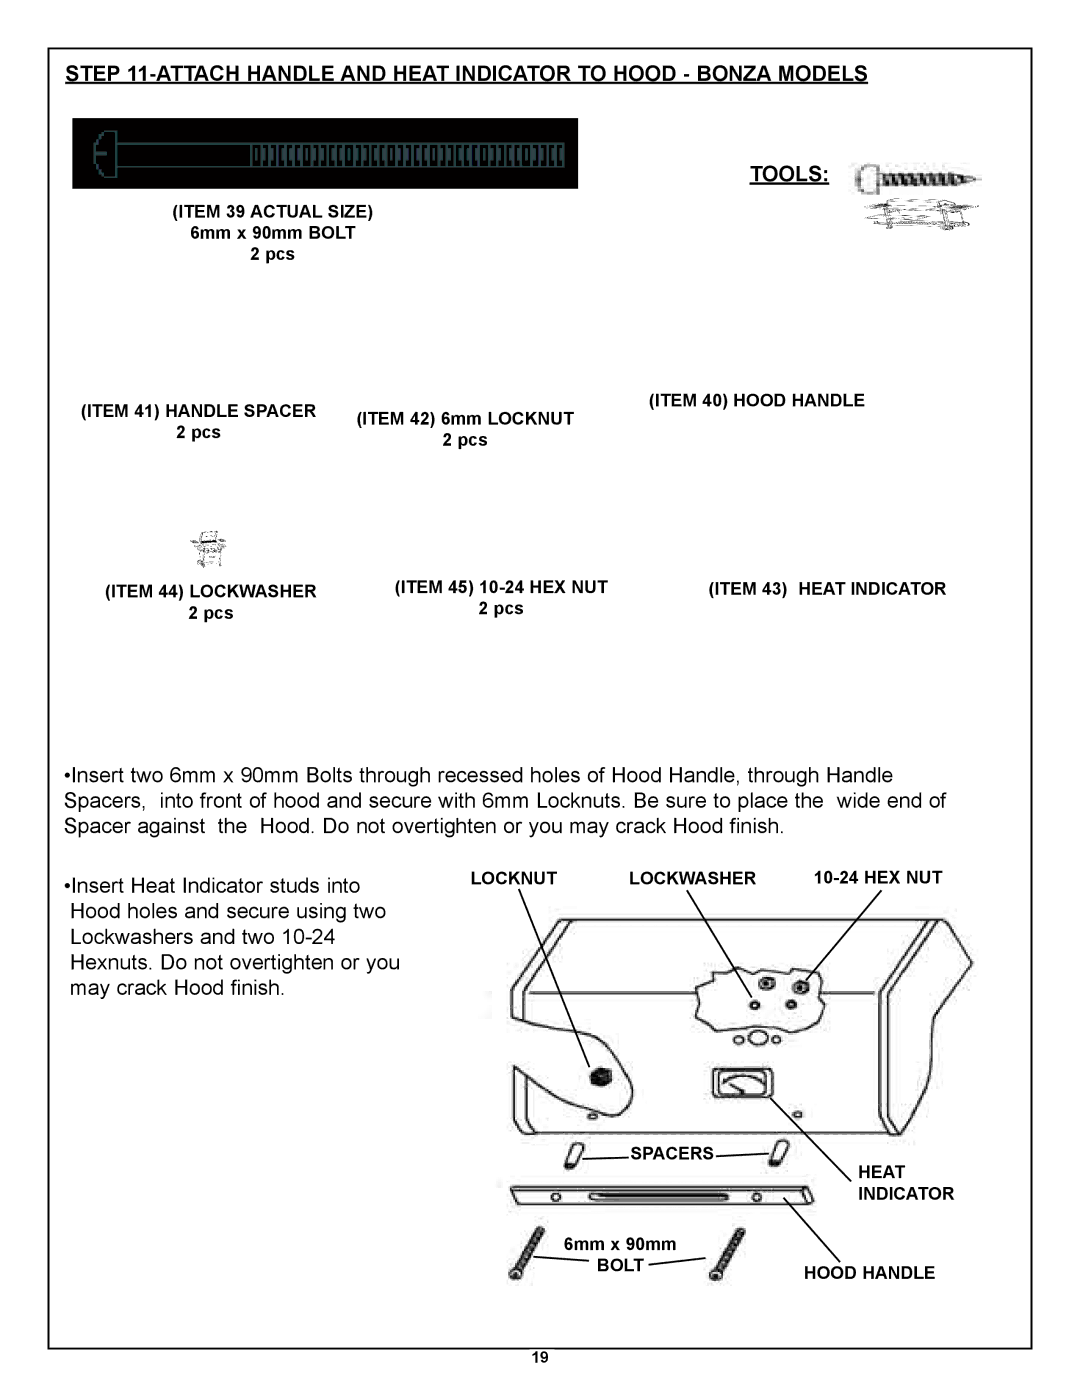
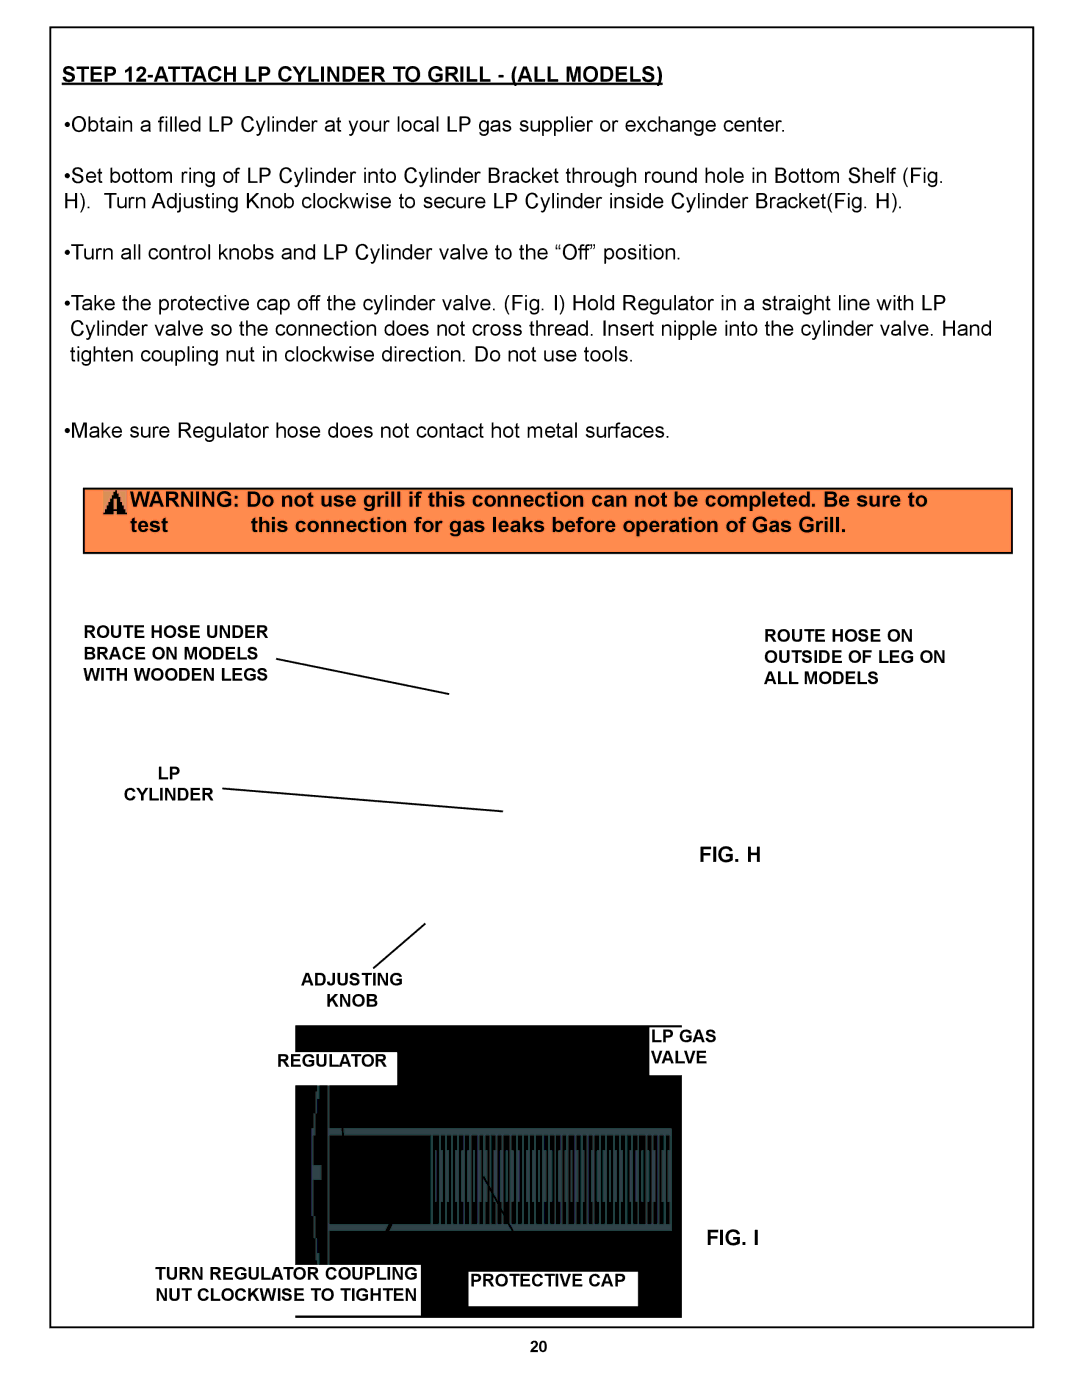
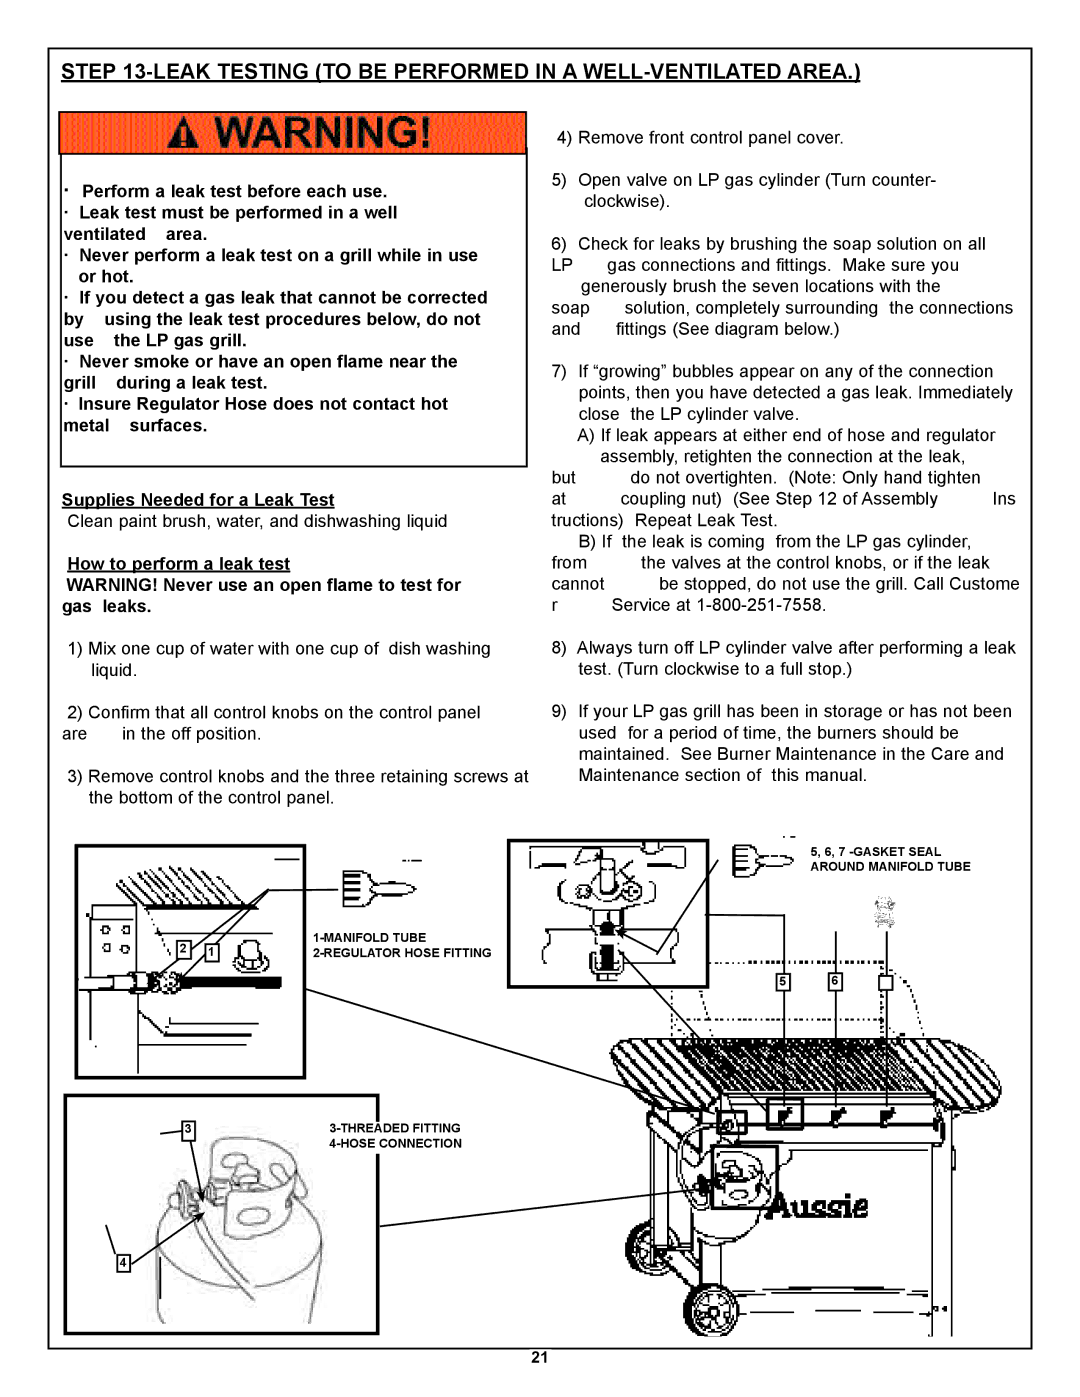
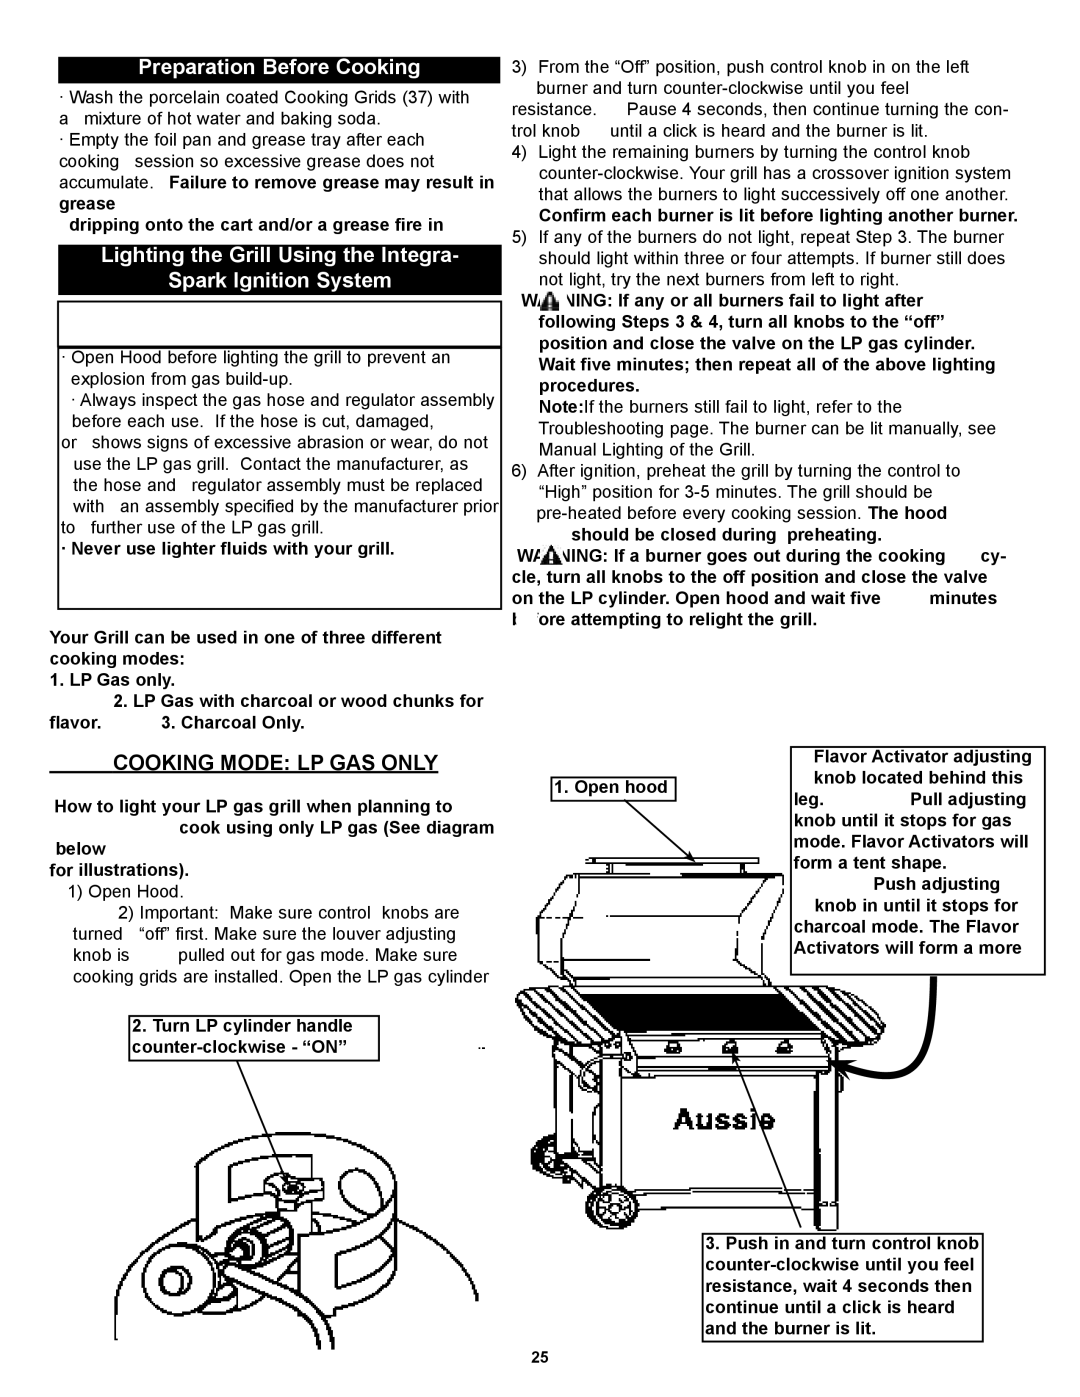
STEP 9-INSTALL BOTTOM BODY PANEL/GREASE TRAY- (ALL MODELS)

•In upright position and

drain

hole toward the rear,

slide Bottom Body Panel

into guides (See Arrows) at

bottom of Grill

Body. Insert

two #8 x 1/2”

screws

through the holes in

guides and Bottom Body

Panel; then tighten. Slide

Foil Pan and Grease Tray

all the

way into Bottom

Body

Panel Brackets.

#8 X 1/2” SCREW (2pcs)

BOTTOM BODY PANEL

FOIL PAN

GREASE TRAY The foil pan is a complimentary item and can be purchased at your local grocery.

UPPER SHOULDER

GRIDS

18

Image 18
Contents For Your Safety AussieTM byImportant Safeguards Grill Continuing use. See Before Using Your LP GasDo not attempt to correct the problem yourself Gas tion of cloggedMeco Corporation PART/DESCRIPTION BonzaBonza Deluxe PART/ Description Bonza Bonza DeluxePART/ Description Bonza PART# QTY DeluxePART/ Description PART# QTY Bonza Wheel LEG/ Side Table Assembly Tools Item 1 or 3 Side Table X 1 3/8 Bolt 8pcs X 1 Bolt 8 pcsItem 9 8 pcs Item 8 8 pcs Fixed LEG/SIDE Table AssemblyTools X 1 3/8LEG Brace Assembly Tools PcsX 1 3/8 Bolt Metal Bottom SHELF/LEG & Caster Assembly ToolsX 1 Bolt Wood LEG X 2 Bolt WOO X 1 Bolt Wood LEG 1/4 x 1 3/8 Bolt Metal LEGItem 26 4 pcs WHEEL/CYLINDER Bracket Assembly ToolsItem 22, 23 X 1/2 BoltGrill BODY/CART ASSEMBLY- Bonza & Bonza Deluxe Models Assembly NextGrill BODY/CART ASSEMBLY- Bonza Models RegulatorNext Install Burner ToolsAttach Decorative Privacy Panel to Cart ALL Models Or 4 PCSFIG. E FIG. FInstall Bottom Body PANEL/GREASE TRAY- ALL Models #8 X 1/2 Screw 2pcsAttach Handle and Heat Indicator to Hood Bonza Models Tools Attach LP Cylinder to Grill ALL Models FIG. HLeak Testing to be Performed in a WELL-VENTILATED Area How to perform a leak testGAS, CYLINDER, Hose Regulator Information Connecting/ Disconnecting LP Gas Cylinder to Grill· Always check for gas leaks when you LP Gas CylinderBefore Using Your LP GAS Grill PrecautionsSelecting a Location LeakTesting Operating the LP GAS GrillDripping onto the cart and/or a grease fire Lighting the Grill Using the Integra Spark Ignition SystemPreparation Before Cooking Confirm each burner is lit before lighting another burnerCooking Mode LP GAS with Wood Chunks for Flavor Cooking Mode Charcoal onlyWood Chunks placed along left or right side of grill How to manually light your LP gas grill Manual Lighting of the GrillOpen hood Grill Cooking Care and MaintenanceCheck Your Flame End of Cooking Session Roasting Hood CookingBurner Maintenance How to clean porcelain coated cast iron burnersPorcelain coated Cooking Surfaces Hood Cleaning the Grill Body Flavor ActivatorsBottom Panel/ Grease Tray Cleaning instructions for Charcoal and Wood chunk ash Preventive MaintenanceCaring for the Wood Cart Burners will not light Using the igniterUsing a match Low flame or low heatPersistent grease fire Flames blow outFlare up Humming orImportant Notice Limited Warranty