Multiquip C1870300404 DCA-220SSJ/SSJU Installation, Outdoor Installation, Indoor Installation

Page 17

DCA-220SSJ/SSJU — INSTALLATION

Outdoor Installation

Install the generator in a area that is free of debris, bystanders, and overhead obstructions. Make sure the generator is on secure level ground so that it cannot slide or shift around. Also install the generator in a manner so that the exhaust will not be discharged in the direction of nearby homes.

The installation site must be relatively free from moisture and dust. All electrical equipment should be protected from excessive moisture. Failure to do will result in deterioration of the insulation and will result in short circuits and grounding.

Foreign materials such as dust, sand, lint and abrasive materials have a tendency to cause excessive wear to engine and alternator parts.

CAUTION - EXHAUST HAZARD

Pay close attention to ventilation when operating the generator inside tunnels and caves. The engine exhaust contains noxious elements. Engine exhaust must be routed to a ventilated area.

Indoor Installation

Exhaust gases from diesel engines are extremely poisonous. Whenever an engine is installed indoors the exhaust fumes must be vented to the outside.The engine should be installed at least two feet from any outside wall. Using an exhaust pipe which is too long or too small can cause excessive back pressure which will cause the engine to heat excessively and possibly burn the valves.

Mounting

The generator must be mounted on a solid foundation (such as concrete) and set firmly on the foundation to isolate vibration of the generator when it is running. The generator must set at least 6 inches above the floor or grade level (in accordance to NFPA 110, Chapter 5-4.1). DO NOT remove the metal skids on the bottom of the generator. They are to resist damage to the bottom of the generator and to maintain alignment.

Generator Grounding

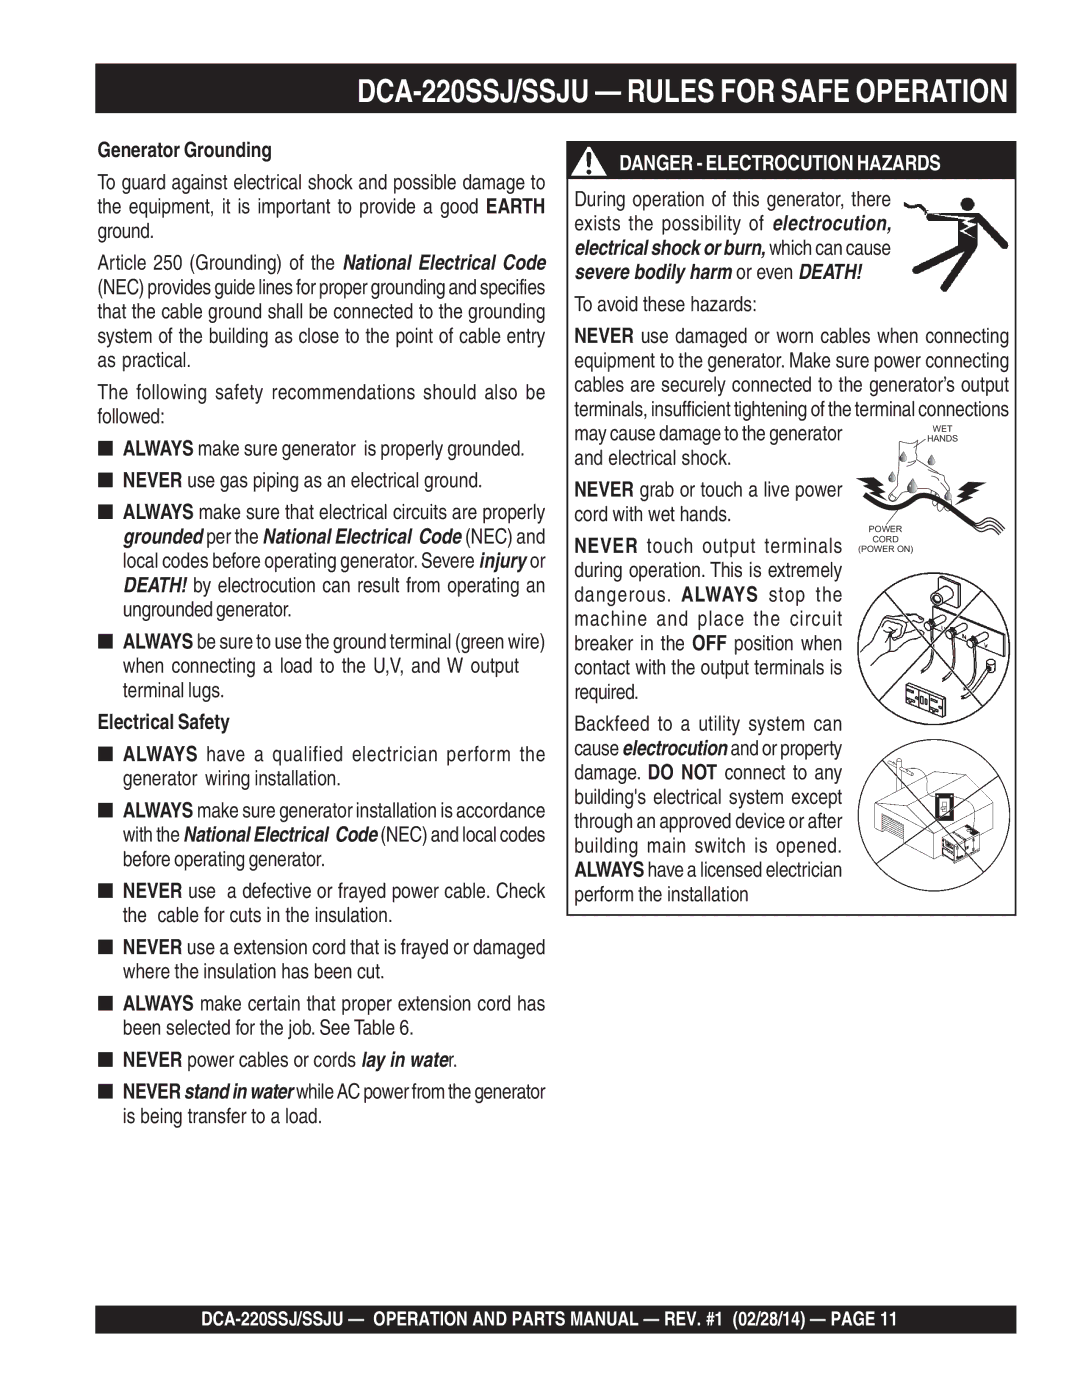
To guard against electrical shock and possible damage to the equipment, it is important to provide a good EARTH ground.

Article 250 (Grounding) of the National Electrical Code (NEC) provides guide lines for proper grounding and specifies that the cable ground shall be connected to the grounding system of the building as close to the point of cable entry as practical.

NEC articles 250-64(b) and 250-66 set the following grounding requirements:

1.Use one of the following wire types to connect the generator to earth ground.

a.Copper - 8 AWG (5.3 mm2)

b.Aluminum - 6 AWG (8.4 mm2)

2.When grounding the generator (Figure 4) connect the ground cable between the lock washer and the nut on the generator and tighten the nut fully. Connect the other end of the ground cable to earth ground.

3.NEC article 250-52(c) specifies that the earth ground rod should be buried a minimum of 8 ft. into the ground.

NOTICE

When connecting the generator to any buildings electrical system ALWAYS consult with a licensed electrician.

DCA-220SSJ/SSJU — OPERATION AND PARTS MANUAL — REV. #1 (02/28/14) — PAGE 17

Image 17
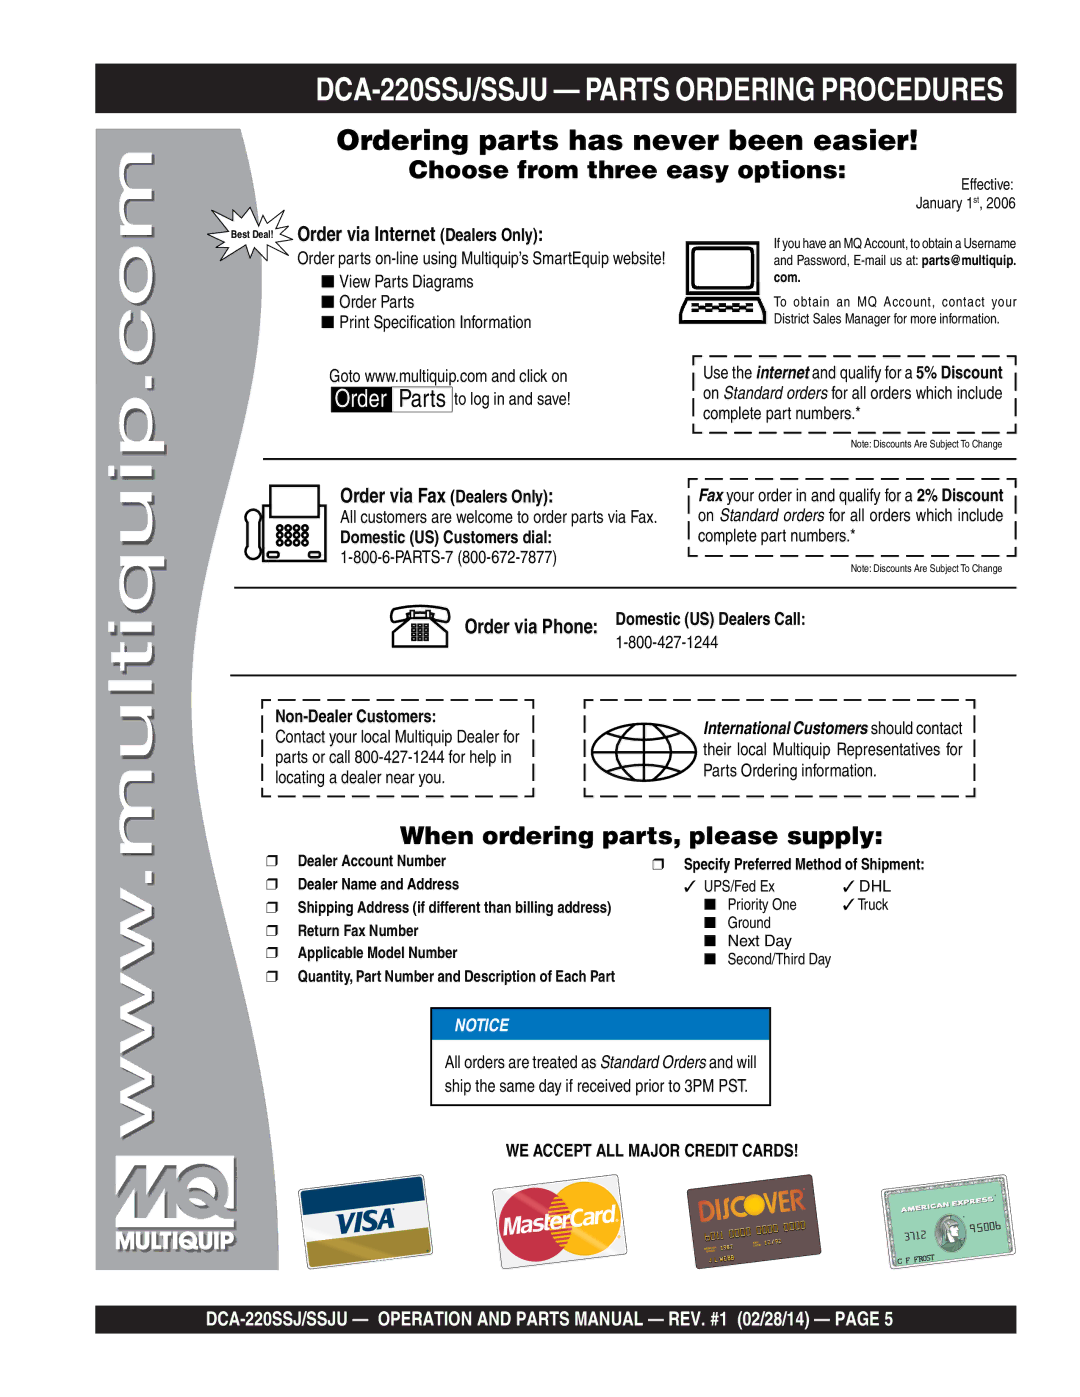
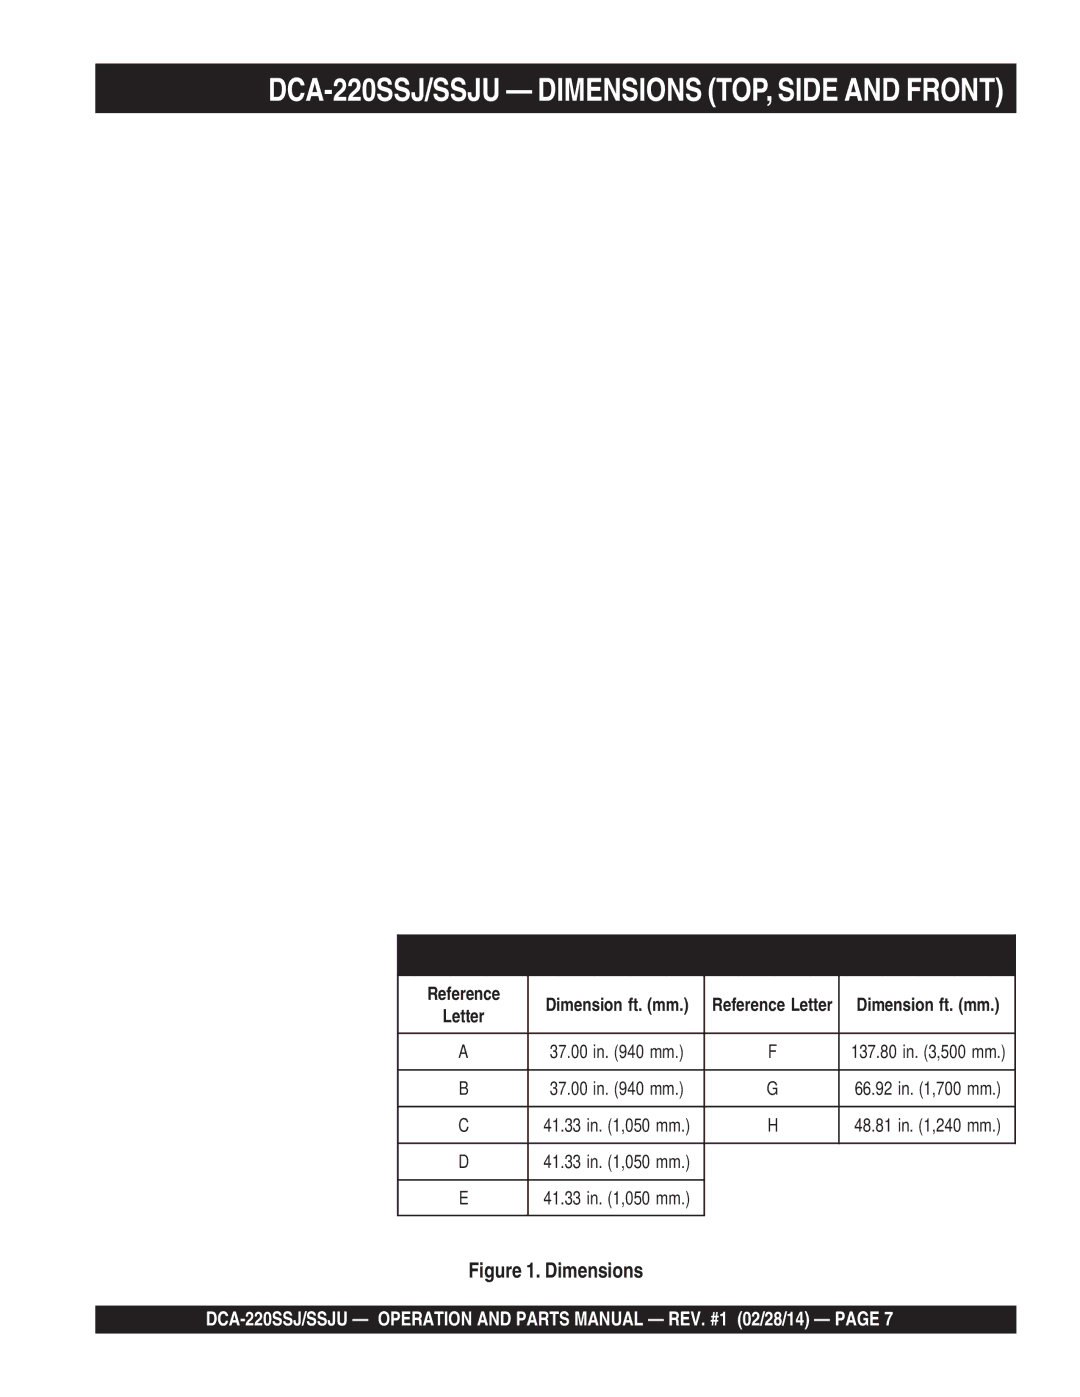
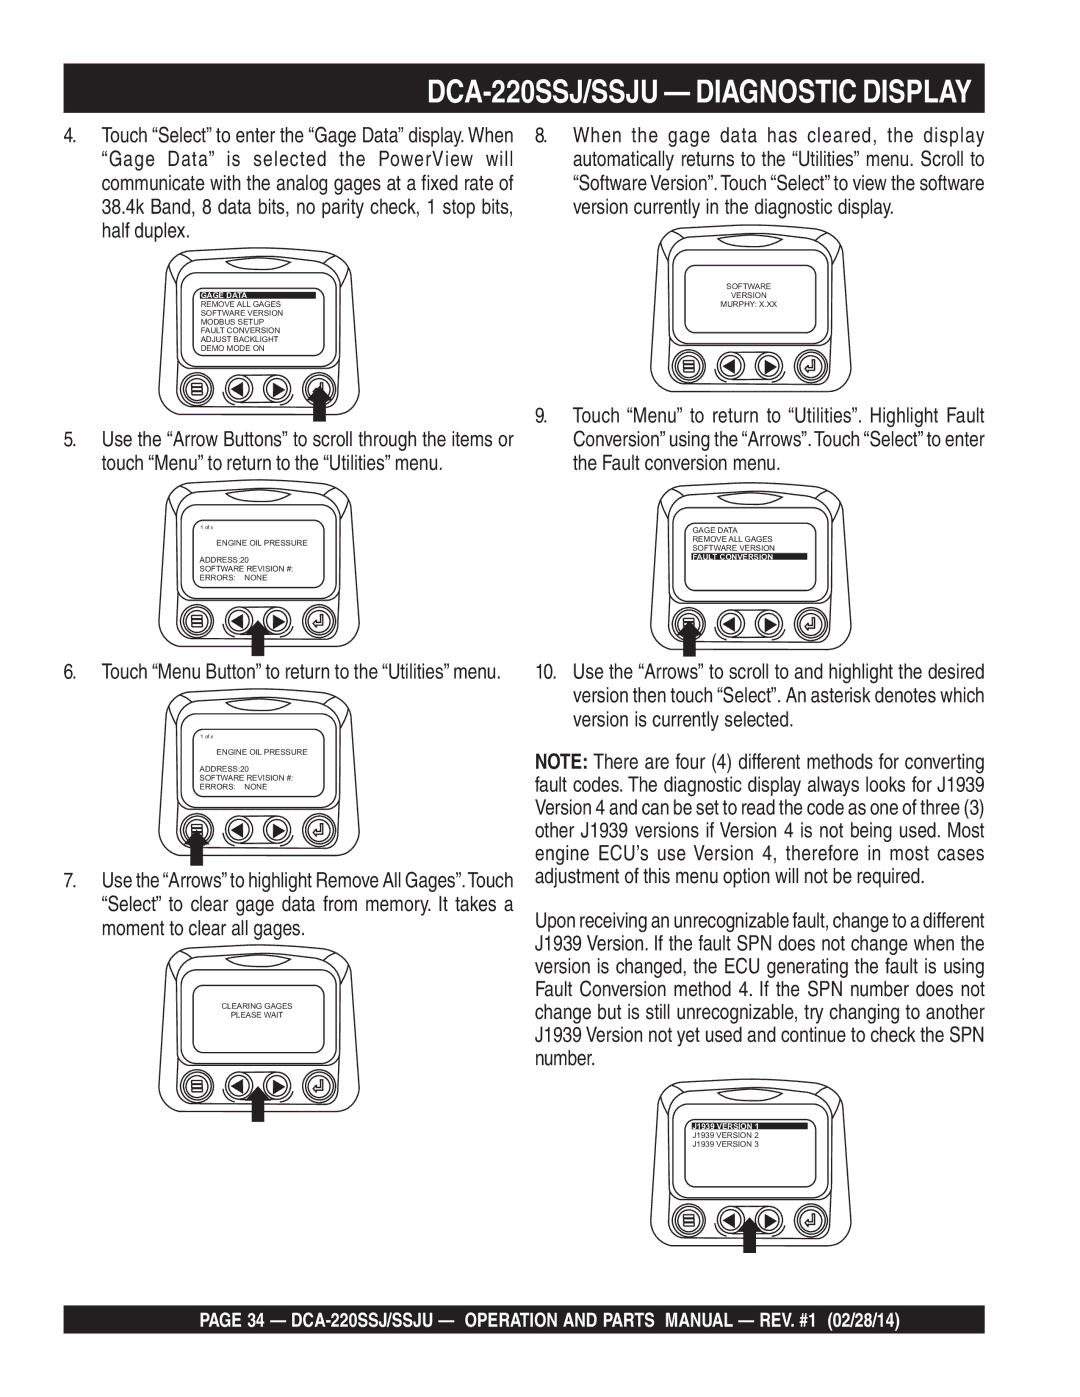
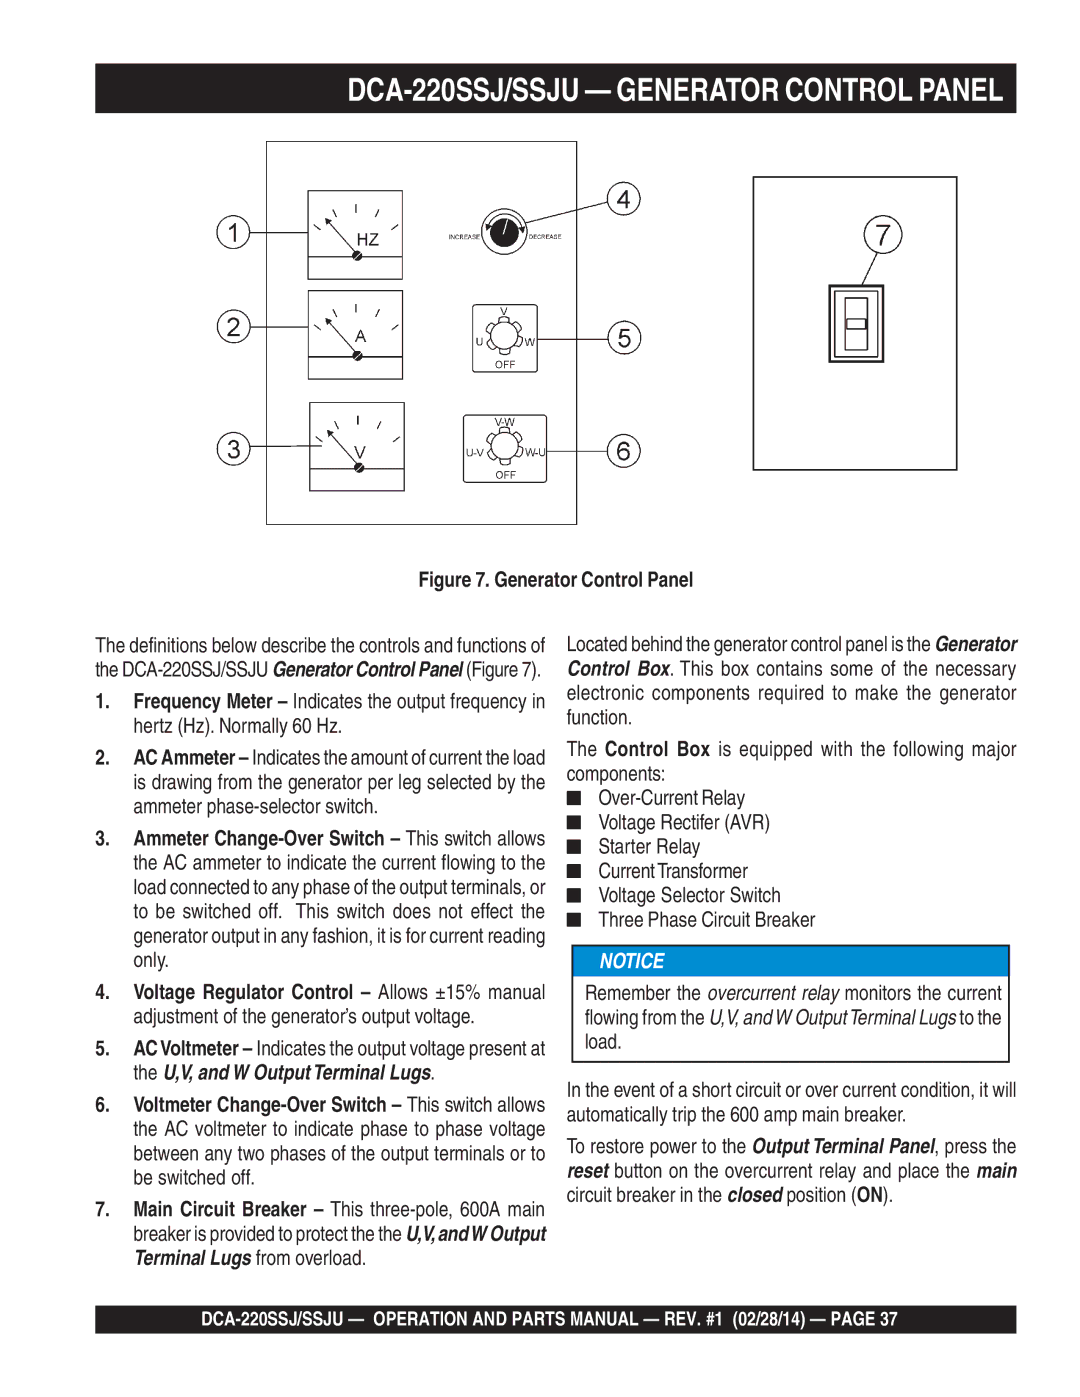
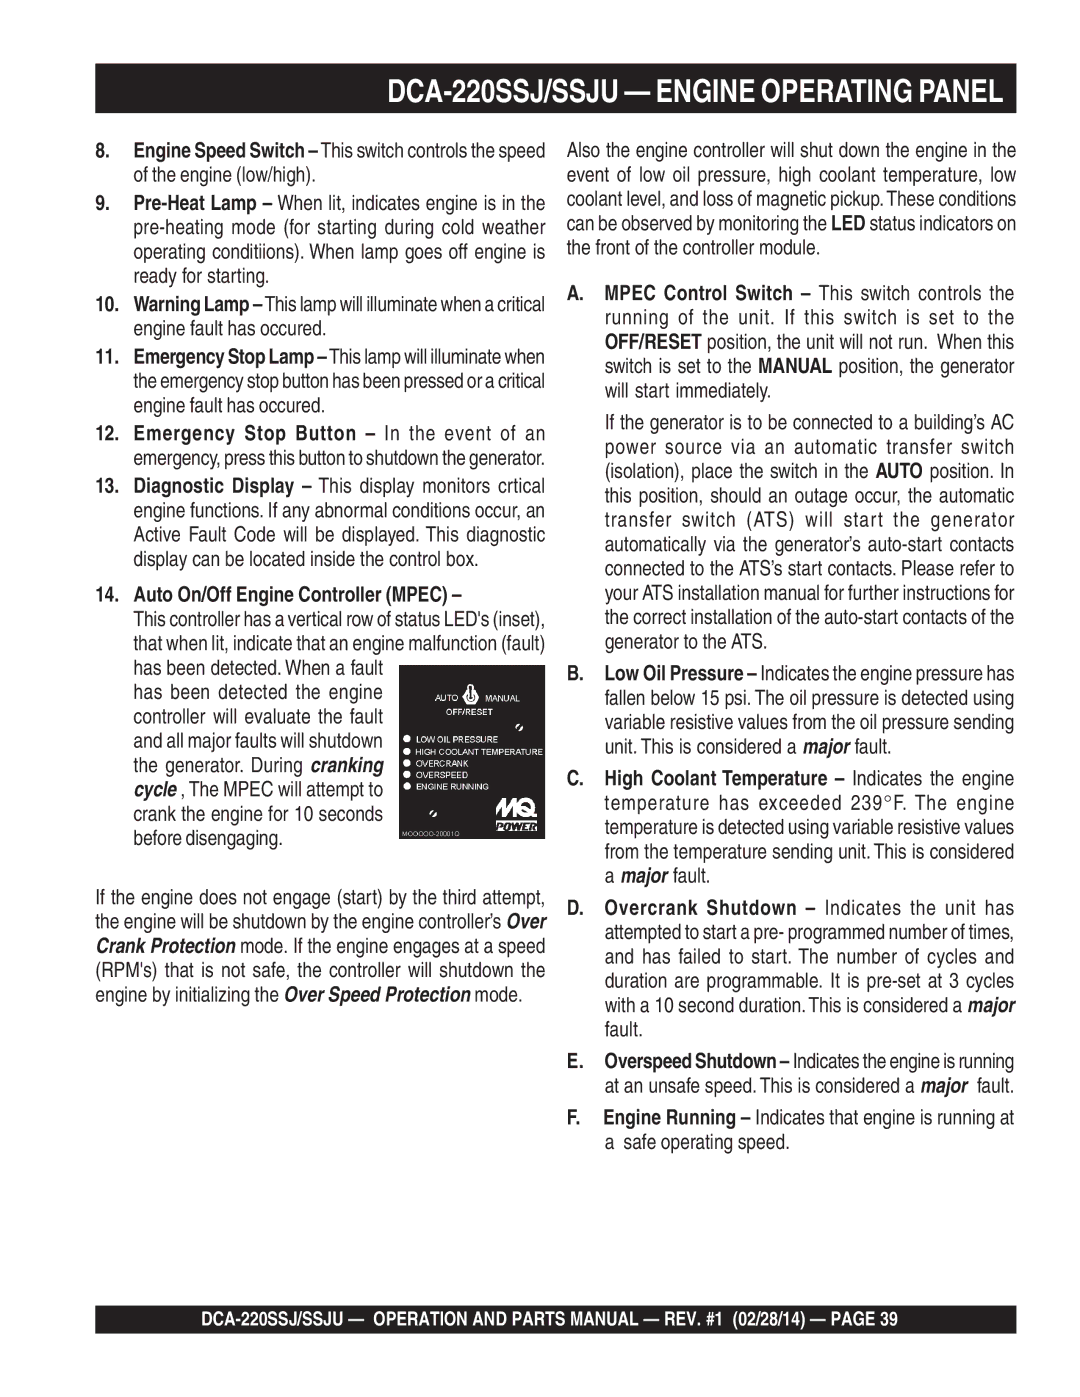
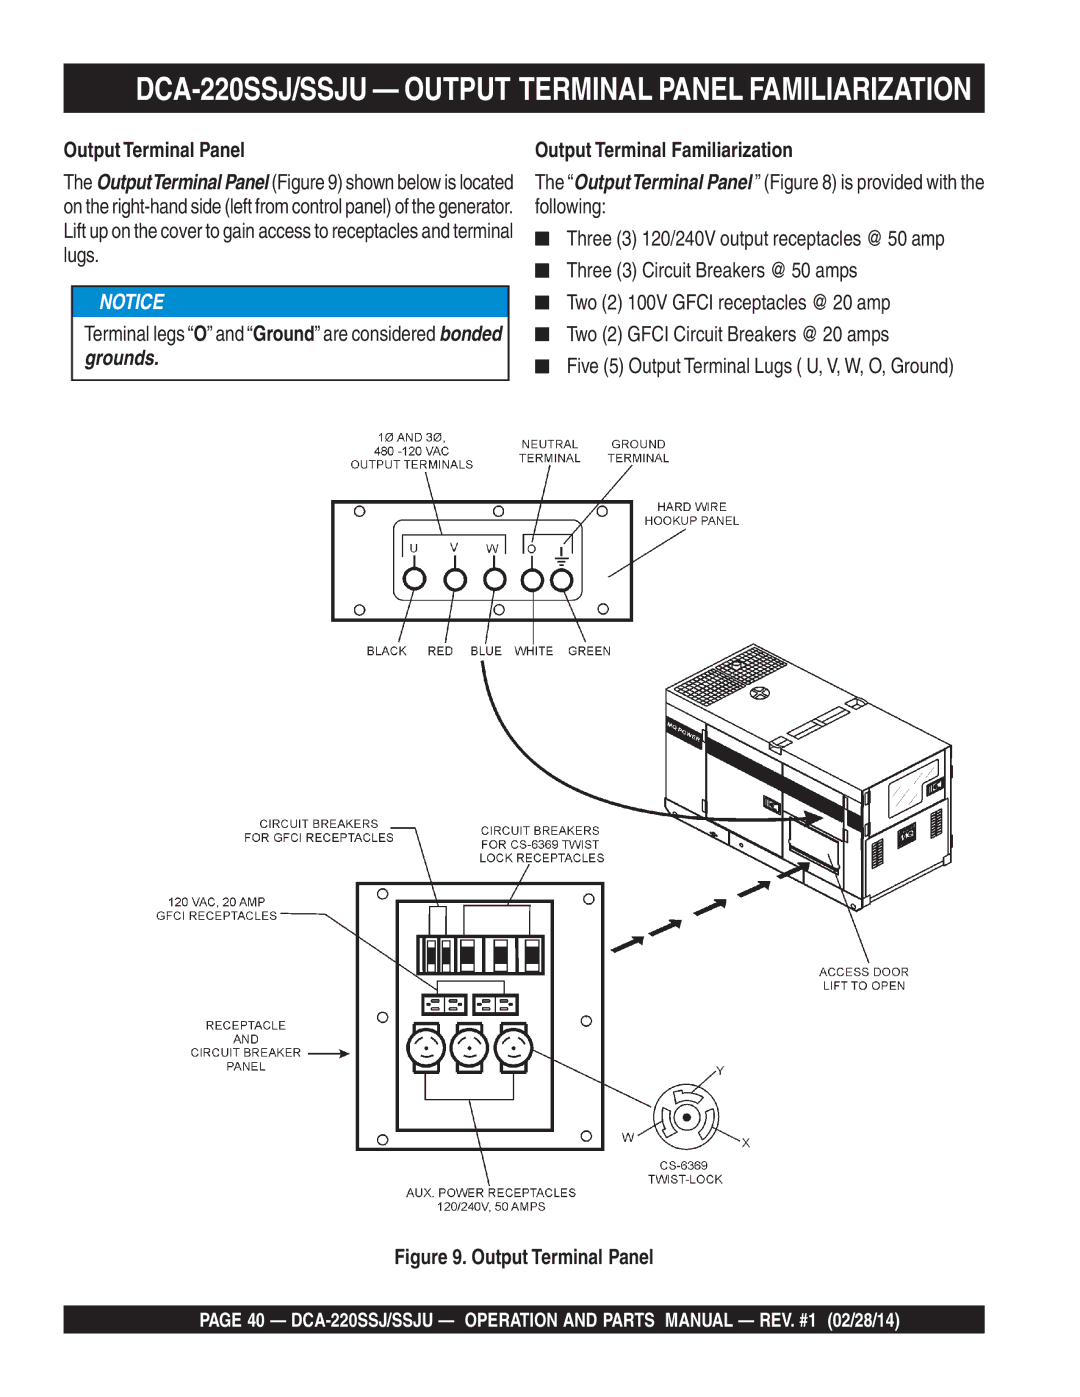
Contents Model DCA220SSJ/SSJU DCA-220SSJ/SSJU Proposition 65WARNING DCA-220SSJ/SSJU Note DCA-220SSJ/SSJU -TABLE of Contents Ordering parts has never been easier DCA-220SSJ/SSJU Parts Ordering ProceduresDCA-220SSJ/SSJU Specifications Dimensions DCA-220SSJ/SSJU Dimensions TOP, Side and FrontHazard Symbols DCA-220SSJ/SSJU Safety Message Alert SymbolsDCA-220SSJ/SSJU Safety Message Alert Symbols DCA-220SSJ/SSJU Rules for Safe Operation General SafetyDrugs or alcohol BurnsGenerator Grounding Electrical SafetyDCA-220SSJ/SSJU Rules for Safe Operation Battery Safety Maintenance SafetyEmergencies Towing &Transporting SafetyGenerator Decals DCA-220SSJ/SSJU Generator DecalsGenerator Decals Cont inued DCA-220SSJ/SSJU Generator DecalsTypical Generator Grounding Application DCA-220SSJ/SSJU InstallationOutdoor Installation DCA-220SSJ/SSJU InstallationIndoor Installation MountingDCA-220SSJ/SSJU General Information Major Components DCA-220SSJ/SSJU Major ComponentsDisplay Parameters DCA-220SSJ/SSJU Diagnostic DisplayMenu Button Press this button to enter or exit menu screens First Time Start Up DCA-220SSJ/SSJU Diagnostic DisplayNext item down Main Menu NavigationStored Fault Codes Diagnostic CodeEngine Configuration Data To make a selectionDCA-220SSJ/SSJU Diagnostic Display DCA-220SSJ/SSJU Diagnostic Display Display will return to the single or four parameter screen Auxiliary Gage FaultActive Fault Codes Shut Down Codes Backlight AdjustmentCode from an engine control unit the single or four DamageIs highlighted Contrast AdjustmentIntensity Select Units Setup 1- Up DisplayUp display function Once the Setup 1-up Display menu icon has beenSetup menu Automatic Scan on Select the 4-Up Custom Setup from the 4-Up Setup menu Setup 4-Up DisplayHighlighted Engine OIL TemperatureGage Data is selected the PowerView will When the gage data has cleared, the displayVersion currently in the diagnostic display Half duplexTouch the Menu Button Highlight it, then touch Enter Touch the Menu button again to return to the MainMenu Glossary Troubleshooting information DCA-220SSJ/SSJU Diagnostic DisplayECU did not respond to the PowerView request No parameter selected for this 4- UP quadrantDCA-220SSJ/SSJU Generator Control Panel Fuel Gauge Indicates amount of diesel fuel available DCA-220SSJ/SSJU Engine Operating PanelAuto On/Off Engine Controller Mpec DCA-220SSJ/SSJU Engine Operating PanelOutput Terminal Familiarization DCA-220SSJ/SSJU Output Terminal Panel Familiarization100VAC Gfci Receptacles DCA-220SSJ/SSJU Output Terminal Panel FamiliarizationOver Current Relay Connecting LoadsDCA-220SSJ/SSJU Load Application Single Phase LoadThree Phase Load DCA-220SSJ/SSJU Generator Outputs Maximum Amps How to Read the Output Terminal GaugeDCA-220SSJ/SSJU Generator OUTPUTS/ Gauge Reading Uvwo Terminal Output Voltages DCA-220SSJ/SSJU Output Terminal Panel Connections3Ø-240V Uvwo Terminal Output Voltages 1Ø-240V Uvwo Terminal Output Voltages3Ø-480V Uvwo Terminal Output Voltages DCA-220SSJ/SSJU Output Terminal Panel Connections1Ø-480V Uvwo Terminal Output Voltages 1Ø-277V Uvwo Terminal Output VoltagesCircuit Breakers DCA-220SSJ/SSJU SetupLubrication Oil Fuel CheckONLY! use #2 diesel fuel when refueling DCA-220SSJ/SSJU SetupRefueling Procedure Air Cleaner Fan Belt Tension Cleaning the RadiatorCoolant Antifreeze Operation FreezingWeatherBattery Cable Installation BatteryWiring AlternatorPlace the engine speed switch in the LOW down position DCA-220SSJ/SSJU Generator START-UP Procedure ManualBefore Starting Engines exhaust contains harmful emissionsEngine Speed Switch High Tachometer Gauge Starting Auto ModeNo Load Place the Mpec Control Switch in the Auto position Place the engine speed switch in the High positionEmergency Shutdown Procedure Normal Shutdown ProcedureDCA-220SSJ/SSJU Maintenance Engine DCA-220SSJ/SSJU Maintenance Engine DCA-220SSJ/SSJU Maintenance HEATER/CHARGER Trailer Maintenance DCA-220SSJ/SSJU Maintenance TrailerBrakes Brake AdjustmentCheck the wheel and drum for free rotation Hydraulic Surge BrakesSuspension Tires/Wheels/Lug NutsTireWear/Inflation Lug Nut Torque Requirements DCA-220SSJ/SSJU Maintenance TrailerStart all wheel lug nuts by hand Never use an pneumatic air gun to tighten wheel lug nutsTrailer/Towing Vehicle Wiring Diagram DCA-220SSJ/SSJU -TRAILERWIRING DiagramGenerator Wiring Diagram DCA-220SSJ/SSJU Generatorwiring DiagramEngine Wiring Diagram DCA-220SSJ/SSJU Enginewiring DiagramGenerator Troubleshooting DCA-220SSJ/SSJU -TROUBLESHOOTING GeneratorEngine Controller Troubleshooting Mpec DCA-220SSJ/SSJU -TROUBLESHOOTING Engine ControllerDCA-220SSJ/SSJU Operation and Parts Manual REV. #1 02/28/14 QTY. Column DCA220SSJ/SSJU Explanation of Code in Remarks ColumnDescription DCA220SSJ/SSJU Suggested Spare PartsDCA220SSJ/SSJU Generator Assy DCA220SSJ/SSJU Generator Assy DCA220SSJ/SSJU- Generator ASSY. DCA220SSJ/SSJU Generator ASSY. DCA220SSJ/SSJU Control Panel Assy DCA220SSJ/SSJU- Control Panel Assy DCA220SSJ/SSJU Control BOX Assy DCA220SSJ/SSJU Control BOX Assy DCA220SSJ/SSJU Control BOX ASSY. DCA220SSJ/SSJU Control BOX ASSY. DCA220SSJ/SSJU- Engine and Radiator Assy DCA220SSJ/SSJU Engine and Radiator Assy DCA220SSJ/SSJU Engine and Radiator Assy 32A M4493601204 M4310301203M4310300903 M4310301003DCA220SSJ/SSJU Engine and Radiator Assy 0269200660 06020210700802081003 M9300000203DCA220SSJ/SSJU Outputterminal Assy DCA220SSJ/SSJU Outputterminal Assy DCA220SSJ/SSJU Outputterminal ASSY. DCA220SSJ/SSJU Outputterminal ASSY. DCA220SSJ/SSJU Battery Assy DCA220SSJ/SSJU Battery Assy DCA220SSJ/SSJU Muffler Assy DCA220SSJ/SSJU Muffler Assy DCA220SSJ/SSJU Fueltank Assy DCA220SSJ/SSJU Fueltank Assy DCA220SSJ/SSJU Enclosure Assy DCA220SSJ/SSJU Enclosure Assy DCA220SSJ/SSJU Enclosure ASSY. DCA220SSJ/SSJU Enclosure ASSY. DCA220SSJ/SSJU Enclosure ASSY. DCA220SSJ/SSJU Enclosure ASSY. DCA220SSJ/SSJU Enclosure ASSY. 62A 0030006000 M9113000102M4453600004 M4453600104DCA220SSJ/SSJU Rubber Seals Assy DCA220SSJ/SSJU Rubber Seals Assy DCA220SSJ/SSJU Nameplate and Decals Assy DCA220SSJ/SSJU Nameplate and Decals Assy DCA220SSJ/SSJU Nameplate and Decals ASSY. DCA220SSJ/SSJU Nameplate and Decals ASSY. Freight Policy Terms and Conditions of Sale PartsDCA-220SSJ/SSJU Operation and Parts Manual REV. #1 02/28/14 HERE’S HOW to GET Help

C1870300404, M4870300104B specifications

Multiquip, a leading manufacturer in the construction and industrial sectors, offers a wide range of durable and reliable products. Among its extensive portfolio, two notable models stand out: the M4870300104B and the C1870300404. These models are particularly praised for their efficiency, innovative technologies, and robust features that cater to various construction needs.

The Multiquip M4870300104B is a powerful multi-process welder, designed to tackle a wide variety of welding applications. This model is equipped with an advanced inverter technology that allows it to deliver smooth and stable arcs for TIG, MIG, and Stick welding. The inverter design also enhances energy efficiency, making it an ideal choice for both on-site and workshop use. Furthermore, the M4870300104B features a dual-voltage capability, supporting both 120V and 240V input, which provides flexibility for different job sites.

In terms of usability, the M4870300104B boasts an intuitive control panel that allows for easy adjustments. Its lightweight design ensures easy transport, while the rugged construction promises durability in demanding environments. With a duty cycle of 35% at 200 Amps, this welder is built for efficiency and long-lasting performance, making it suitable for both professional and DIY applications.

On the other hand, the C1870300404 is a high-performance concrete vibratory screed that plays a crucial role in ensuring smooth finishes on concrete surfaces. This model is engineered with advanced vibration technology which allows it to efficiently remove air pockets and stabilize the concrete. The C1870300404 features a robust aluminum frame, enhancing its durability while maintaining a lightweight structure for ease of handling.

Equipped with a powerful and reliable engine, the C1870300404 offers impressive runtime, allowing crews to work continuously without frequent interruptions. It also features adjustable vibration settings, enabling users to customize the intensity based on the specific requirements of the project at hand. The ergonomic design of the handle contributes to user comfort, reducing fatigue during extended periods of operation.

In conclusion, both the Multiquip M4870300104B and C1870300404 exemplify the brand’s commitment to quality, innovation, and user-centric design. These tools not only enhance productivity but also guarantee precision and efficiency in various construction tasks. Whether for welding or concrete finishing, Multiquip continues to deliver equipment that meets the evolving demands of the industry.