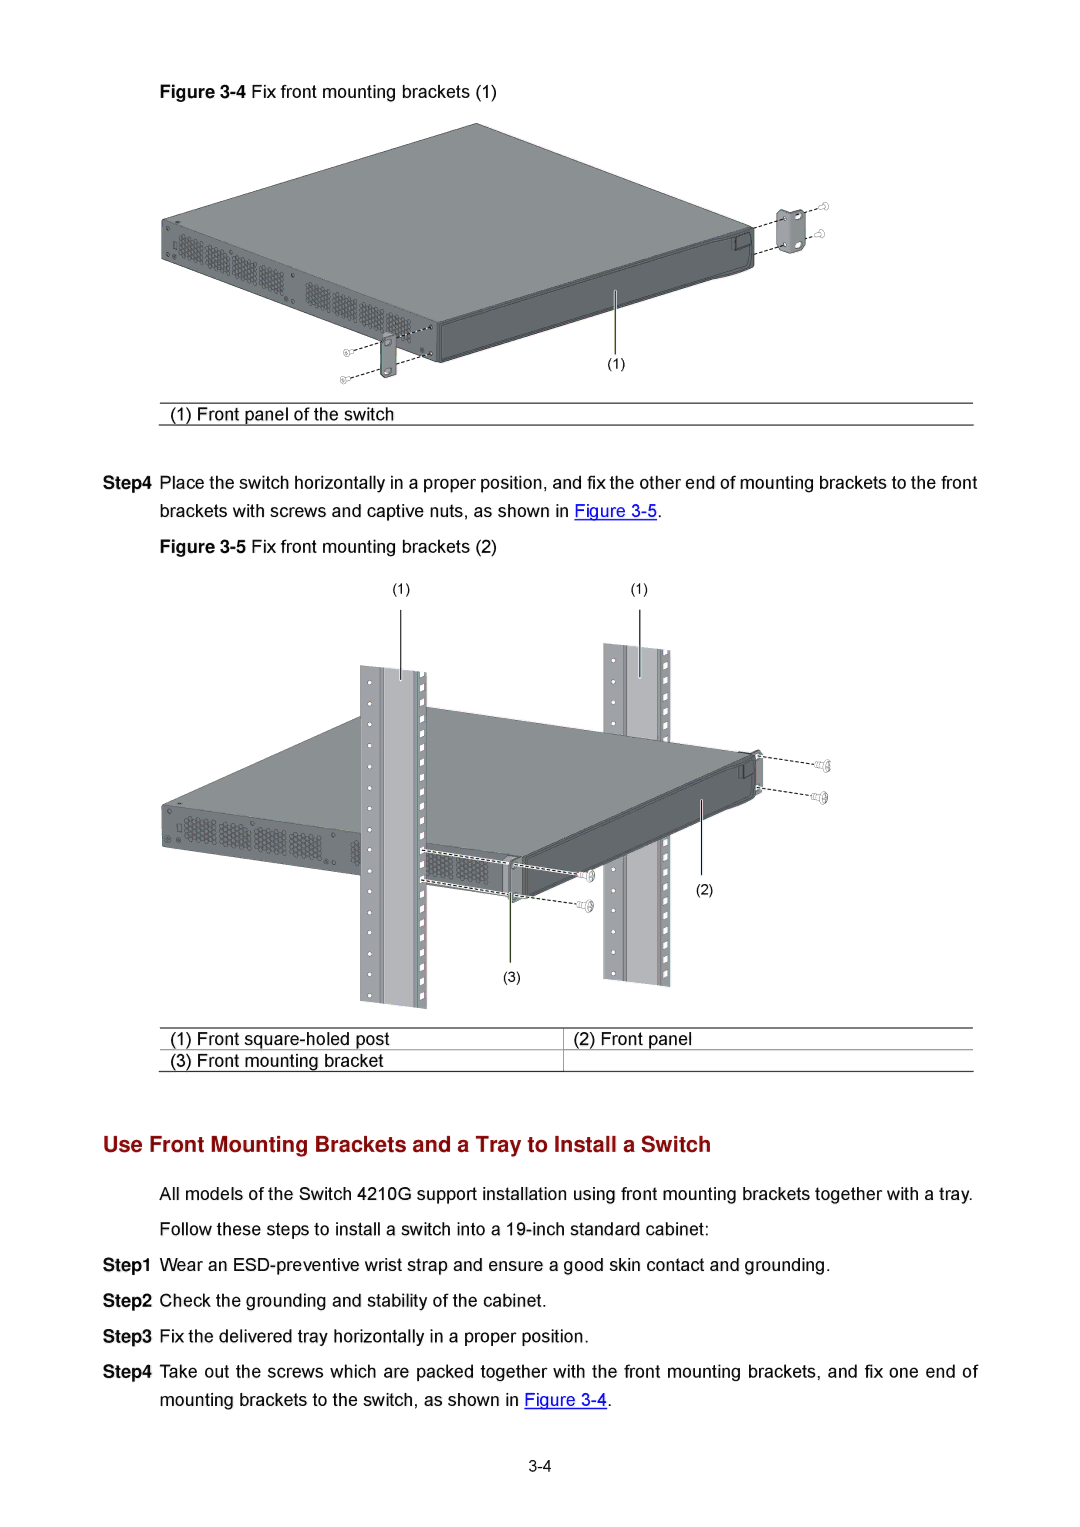
Figure 3-4 Fix front mounting brackets (1)
(1) Front panel of the switch
Step4 Place the switch horizontally in a proper position, and fix the other end of mounting brackets to the front brackets with screws and captive nuts, as shown in Figure 3-5.
Figure 3-5 Fix front mounting brackets (2)
(1) | (1) |
(2)
|
| (3) |
(1) | Front | (2) Front panel |
(3) | Front mounting bracket |
|
Use Front Mounting Brackets and a Tray to Install a Switch
All models of the Switch 4210G support installation using front mounting brackets together with a tray. Follow these steps to install a switch into a
Step1 Wear an
Step3 Fix the delivered tray horizontally in a proper position.
Step4 Take out the screws which are packed together with the front mounting brackets, and fix one end of mounting brackets to the switch, as shown in Figure
