INSTALLATION INSTRUCTIONS
CONNECTING THE GAS SUPPLY
Once the stove is in place it is then possible to connect the gas supply. The gas supply point is located centrally at the rear (as show in fig.7) and should be connected in accordance with the follow- ing requirements.
Gas Inlet
Rear Of
Valve
Fig. 7
Check that the appliance is suitable for the gas supply; refer to data labels on packaging and/or the stove data label for the gas type.
The gas installation must be in accordance with the current issue of BS6891.Gas supply pressure at the fire should be 20mbar for natural gas & 37mbar for LPG.
The gas supply should be connected with the 12mm fitting and olive supplied with the stove.
A maximum pipe run of 1.5 meters (or 5 feet) should be adhered to. Copper tubing may be used provided a distance of 25mm is maintained between
The gas service tap (supplied) should be fitted adja- cent to the fireplace to enable safe removal of the appliance for servicing. After fitting the supply, operate the gas tap (supplied) and check all joints up to the termination of the supply pipe for gas tightness using a soap/water solution and the pres- sure drop method.
To check the pressure to the burner. This must be carried out with all other gas appliances operating at maximum. To check the pressure to the burner it is necessary to ignite the appliance and set to 'high rate'. (See pressure test sequence).
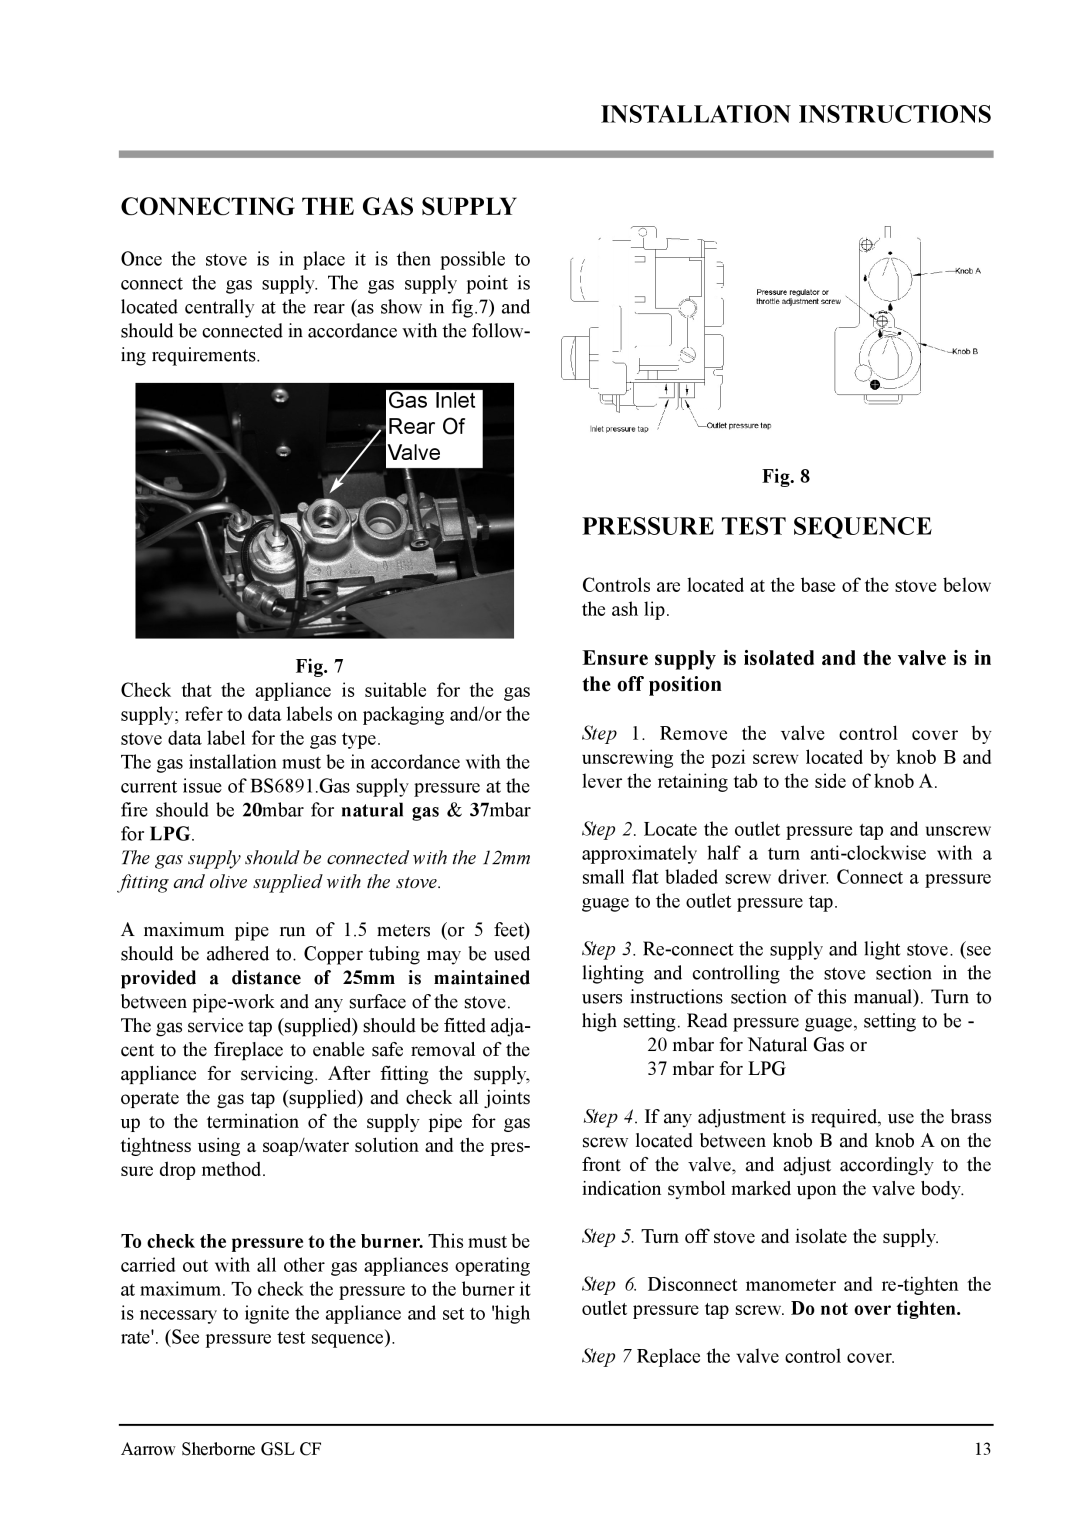
Fig. 8
PRESSURE TEST SEQUENCE
Controls are located at the base of the stove below the ash lip.
Ensure supply is isolated and the valve is in the off position
Step 1. Remove the valve control cover by unscrewing the pozi screw located by knob B and lever the retaining tab to the side of knob A.
Step 2. Locate the outlet pressure tap and unscrew approximately half a turn
Step 3.
20 mbar for Natural Gas or
37 mbar for LPG
Step 4. If any adjustment is required, use the brass screw located between knob B and knob A on the front of the valve, and adjust accordingly to the indication symbol marked upon the valve body.
Step 5. Turn off stove and isolate the supply.
Step 6. Disconnect manometer and
Step 7 Replace the valve control cover.
Aarrow Sherborne GSL CF | 13 |