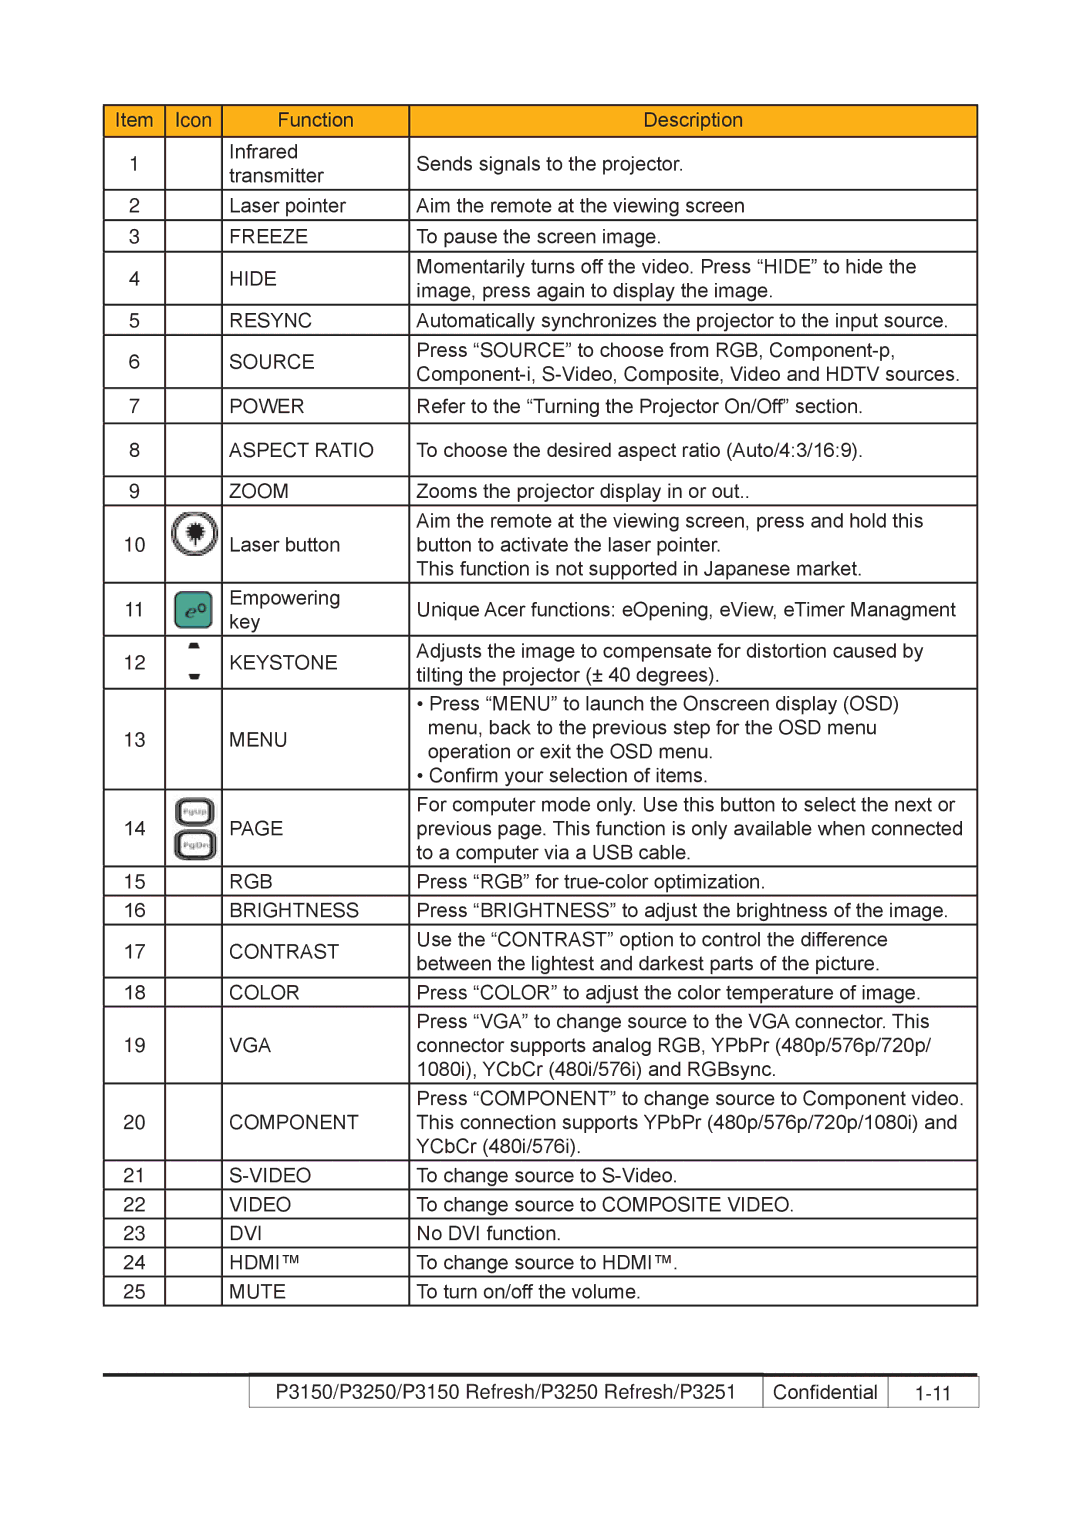
Item | Icon | Function | Description |
|
|
|
|
1 |
| Infrared | Sends signals to the projector. |
| transmitter | ||
|
|
| |
2 |
| Laser pointer | Aim the remote at the viewing screen |
3 |
| FREEZE | To pause the screen image. |
4 |
| HIDE | Momentarily turns off the video. Press “HIDE” to hide the |
| image, press again to display the image. | ||
|
|
| |
5 |
| RESYNC | Automatically synchronizes the projector to the input source. |
6 |
| SOURCE | Press “SOURCE” to choose from RGB, |
| |||
|
|
| |
7 |
| POWER | Refer to the “Turning the Projector On/Off” section. |
|
|
|
|
8 |
| ASPECT RATIO | To choose the desired aspect ratio (Auto/4:3/16:9). |
|
|
|
|
9 |
| ZOOM | Zooms the projector display in or out.. |
|
|
| Aim the remote at the viewing screen, press and hold this |
10 |
| Laser button | button to activate the laser pointer. |
|
|
| This function is not supported in Japanese market. |
11 |
| Empowering | Unique Acer functions: eOpening, eView, eTimer Managment |
| key | ||
|
|
| |
12 |
| KEYSTONE | Adjusts the image to compensate for distortion caused by |
| tilting the projector (± 40 degrees). | ||
|
|
| |
|
|
| • Press “MENU” to launch the Onscreen display (OSD) |
13 |
| MENU | menu, back to the previous step for the OSD menu |
| operation or exit the OSD menu. | ||
|
|
| |
|
|
| • Confirm your selection of items. |
|
|
| For computer mode only. Use this button to select the next or |
14 |
| PAGE | previous page. This function is only available when connected |
|
|
| to a computer via a USB cable. |
15 |
| RGB | Press “RGB” for |
16 |
| BRIGHTNESS | Press “BRIGHTNESS” to adjust the brightness of the image. |
17 |
| CONTRAST | Use the “CONTRAST” option to control the difference |
| between the lightest and darkest parts of the picture. | ||
|
|
| |
18 |
| COLOR | Press “COLOR” to adjust the color temperature of image. |
|
|
| Press “VGA” to change source to the VGA connector. This |
19 |
| VGA | connector supports analog RGB, YPbPr (480p/576p/720p/ |
|
|
| 1080i), YCbCr (480i/576i) and RGBsync. |
|
|
| Press “COMPONENT” to change source to Component video. |
20 |
| COMPONENT | This connection supports YPbPr (480p/576p/720p/1080i) and |
|
|
| YCbCr (480i/576i). |
21 |
| To change source to | |
22 |
| VIDEO | To change source to COMPOSITE VIDEO. |
23 |
| DVI | No DVI function. |
24 |
| HDMI™ | To change source to HDMI™. |
25 |
| MUTE | To turn on/off the volume. |
P3150/P3250/P3150 Refresh/P3250 Refresh/P3251 | Confidential |