Using this guide
Please carefully read this user guide. It contains information about your phone and the way that it operates on the net- work. Some of the features described in this user guide are network dependent. Do not forget to check with your service pro- vider which of these you can use. You may need to take additional subscriptions to activate some features.
Key Actions
To help you quickly use your mobile and this user guide, here is how to use the key- pad and the related symbols.
![]() OK key (to validate OK on the display.)
OK key (to validate OK on the display.)
![]() left softkey (to validate the item above: usually an action).
left softkey (to validate the item above: usually an action).
 right softkey (to validate the action above: usually Exit).
right arrow on cursor keys. left arrow on cursor keys. up arrow on cursor key. down arrow on cursor key. SEND/CALL key. END/PHONE ON or OFF key.
User guide notation
Here is how to follow the instructions of this user guide and use your mobile fea- tures.
Select OK
Press on the ![]() key to select OK (middle of the display).
key to select OK (middle of the display).
Press ![]() . Select one of the menu items (e.g.: Settings).
. Select one of the menu items (e.g.: Settings).
From the idle screen press the ![]() key to
key to
access the menu list, scroll up or down
and select OK ![]() to access the sub- menu.
to access the sub- menu.
Function | guide | ||
E.g. 'Select Read '. | |||
To show the softkey plus the linked action. |
| ||
means Read is displayed (left). Press the | this | ||
key underneath to read the message, the | |||
| |||
names list, etc. | Using | ||
Select | (item from a list) | ||
| |||
Use | and on the cursor key to scroll |
| |
to the required menu item and validate by |
| ||
selecting OK . |
| ||
E.g. Select Phone Book: scroll to the |
| ||
Phone Book menu item and press the |
| ||
OK key | to validate your selection. |
| |
Please refer to the 'Getting started with your One Touch™ 531booklet for keypad use.
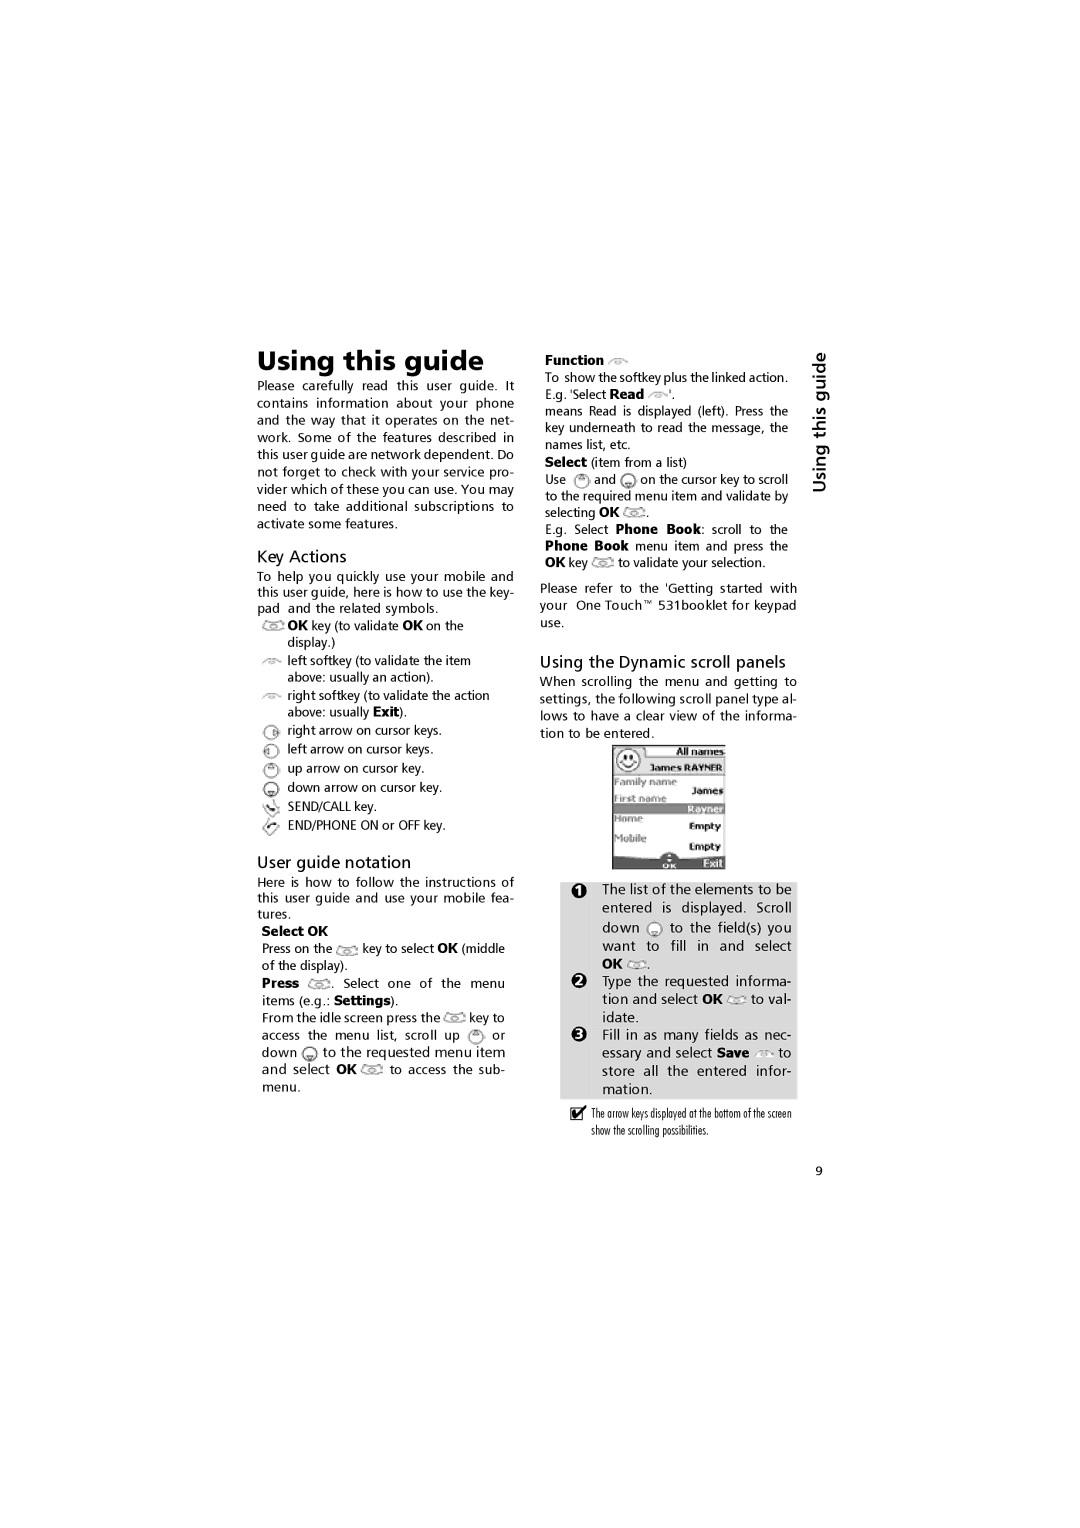
Using the Dynamic scroll panels
When scrolling the menu and getting to settings, the following scroll panel type al- lows to have a clear view of the informa- tion to be entered.
1The list of the elements to be entered is displayed. Scroll
down ![]() to the field(s) you want to fill in and select OK .
to the field(s) you want to fill in and select OK .
2Type the requested informa-
tion and select OK ![]() to val- idate.
to val- idate.
3Fill in as many fields as nec-
essary and select Save ![]() to store all the entered infor- mation.
to store all the entered infor- mation.
!The arrow keys displayed at the bottom of the screen show the scrolling possibilities.
9