Chapter 2: Installing the Switch
Installing the Switch in a Rack
Perform the following procedure to install the switch in a standard
Note
Steps 1, 2, and 3 are optional. They remove the
1.Place the unit upside down on a level, secure surface.
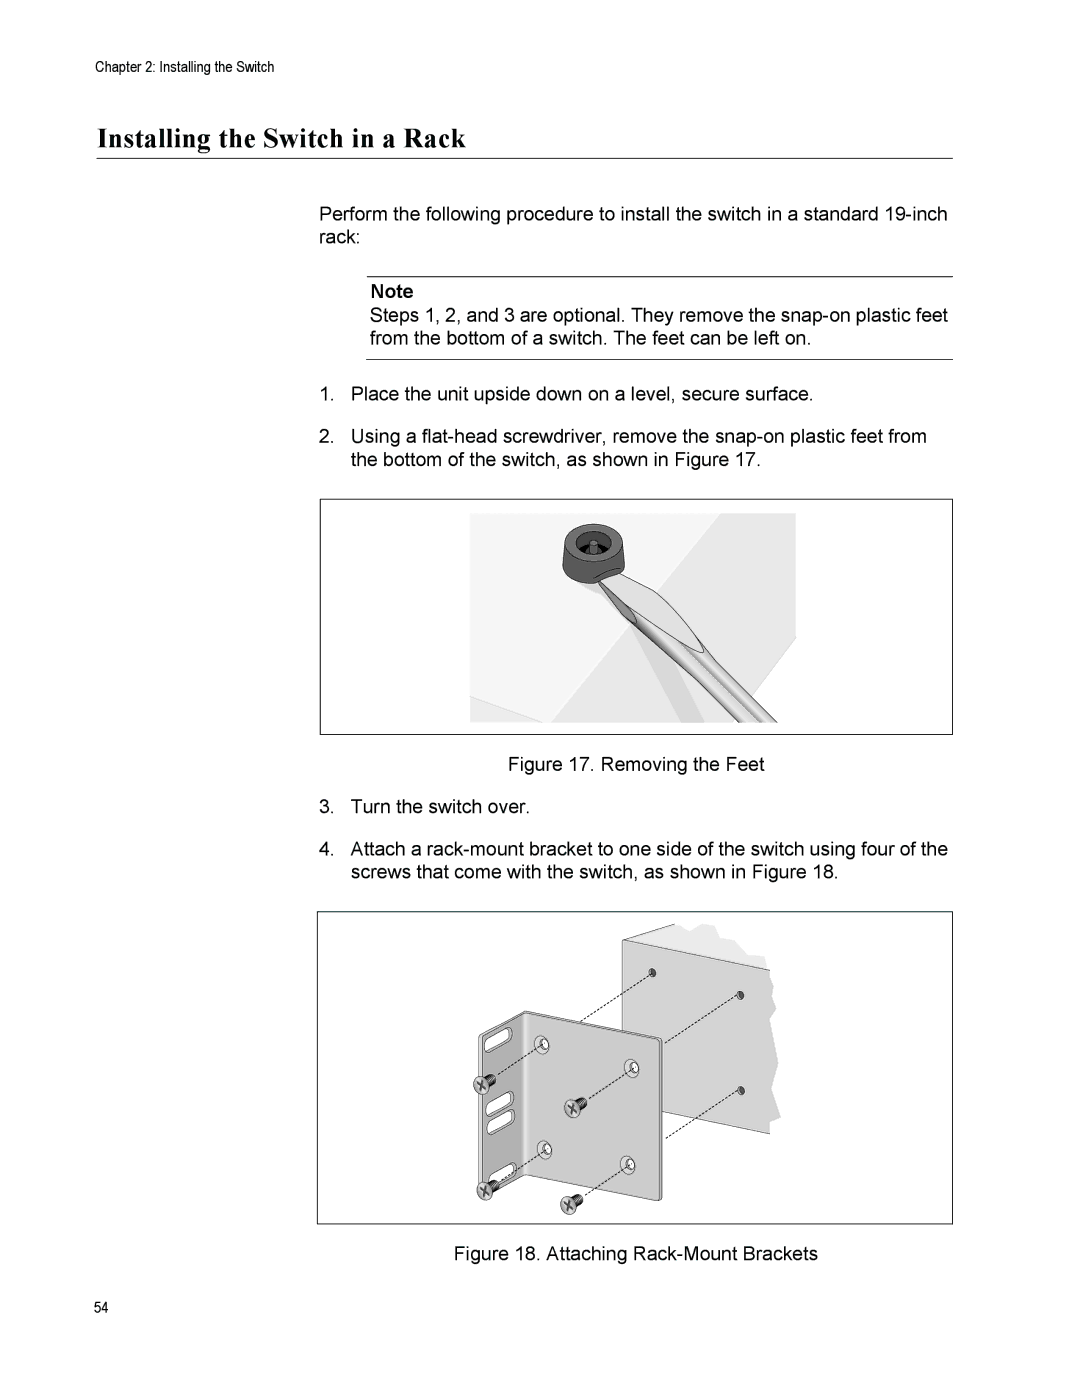
2.Using a
Figure 17. Removing the Feet
3.Turn the switch over.
4.Attach a rack-mount bracket to one side of the switch using four of the screws that come with the switch, as shown in Figure 18.
Figure 18. Attaching Rack-Mount Brackets
54
