AT-9400 Series Gigabit Ethernet Switches Installation Guide
Installing an SFP Transceiver
CLASS | 1 |
|
|
|
|
|
| |
LASER |
|
|
|
|
|
|
| |
| PRODUCT |
|
|
|
|
|
| |
24R |
|
|
|
|
|
|
|
|
23 |
|
| L/A | 1000 L |
|
|
| |
|
| D/C | INK / |
| PO | |||
|
|
| FDX |
|
| |||
|
|
|
|
|
|
| ACT | |
|
|
| L/A | 1 | 3 |
|
| |
|
|
|
| 5 |
| |||
|
|
| D/C |
|
|
| 7 | |
|
|
|
|
|
|
| ||
|
| 24 | L/A |
|
|
|
|
|
|
|
| D/C |
|
|
|
|
|
|
|
|
| 2 | 4 |
|
| |
|
|
|
|
| 6 |
| ||
|
|
|
|
|
|
| 8 | |
|
|
|
|
|
|
|
| |
Figure 20. Installing a GBIC Transceiver
3.Repeat this procedure to install another GBIC transceiver or go to “Cabling the Twisted Pair or Fiber Optic Ports” on page 61.
For GBIC optical and cabling specifications, consult the documentation shipped with the module.
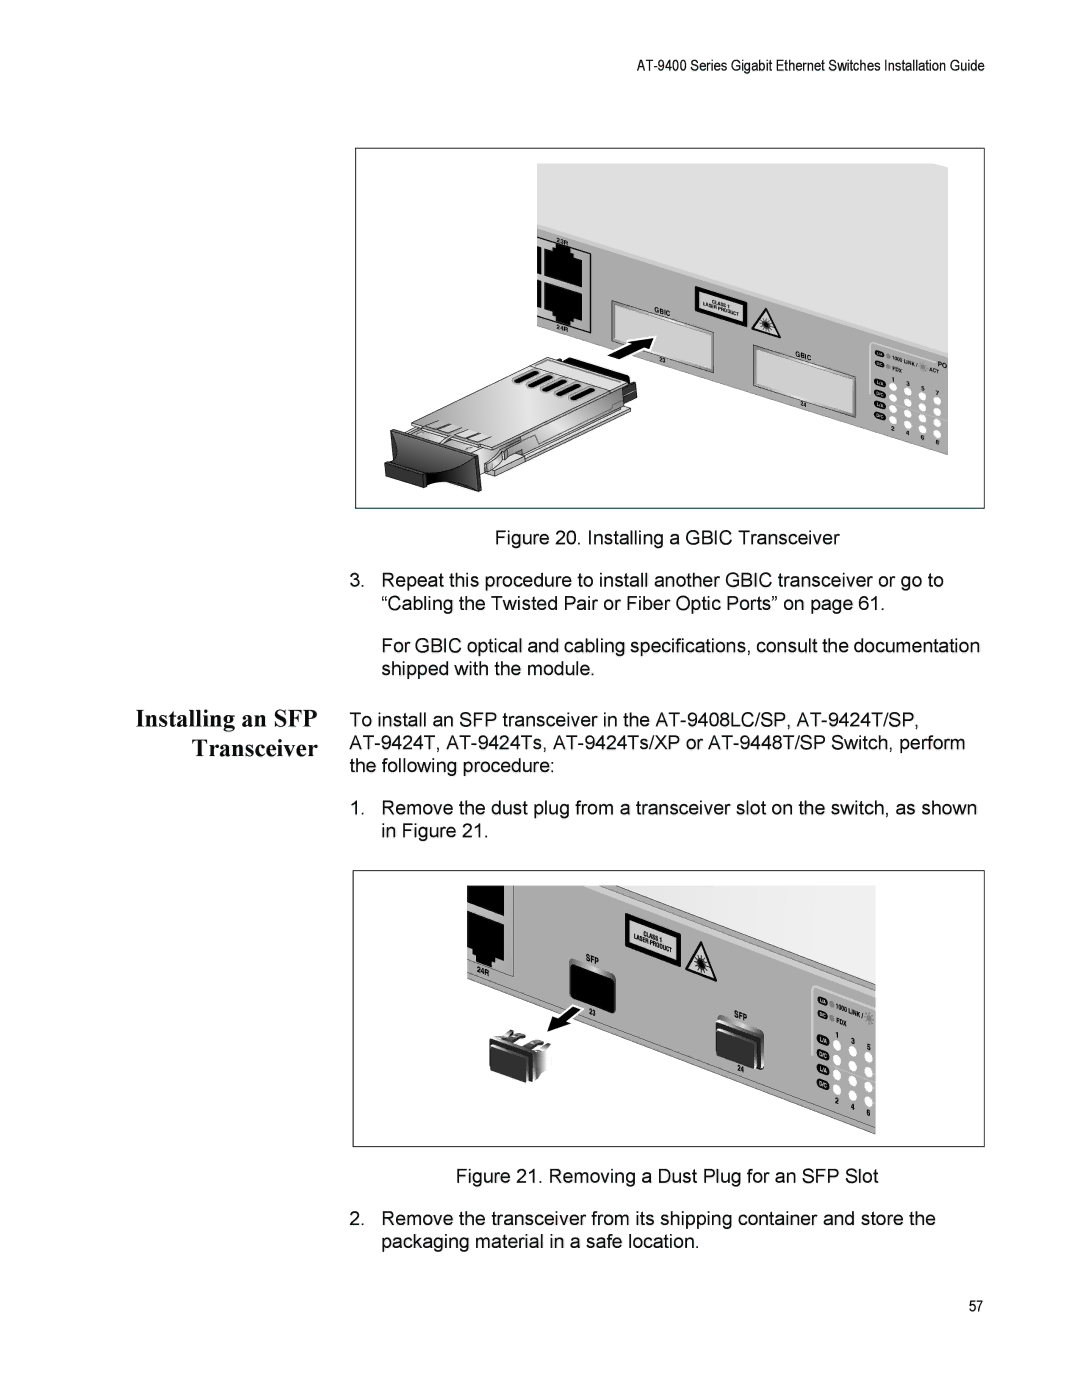
To install an SFP transceiver in the AT-9408LC/SP, AT-9424T/SP, AT-9424T, AT-9424Ts, AT-9424Ts/XP or AT-9448T/SP Switch, perform the following procedure:
1.Remove the dust plug from a transceiver slot on the switch, as shown in Figure 21.
Figure 21. Removing a Dust Plug for an SFP Slot
2.Remove the transceiver from its shipping container and store the packaging material in a safe location.
57
