Button Labelling
The bottom is indicated by the AMX logo (FIG. 6).
5.Use a 5mm wrench to remove the second set of
6.Carefully pull the bottom circuit board straight up and off the standoffs.
The bottom board has the pushbuttons on the reverse side. Be careful not to damage the buttons when removing the board.
Note the orientation of the board - it must be oriented in the same direction when replaced.
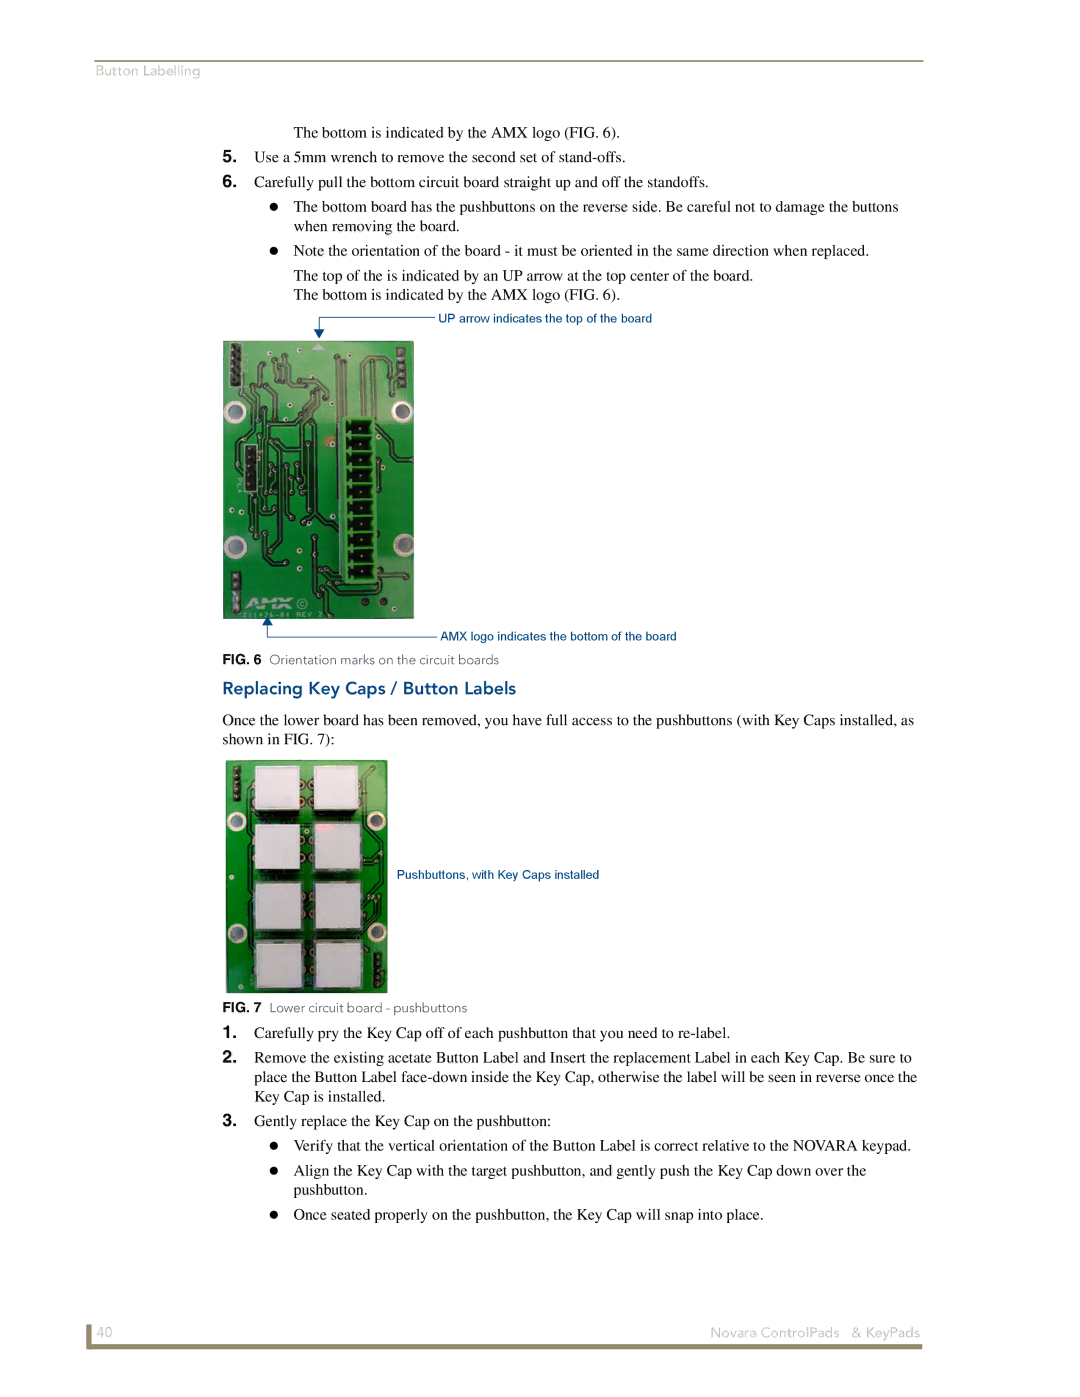
The top of the is indicated by an UP arrow at the top center of the board.
The bottom is indicated by the AMX logo (FIG. 6).
![]() UP arrow indicates the top of the board
UP arrow indicates the top of the board
![]() AMX logo indicates the bottom of the board
AMX logo indicates the bottom of the board
FIG. 6 Orientation marks on the circuit boards
Replacing Key Caps / Button Labels
Once the lower board has been removed, you have full access to the pushbuttons (with Key Caps installed, as shown in FIG. 7):
Pushbuttons, with Key Caps installed
FIG. 7 Lower circuit board - pushbuttons
1.Carefully pry the Key Cap off of each pushbutton that you need to
2.Remove the existing acetate Button Label and Insert the replacement Label in each Key Cap. Be sure to place the Button Label
3.Gently replace the Key Cap on the pushbutton:
Verify that the vertical orientation of the Button Label is correct relative to the NOVARA keypad.
Align the Key Cap with the target pushbutton, and gently push the Key Cap down over the pushbutton.
Once seated properly on the pushbutton, the Key Cap will snap into place.
40 | Novara ControlPads & KeyPads |