Take Apart |
|
| Floppy Drive - 14 | |||
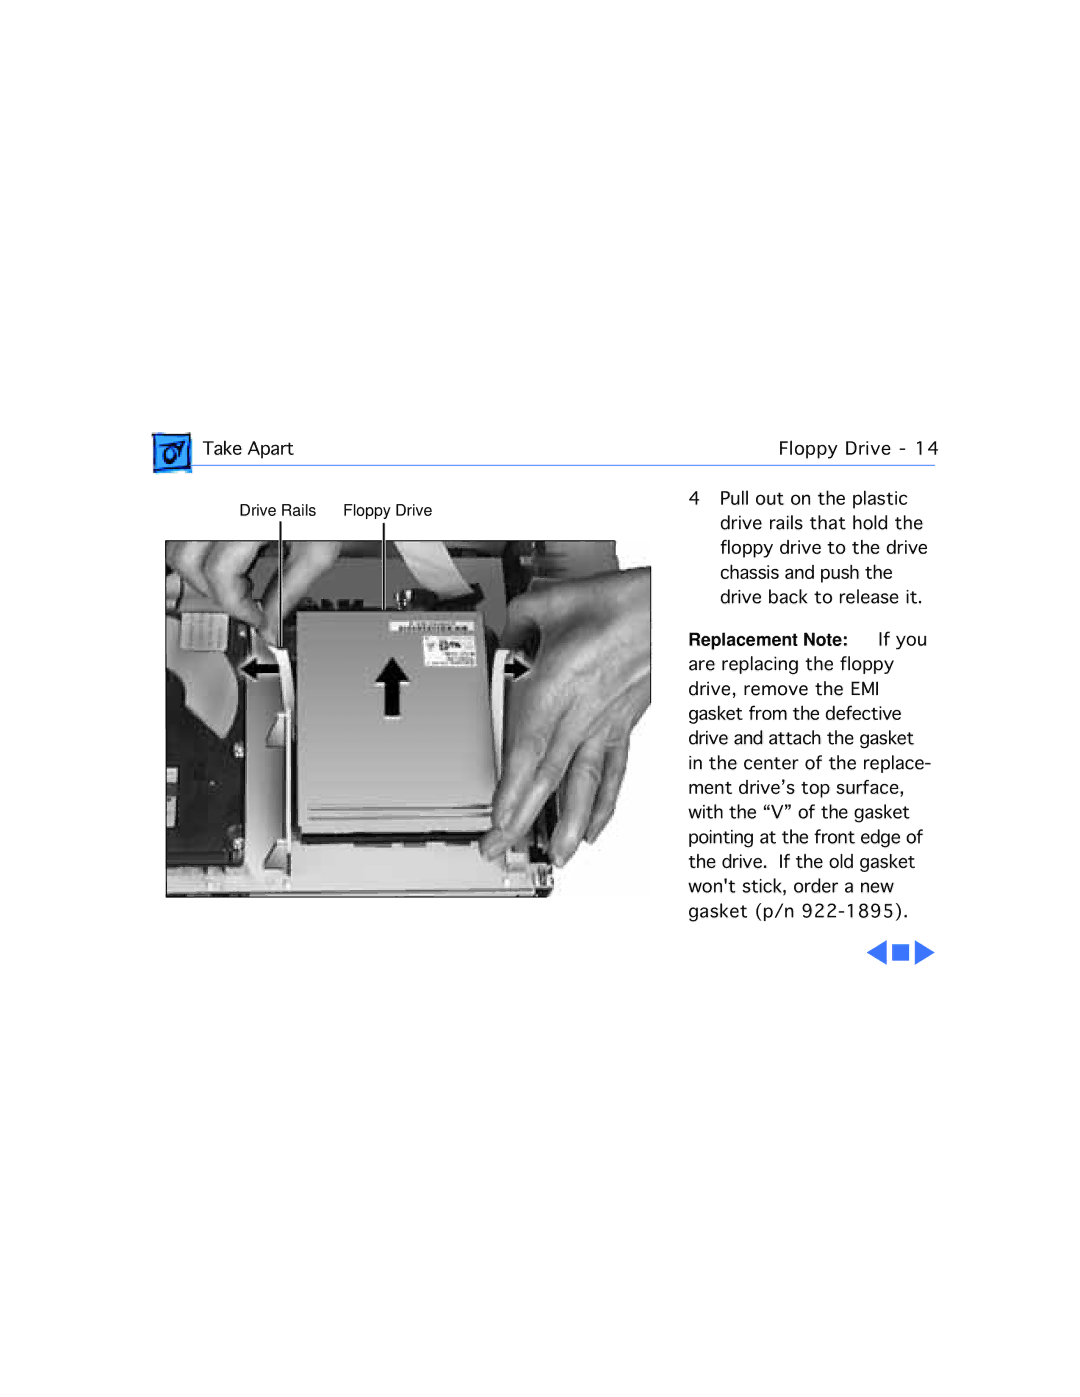
Drive Rails | Floppy Drive | 4 Pull out on the plastic |
| |||
drive rails that hold the | ||||||
|
|
| ||||
|
|
|
| floppy drive to the drive | ||
|
|
|
| |||
|
|
|
| chassis and push the | ||
|
|
|
| |||
|
|
|
| drive back to release it. | ||
|
|
|
| Replacement Note: | If you | |
|
|
|
| are replacing the floppy | ||
|
|
|
| drive, remove the EMI | ||
|
|
|
| gasket from the defective | ||
|
|
|
| |||
|
|
|
| drive and attach the gasket | ||
|
|
|
| in the center of the replace- | ||
|
|
|
| ment drive’s top surface, | ||
|
|
|
| with the “V” of the gasket | ||
|
|
|
| pointing at the front edge of | ||
|
|
|
| the drive. If the old gasket | ||
|
|
|
| won't stick, order a new | ||
|
|
|
| gasket (p/n | ||
