Using the Web-Based Advanced User Interface
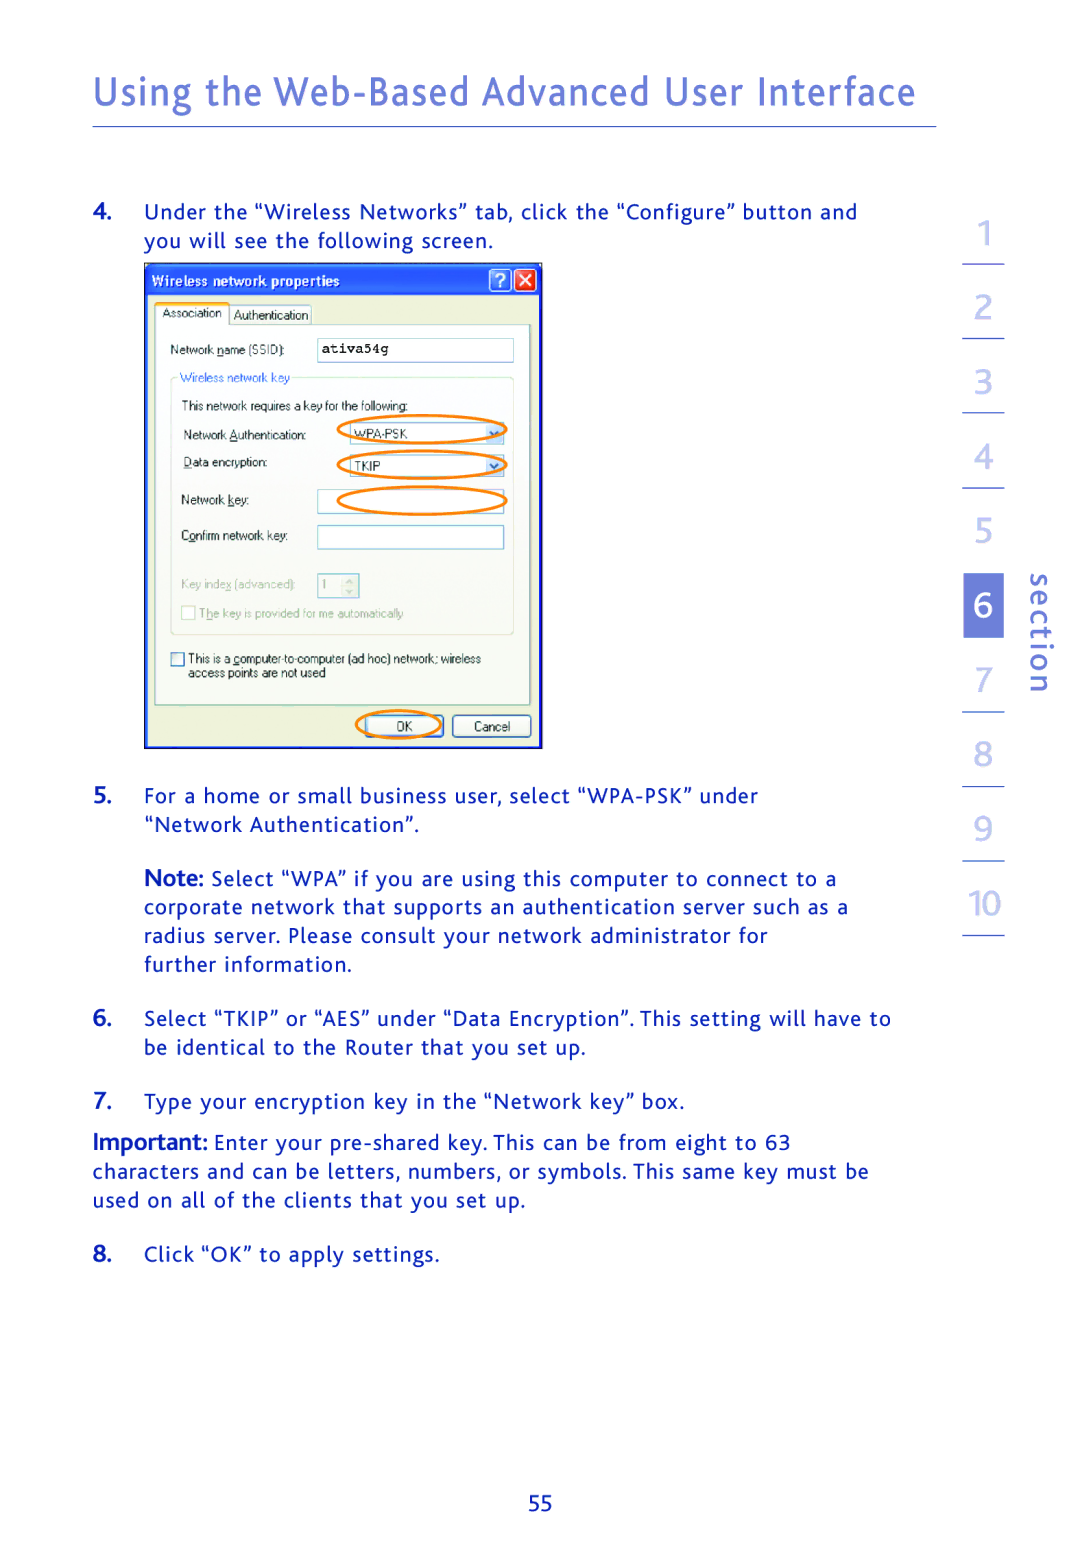
4.Under the “Wireless Networks” tab, click the “Configure” button and you will see the following screen.
5.For a home or small business user, select
Note: Select “WPA” if you are using this computer to connect to a corporate network that supports an authentication server such as a radius server. Please consult your network administrator for further information.
6.Select “TKIP” or “AES” under “Data Encryption”. This setting will have to be identical to the Router that you set up.
7.Type your encryption key in the “Network key” box.
Important: Enter your
8. Click “OK” to apply settings.
1
2
3
4
5
6
7
8
9
10
section
55