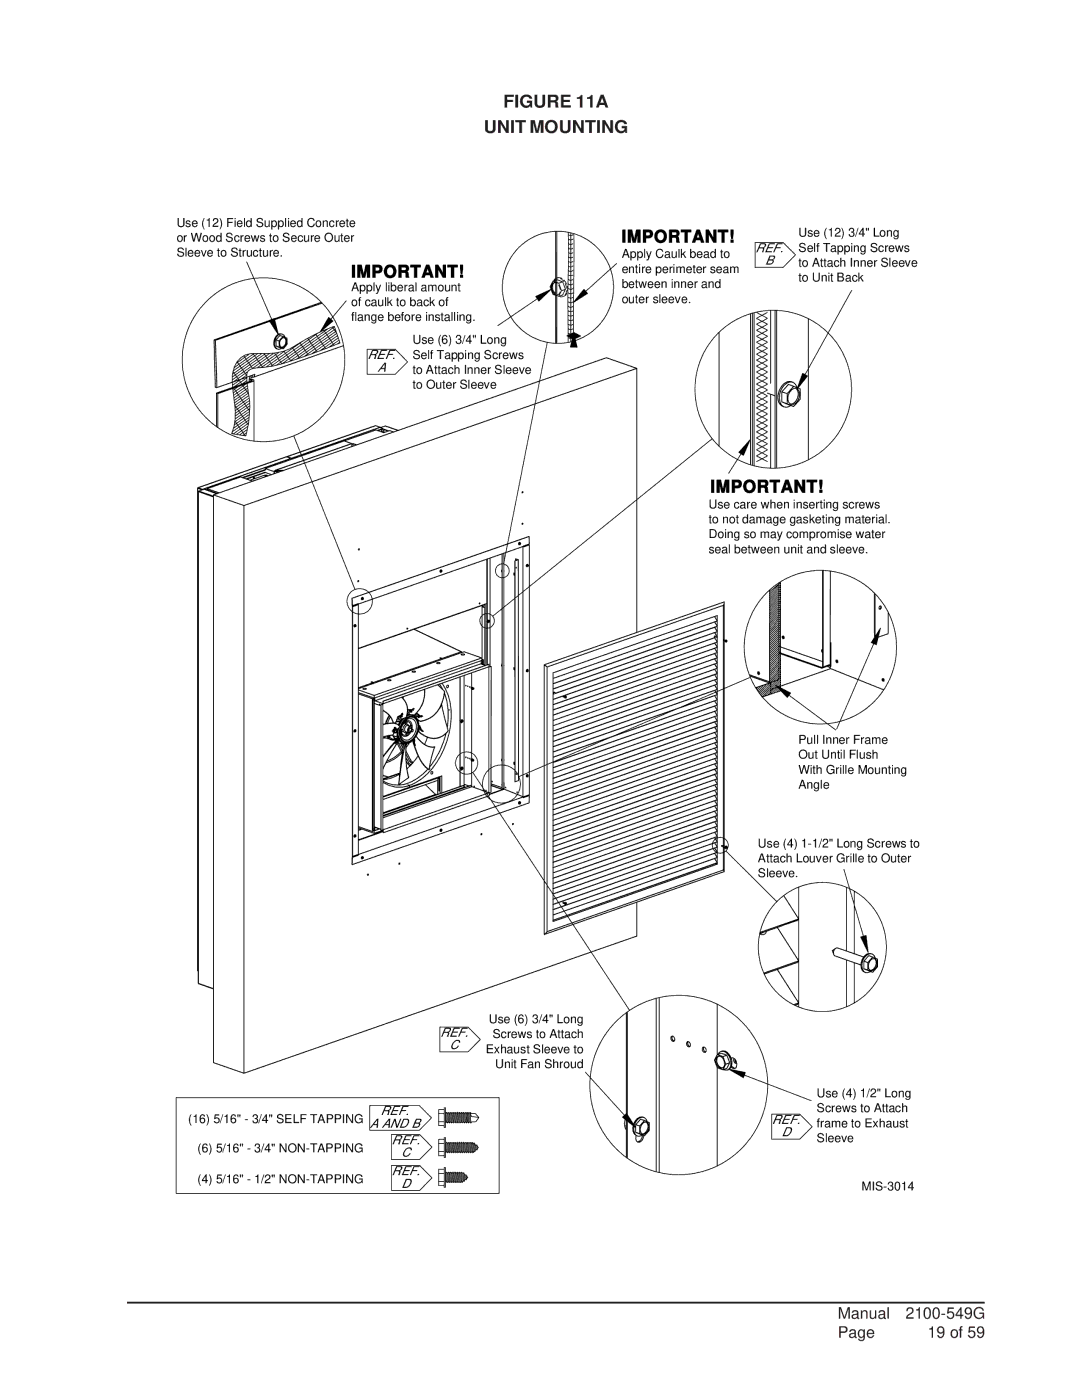
FIGURE 11A
UNIT MOUNTING
Use (12) Field Supplied Concrete or Wood Screws to Secure Outer Sleeve to Structure.
IMPORTANT!
Apply liberal amount of caulk to back of flange before installing.
Use (6) 3/4" Long
REF. Self Tapping Screws
A to Attach Inner Sleeve
to Outer Sleeve
IMPORTANT!
Apply Caulk bead to entire perimeter seam between inner and outer sleeve.
REF.
B
Use (12) 3/4" Long Self Tapping Screws to Attach Inner Sleeve to Unit Back
Use (6) 3/4" Long
REF. Screws to Attach
C Exhaust Sleeve to
Unit Fan Shroud
REF.
(16) 5/16" - 3/4" SELF TAPPING A AND B
(6) 5/16" - 3/4" | REF. | |
C | ||
| ||
(4) 5/16" - 1/2" | REF. | |
D | ||
|
IMPORTANT!
Use care when inserting screws to not damage gasketing material. Doing so may compromise water seal between unit and sleeve.
Pull Inner Frame
Out Until Flush
With Grille Mounting
Angle
Use (4)
Use (4) 1/2" Long
Screws to Attach
REF. frame to Exhaust
DSleeve
Manual | |
Page | 19 of 59 |
