CONFIGURING BARD PART
MOUNTING
1.Push tab on bottom of cover and lift cover from back plate.
2.Select the mounting location, away from diffusers, lights or any external influences.
3.Mount transmitter on a vertical surface to a standard electrical box using the two #6 M2C type screws provided.
4.Pull wires through sub base hole and make necessary connections.
5.Reattach cover to base plate.
WIRING
Use maximum 18 AWG wire for wiring to terminals. Refer to Figures
SELECTION OF VOLTAGE OUTPUTS
Prior to wiring, verify the voltage selector jumpers on jumpers PJ1 and PJ2 are set to voltage (See Figure below).
CURRENT/VOLTAGE OUTPUT
SELECTION JUMPER (PJ1 & PJ2)
VOLTAGE
OUTPUT
CV
Next, move jumper PJ5 to the
OUTPUT RANGE SELECTION JUMPER PJ5
0 to 10 V
0 to 20 mA
EDITING MENU PARAMETERS
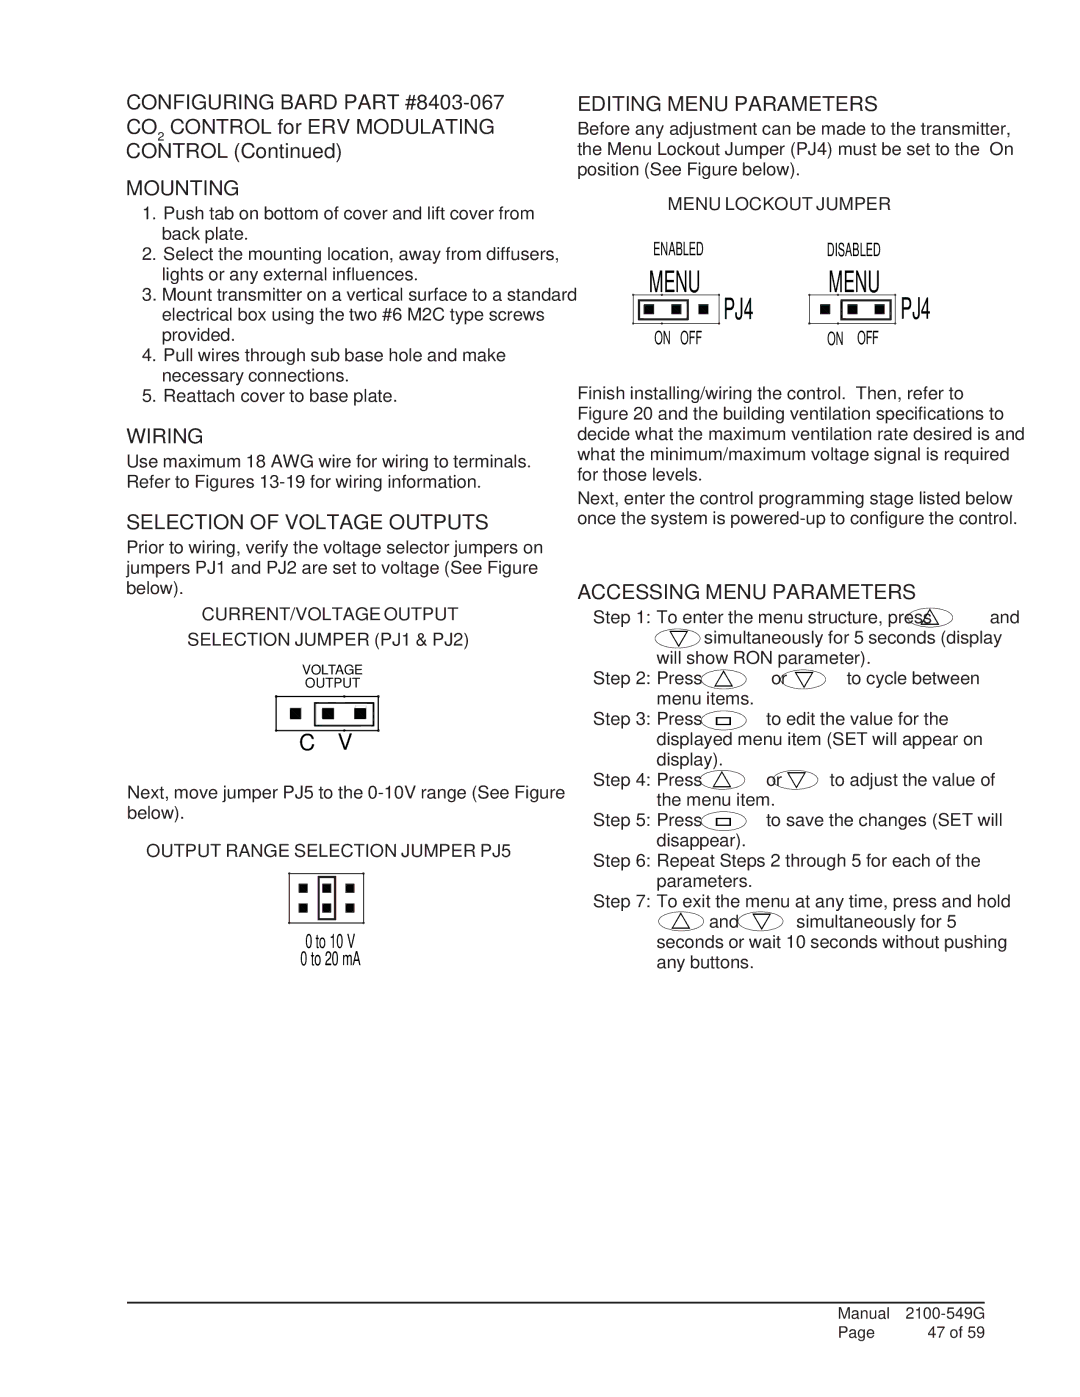
Before any adjustment can be made to the transmitter, the Menu Lockout Jumper (PJ4) must be set to the “On” position (See Figure below).
MENU LOCKOUT JUMPER
ENABLED DISABLED
MENU MENU
PJ4 | PJ4 |
ON OFF | ON OFF |
Finish installing/wiring the control. Then, refer to Figure 20 and the building ventilation specifications to decide what the maximum ventilation rate desired is and what the minimum/maximum voltage signal is required for those levels.
Next, enter the control programming stage listed below once the system is
ACCESSING MENU PARAMETERS
Step 1: To enter the menu structure, press U and
Vsimultaneously for 5 seconds (display will show RON parameter).
Step 2: Press | U or | V to cycle between |
menu items. |
| |
Step 3: Press | to edit the value for the | |
displayed menu item (SET will appear on | ||
display). |
| |
Step 4: Press | U or | V to adjust the value of |
the menu item. |
| |
Step 5: Press | to save the changes (SET will | |
disappear).
Step 6: Repeat Steps 2 through 5 for each of the parameters.
Step 7: To exit the menu at any time, press and hold
Uand V simultaneously for 5 seconds or wait 10 seconds without pushing any buttons.
Manual | |
Page | 47 of 59 |