F1D116_OSD_AM_man.qxd 4/20/00 4:07 PM Page 9
Hardware Installation (continued)
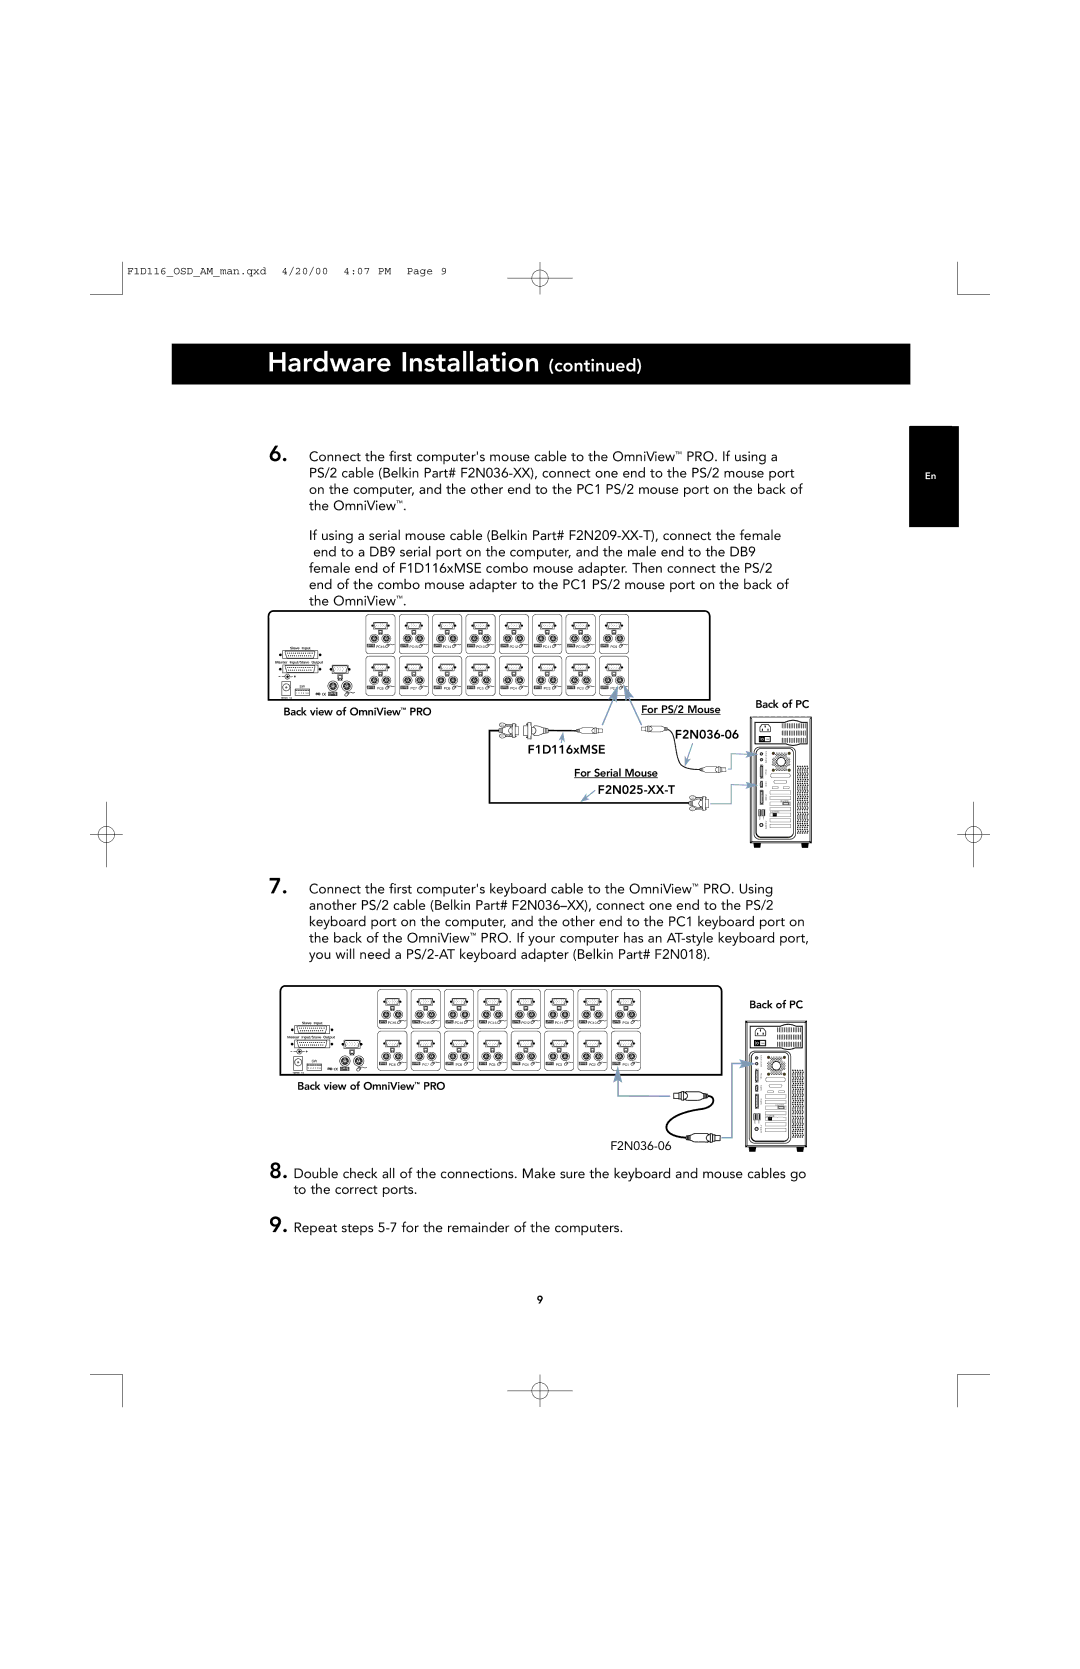
6. Connect the first computer's mouse cable to the OmniView™ PRO. If using a
PS/2 cable (Belkin Part#
the OmniView™.
If using a serial mouse cable (Belkin Part#
| PC16 | PC15 | PC14 | PC13 | PC12 | PC11 | PC10 | PC9 |
SW | PC8 | PC7 | PC6 | PC5 | PC4 | PC3 | PC2 | PC1 |
| ||||||||
Back view of OmniView™ PRO |
|
|
|
|
| For PS/2 Mouse | ||
F2N036-06
F1D116xMSE
For Serial Mouse
Back of PC
Back of PC
VGA MONITOR |
RJ45 NETWORK |
7. Connect the first computer's keyboard cable to the OmniView™ PRO. Using another PS/2 cable (Belkin Part#
PC16 | PC15 | PC14 | PC13 | PC12 | PC11 | PC10 | PC9 |
SW |
|
|
|
|
|
|
|
PC8 | PC7 | PC6 | PC5 | PC4 | PC3 | PC2 | PC1 |
BackBackof OmniViewview of OmniView™ PRO ™ PRO
Back of PC
Back of PC
VGA MONITOR |
RJ45 NETWORK |
8. Double check all of the connections. Make sure the keyboard and mouse cables go to the correct ports.
9. Repeat steps
9