F1D116_OSD_AM_man.qxd 4/20/00 4:07 PM Page 10
Hardware Installation (continued)
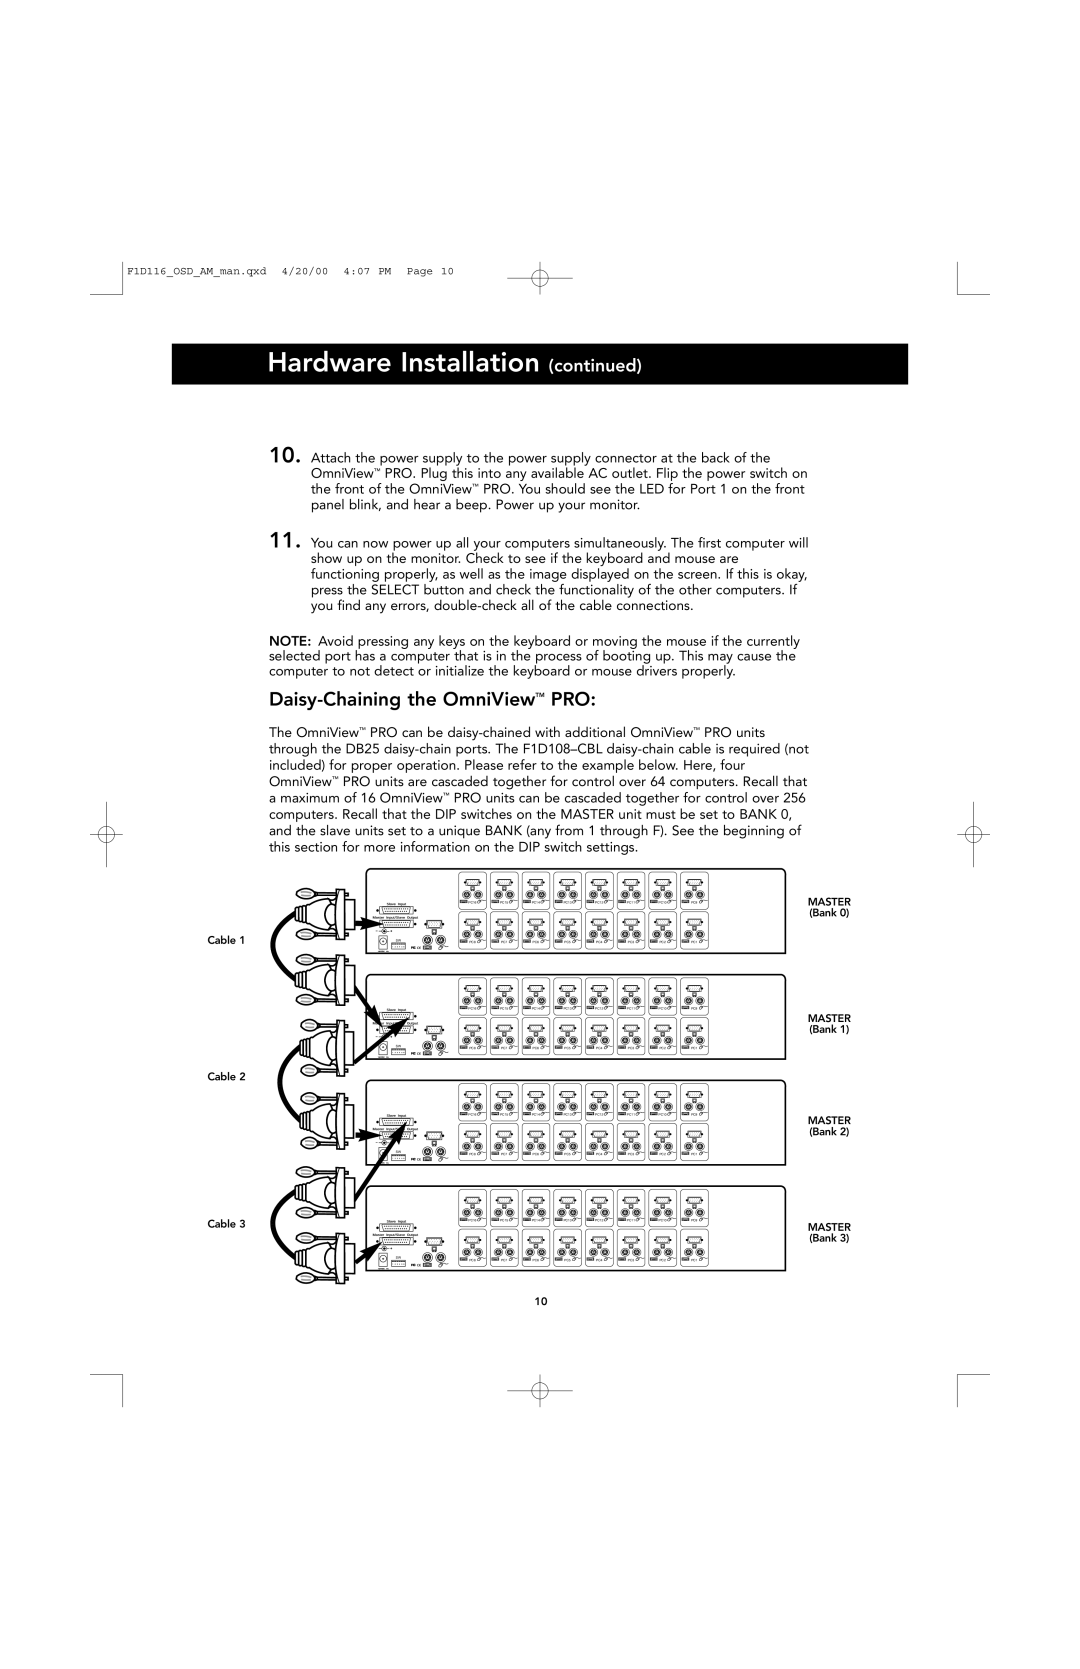
Cable 1
Cable 2
Cable 3
10. Attach the power supply to the power supply connector at the back of the OmniView™ PRO. Plug this into any available AC outlet. Flip the power switch on the front of the OmniView™ PRO. You should see the LED for Port 1 on the front panel blink, and hear a beep. Power up your monitor.
11. You can now power up all your computers simultaneously. The first computer will show up on the monitor. Check to see if the keyboard and mouse are functioning properly, as well as the image displayed on the screen. If this is okay, press the SELECT button and check the functionality of the other computers. If you find any errors,
NOTE: Avoid pressing any keys on the keyboard or moving the mouse if the currently selected port has a computer that is in the process of booting up. This may cause the computer to not detect or initialize the keyboard or mouse drivers properly.
Daisy-Chaining the OmniViewTM PRO:
The OmniView™ PRO can be
| PC16 | PC15 | PC14 | PC13 | PC12 | PC11 | PC10 | PC9 | MASTER |
|
|
|
|
|
|
|
|
| (Bank 0) |
SW | PC8 | PC7 | PC6 | PC5 | PC4 | PC3 | PC2 | PC1 |
|
|
|
| PC16 | PC15 | PC14 | PC13 | PC12 | PC11 | PC10 | PC9 |
|
|
|
|
|
|
|
| MASTER |
|
|
|
|
|
|
|
| (Bank 1) |
SW | PC8 | PC7 | PC6 | PC5 | PC4 | PC3 | PC2 | PC1 |
|
PC16 | PC15 | PC14 | PC13 | PC12 | PC11 | PC10 | PC9 |
|
|
|
|
|
|
| MASTER |
|
|
|
|
|
|
| (Bank 2) |
SW | PC7 | PC6 | PC5 | PC4 | PC3 | PC2 | PC1 |
PC8 |
PC16 | PC15 | PC14 | PC13 | PC12 | PC11 | PC10 | PC9 |
|
|
|
|
|
|
| MASTER |
|
|
|
|
|
|
| (Bank 3) |
SW | PC7 | PC6 | PC5 | PC4 | PC3 | PC2 | PC1 |
PC8 |
10